- AI Fire
- Posts
- 🤖 Build Custom AI Agents In N8N With LangChain's Code Node
🤖 Build Custom AI Agents In N8N With LangChain's Code Node
Is your n8n AI limited by standard nodes? Unlock true creative freedom with the LangChain Code Node, your key to building advanced, bespoke AI agents.
Neil Phan
July 31, 2025
Table of Contents
Introduction: Moving The Limits Of Pre-Built Nodes
In the world of workflow automation, n8n has emerged as a powerful tool, allowing users to intuitively connect various applications and services. With the explosion of artificial intelligence, n8n's AI nodes have become an indispensable part, helping to automate complex tasks from sentiment analysis to content generation. However, there's a fact that not every user is aware of: hidden behind the friendly drag-and-drop interface is a "hidden gem" capable of unlocking a whole new world of customization and power - the LangChain Code Node.

While most users are content with standard AI nodes like the AI Agent, they may not realize they are using a simplified version of a much larger technology. These nodes, and many others, are actually built on the LangChain framework, a groundbreaking technology for developing applications powered by language models.
This guide will take you on a deeper exploratory journey. Together, we will learn how to find and use this "secret" node, analyze what makes it so incredibly powerful, and most importantly, how it can completely transform your approach to workflow automation. Whether you are building customer support chatbots, data analysis tools, or complex decision-making systems, mastering the LangChain Code Node will give you a significant advantage, allowing you to build AI agents that are not only intelligent but also precisely tailored to your needs.
What Is LangChain? The Foundation For Sophisticated AI Agents
Before we dive into the node itself within n8n, it is crucial to understand the underlying technology. LangChain is not just a tool, but a comprehensive framework designed for developing applications powered by large language models (LLMs). It is the core technology trusted by many leading tech companies like Replit and Klarna to build their own AI assistants and co-pilots.

So, what makes LangChain special? Its power lies in providing a robust structure for building AI agents that can:
Connect to external tools and APIs: This is one of its most groundbreaking features. LangChain allows LLMs not just to "think" but also to "act." It can interact with external systems, from querying databases and calling a weather API to performing web searches and controlling IoT devices.


Maintain memory across conversations: For an agent to be truly useful, it needs to remember what was discussed previously. LangChain provides sophisticated memory management mechanisms, allowing the agent to maintain context, understand references, and build a seamless, natural dialogue.

Execute custom code and make decisions: Agents can execute complex code snippets, follow conditional logic, and make autonomous decisions based on input and predefined rules.

Handle complex sequences of operations: LangChain allows you to build "chains" and "graphs" of logic, where the output of one step becomes the input for the next, creating incredibly complex multi-stage workflows.

In essence, LangChain provides a powerful infrastructure that enables AI models to interact with the outside world in a structured, reliable way. It handles the complex work of formatting API calls, processing responses, managing the flow of information between different components of an AI system, and allows developers to focus on building logic and user experiences.
Learn How to Make AI Work For You!
Transform your AI skills with the AI Fire Academy Premium Plan - FREE for 14 days! Gain instant access to 500+ AI workflows, advanced tutorials, exclusive case studies and unbeatable discounts. No risks, cancel anytime.
The Secret Revealed: N8N's AI Nodes Are Powered By LangChain
One of the most exciting discoveries for n8n users is realizing that many of the AI nodes they regularly use are actually interface layers built on top of LangChain. If you're curious and inspect the JSON configuration of a workflow using the standard AI Agent node, you'll see it identified as n8n-nodes-langchain.agent. This means that when you are dragging, dropping, and configuring the AI Agent, you are actually interacting with a simplified interface for LangChain.
This is also true for a range of other AI nodes:

Basic LLM Chain
Information Extractor
Question and Answer
Sentiment Analysis
Text Classification
Summarization
All of these nodes are interfaces designed to make common tasks easy and fast. However, this simplification comes with a trade-off: limited customization. By using the LangChain Code Node directly, you can bypass these limitations and harness the full power of the LangChain framework.
The LangChain Code Node is placed in a less obvious location, perhaps intentionally to guide new users toward simpler nodes first. Here is how you can find it:
Step 1: Open the nodes panel in n8n
First, click the "+" button to add a new node to your workflow.
Step 2: Navigate to the AI section
Find the "AI" category in the nodes panel.

Step 3: Scroll to the bottom
Scroll all the way to the bottom of the list to find "Other AI Nodes."

Step 4: Go to Miscellaneous
Click on "Miscellaneous" at the very end of the list.

Step 5: Find LangChain Code
Here, you will find the "LangChain Code" node, ready to be added to your canvas.

Setting Up The LangChain Code Node: A Canvas For Creativity
At first glance, the LangChain Code Node looks deceptively simple - it has no visible inputs or outputs. But this is precisely where its power lies - it is a completely blank slate, waiting for you to shape it.
Step 1: Add input connections
Click on the node and navigate to the "Input" tab. Click "Add Input" and select "Main" from the dropdown menu. This allows you to connect a trigger node (like a Chat Trigger) to your LangChain node.


Step 2: Add output connections
Now, switch to the "Output" tab and click "Add Output." Select "Main" again. This creates an output that you can connect to other nodes in your workflow.

Step 3: Add language model connections
Return to the "Input" tab and click "Add Input" again. This time, select "Type" and then "Language Model." This allows you to connect one or more AI model nodes (like OpenAI or Anthropic) to your LangChain node.


Step 4: Add memory connections (optional)
If your AI agent needs memory to maintain context across conversations, add another input by clicking "Add Input" and selecting "Memory." This allows you to connect memory storage solutions like Simple Memory or a database like PostgreSQL.


Step 5: Add tool call connections (optional)
For agents that need to use external tools, add another input with "Add Input" and select "Tool." This allows you to connect tool nodes like HTTP Request, Database, or any other n8n node.


Step 6: Configure the code section
The heart of the LangChain Code Node is the "Add Code and Execute" section. This is where you can write custom JavaScript code to define exactly how your AI agent will behave.

Understanding The Code Section: Where The Magic Happens
The code section is where the real magic happens. Here, you can write JavaScript code that leverages the LangChain framework to define your agent's behavior. While writing code might seem intimidating to some, this is what grants you complete control over your agent's capabilities.

You can use AI models like Claude or ChatGPT to assist you in writing the code if you are not familiar with JavaScript or LangChain. Simply describe what you want your agent to do, and the AI can generate the code for you to copy and paste into the node.
The code section allows you to:
Define custom workflows for your agent.
Create complex conditional logic and decision trees.
Implement loops and iterative processes.
Build "teams" of agents that collaborate to solve large tasks.
Switch between different language models for different parts of a task.
Create more autonomous agents with the ability to plan and adapt.
Comparing The Standard AI Agent Vs. LangChain Code Node
Let's compare the standard AI Agent node with the LangChain Code Node to better understand the trade-offs:
Feature | Standard AI Agent | LangChain Code Node |
Ease of Use | Very easy - visual interface | More complex - requires code |
Customization | Limited to provided options | Unlimited - full control via code |
Multiple Language Models | One model per node | Can use multiple models |
Agent Autonomy | Basic - follows predefined paths | Advanced - can implement planning, reflection |
Complex Workflows | Requires multiple nodes | Can be implemented in a single node |
Development Time | Quick setup | More time needed for coding |
Error Handling | Basic | Can customize sophisticated error-handling logic |
Debuggability | Limited | Can integrate with specialized debugging tools |
Understanding AI Agent Architecture

To better understand why the LangChain Code Node is so powerful, let's examine the components that make up an AI agent:
Input: The user's request or the event that triggers the agent.
Language Model: The AI "brain" that processes the input (OpenAI, Claude, etc.).
Memory: Storage for conversation history and context.
Tools: External systems the agent can interact with (APIs, databases, etc.).
Instructions: The system message that defines the agent's role and behavior.
Logic: The decision-making process for when to use which tools.
Output: The final response delivered to the user.
In the standard AI Agent node, items 1 through 5 are configurable, but the Logic (item 6) is fixed. The LangChain Code Node gives you control over all seven components, paving the way for much more sophisticated agents.
Advanced Feature: Langsmith Integration
Because n8n's AI nodes are built on LangChain, you can actually integrate them with Langsmith, LangChain's official monitoring and debugging platform. This provides you with detailed insights into your agent's operations.

With Langsmith integration (currently available for self-hosted n8n instances), you can:
Track token usage and costs.
Monitor response times.
View detailed logs of the agent's reasoning process.
See step-by-step execution of tool calls.
Identify errors and performance issues.
Analyze patterns across multiple agent runs.
Important Note: Langsmith integration is currently only available for self-hosted n8n instances. Setting it up requires additional configuration steps not covered in this guide.
Comparing LangChain And The OpenAI Assistants API
You might wonder how LangChain compares to other frameworks like the OpenAI Assistants API. Here are the key differences:
LangChain Advantages:

Model Flexibility: Use any LLM provider (OpenAI, Anthropic, Google AI, etc.), avoiding vendor lock-in.
Full Control: Complete customization of agent behavior.
Self-Hosting Option: Can run entirely on your own infrastructure, ensuring data sovereignty.
Broader Tool Integration: Connect to any external system with an API.
Framework Approach: Build custom solutions rather than using a predefined service.
Open-Source Community: Benefit from the contributions and support of a large, active community.
OpenAI Assistants API Advantages:

Simplicity: Easier to set up with less code.
Optimized Performance: Fine-tuned for OpenAI models.
Built-in Features: File handling and code execution are included.
Managed Service: Less operational overhead.
Tight Integration with OpenAI Ecosystem: Easily combines with other OpenAI products.
For most use cases within n8n, both approaches can work well, but LangChain offers superior flexibility and control.
Use Cases For Advanced LangChain Agents
The LangChain Code Node is especially valuable in these scenarios:
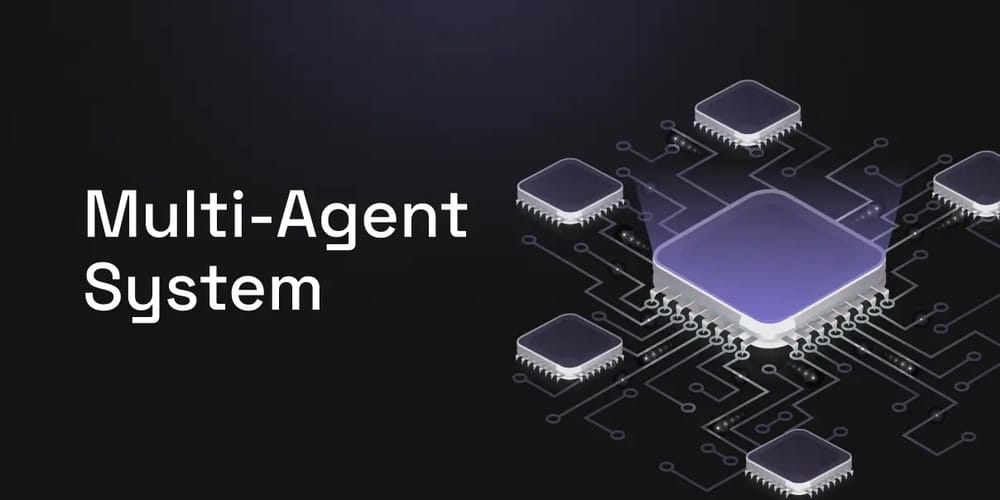
Multi-agent systems: Create "teams" of specialized agents that collaborate on complex tasks. For example, a research agent gathers information, an analysis agent processes the data, and a writing agent synthesizes the results into a report.
Dynamic reasoning: Implement agents that can plan, reflect on their actions, and adapt their approach. For instance, an agent could try one tool, realize it's not working, and autonomously try a different one.

Complex workflows: Build agents that follow sophisticated decision trees with multiple logic branches, handling exceptions gracefully.

Iterative processing: Create agents that can continuously refine results until a desired quality threshold is met. For example, an agent could write a draft, then self-critique and rewrite it multiple times for improvement.

Model switching: Use different LLMs for different parts of a task based on their strengths. For example, use a fast, cheap model for classifying requests, then a more powerful model for handling complex requests.

Custom safeguards: Implement specialized validation and safety checks for sensitive operations.

Practical Example: Building A Simple Research Agent
Let's look at a simplified example of how you might set up a LangChain Code Node to create a research agent that uses multiple tools:
JavaScript
// This is a simplified example of a research agent
// that uses a search tool and then summarizes the results.

// Assume the input contains a 'topic' property
const topic = input.topic;

// Step 1: Use the search tool (assumed to be connected)
// to find information on the topic.
const searchResults = await tools.search.invoke({
  query: `Detailed information about ${topic}`
});

// Step 2: Prepare a prompt to summarize the results.
const summaryPrompt = `Based on the following search results:
---
${searchResults}
---
Please write a detailed summary on the topic: "${topic}".
The summary should be well-structured, easy to understand, and cover the main points.`;

// Step 3: Use the language model (assumed to be connected)
// to generate the summary.
const summary = await llms.openai.invoke({
  input: summaryPrompt
});

// Step 4: Return the final result.
return {
  summary: summary,
  sources: searchResults
};
This is just a simple example, but it demonstrates how the LangChain Code Node allows you to implement a multi-step logic that interacts with tools, something that would be very difficult or impossible with the standard AI Agent node.
Key Benefits Of Using The LangChain Code Node

Flexibility: Build exactly what you need without being constrained by predefined node options.
Scalability: Create solutions that can grow in complexity as your automation needs evolve.
Future-proof: Learn a framework that will remain valuable as AI technology continues to develop.
Is It Worth Learning?
The question many n8n users will ask is: "Should I invest time in learning how to use the LangChain Code Node?"
The answer depends on your specific needs:
When to use the standard AI Agent node:

You need a quick and simple solution.
Your agent's logic is straightforward with few complex conditions.
You are not comfortable with or do not want to write code.
You only need to use a single AI model.
Your workflow does not require complex decision-making.
When to use the LangChain Code Node:

You need advanced customization and full control.
Your agent needs to make complex decisions with multiple logic branches.
You want to use multiple AI models or switch between them.
You are building a system that needs to be scalable.
You are willing to invest time in learning a more powerful solution.
In the long term, understanding frameworks like LangChain is likely to become increasingly valuable as AI becomes more deeply integrated into business processes. The ability to build sophisticated, autonomous systems that can reason, plan, and adapt will be a significant competitive advantage.
Conclusion
The LangChain Code Node represents the true power underlying n8n's AI capabilities. While it may seem intimidating at first, it opens up possibilities that are simply not available with the standard nodes.
As AI continues to evolve, the ability to build custom, sophisticated agents will become increasingly important. By understanding and using the LangChain Code Node, you are not just learning a feature of n8n - you are developing skills that will be valuable across the entire AI ecosystem.
Start small - perhaps by examining how the standard AI nodes are implemented - and gradually work your way up to building your own custom agents. The journey may be challenging, but the results will be well worth it.
Next Steps
Experiment with the LangChain Code Node in a test workflow.
Compare the implementation of standard AI nodes with your custom solutions.
Try building a simple agent that uses multiple language models.
Explore the LangChain documentation to learn more about its capabilities.
Consider integrating Langsmith for detailed monitoring (for self-hosted instances).
Join the n8n community to share your experiences and learn from others.
If you are interested in other topics and how AI is transforming different aspects of our lives or even in making money using AI with more detailed, step-by-step guidance, you can find our other articles here:
This AI "Master Builder" Creates Full n8n Workflows In 30 Secs!*
AI Integration: 11 Ways To Make Your AI Agent Everywhere!
*indicates a premium content, if any
How would you rate the quality of this AI Workflows article? 📝 |
Reply