- AI Fire
- Posts
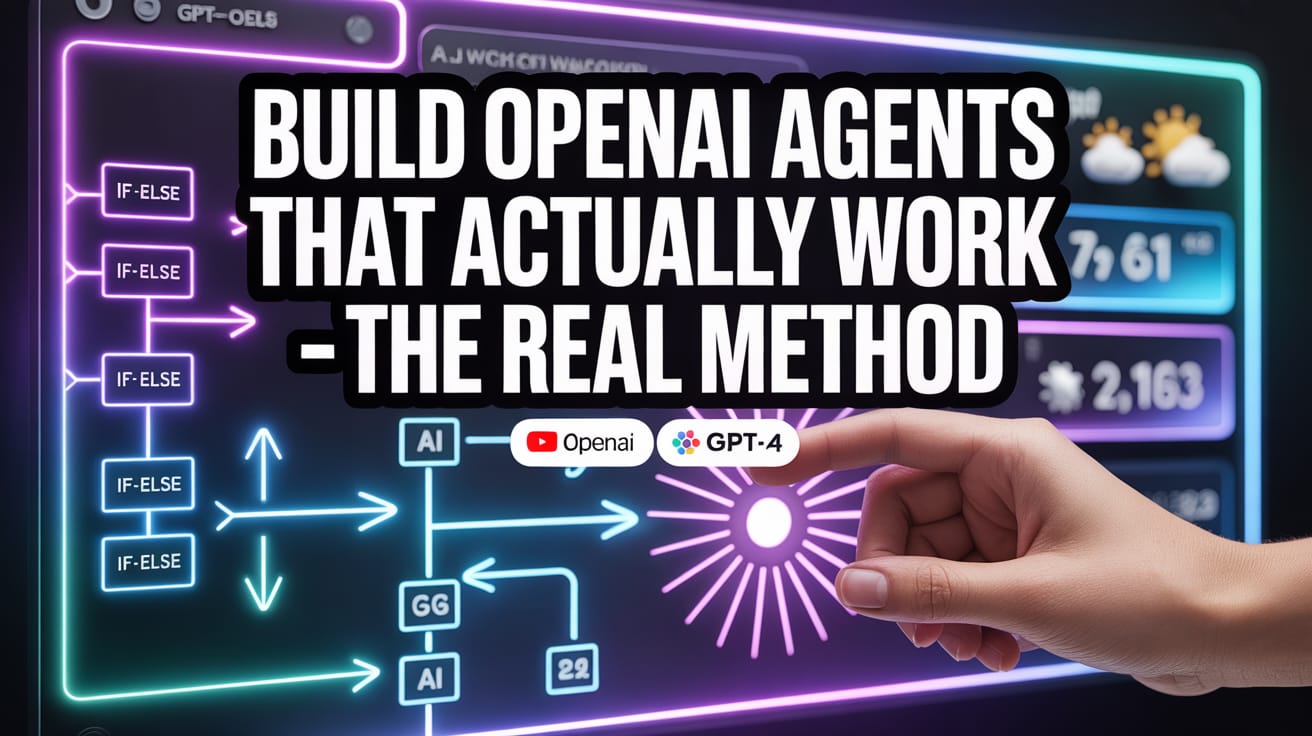
- 🧐 Build OpenAI Agents That Actually Work - The Real Method
🧐 Build OpenAI Agents That Actually Work - The Real Method
OpenAI's Agent Builder is more technical than it looks. This simple walkthrough helps you build your first workflow, manage logic, and add widgets.
Neil Phan
October 21, 2025
How much have you used the new OpenAI Agent Builder? |
Table of Contents
If you have heard about OpenAI's new Agent Builder tool and felt a little confused, you are not alone. This tool looks simple, but it is actually more technical than other "no-code" platforms.
But don't worry. This article will explain everything you need to know, step by step, in an easy-to-understand way. Just imagine you are learning a new recipe.
By the end of this article, you will understand how to make your first AI workflow, how to set up conditions, add nice-looking 'widgets', and get your agents ready to use. Let's start!
What You Need To Know Before Starting
Before we start building, let's learn the three main parts of this tool:
1. Agent Builder
This is where you do all the work. You can find it in your OpenAI developer account. If you don't have one, just go to OpenAI's website, create an account (it can be free to start), and you are ready.
Think of Agent Builder as your workspace. You will drag and drop different blocks to create a workflow for your AI.
2. Chat Kit
This is the tool that helps you take the workflow you made and put it on your website or in your software. It is like a bridge between what you create and the place where your users will talk to it. We will talk more about this later.
3. Widgets
Widgets control how your chatbot's answers look. Instead of just getting a boring line of text, widgets let you create nice-looking user interfaces (UI).
For example, instead of the chatbot saying: "The movie The Matrix was released in 1999," a widget could show a nice card with the movie poster, the title, and the release year. This makes the user's experience much better.
Now you understand these three parts, let's start building something.
Learn How to Make AI Work For You!
Transform your AI skills with the AI Fire Academy Premium Plan - FREE for 14 days! Gain instant access to 500+ AI workflows, advanced tutorials, exclusive case studies and unbeatable discounts. No risks, cancel anytime.
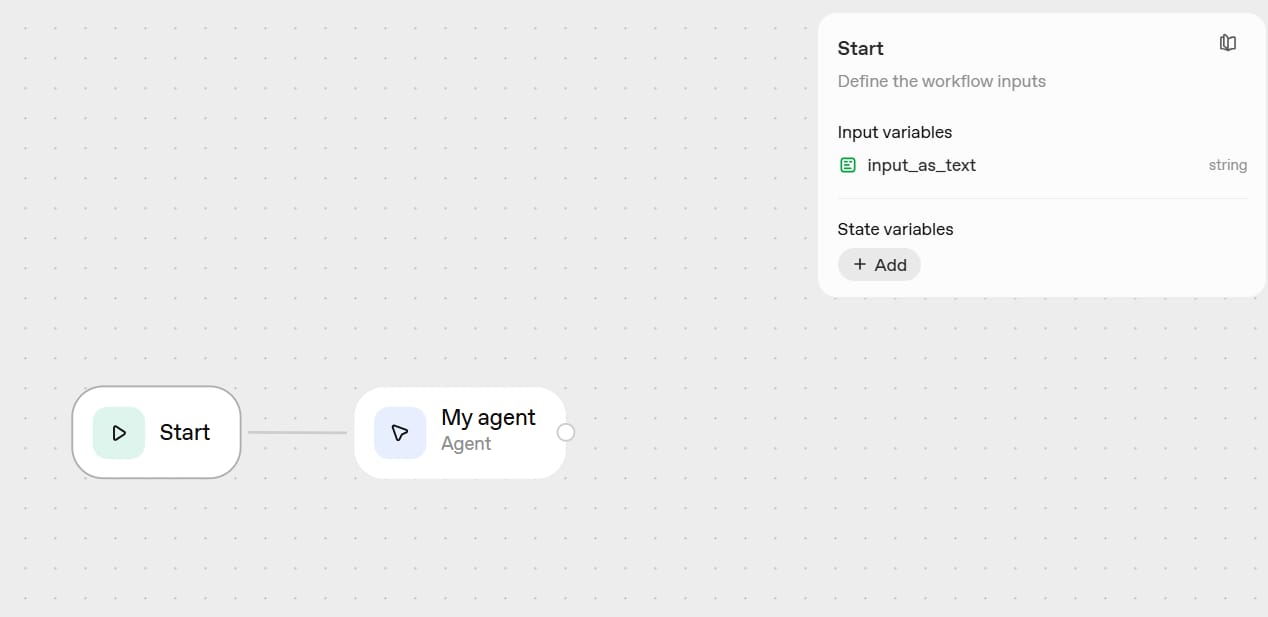
Getting Started: Your First Workflow

When you open Agent Builder, you will see a drag-and-drop screen. Here is the first thing you need to know: even though it looks easy, this tool needs you to understand logic more than a tool like Zapier. You don't need to be a programmer, but you need to understand a little bit about syntax (how to write commands) and logic (how to think in steps). Don't be scared, we will go through it together.
How Does A Workflow Start?
Every workflow begins with a chat. When you type "hello" or any message in the preview window, the workflow starts. Right now, that is the only way to start these workflows.
Understanding The Building Blocks
Let's look at each tool you see on the side menu. These are the "bricks" you use to build your workflow.
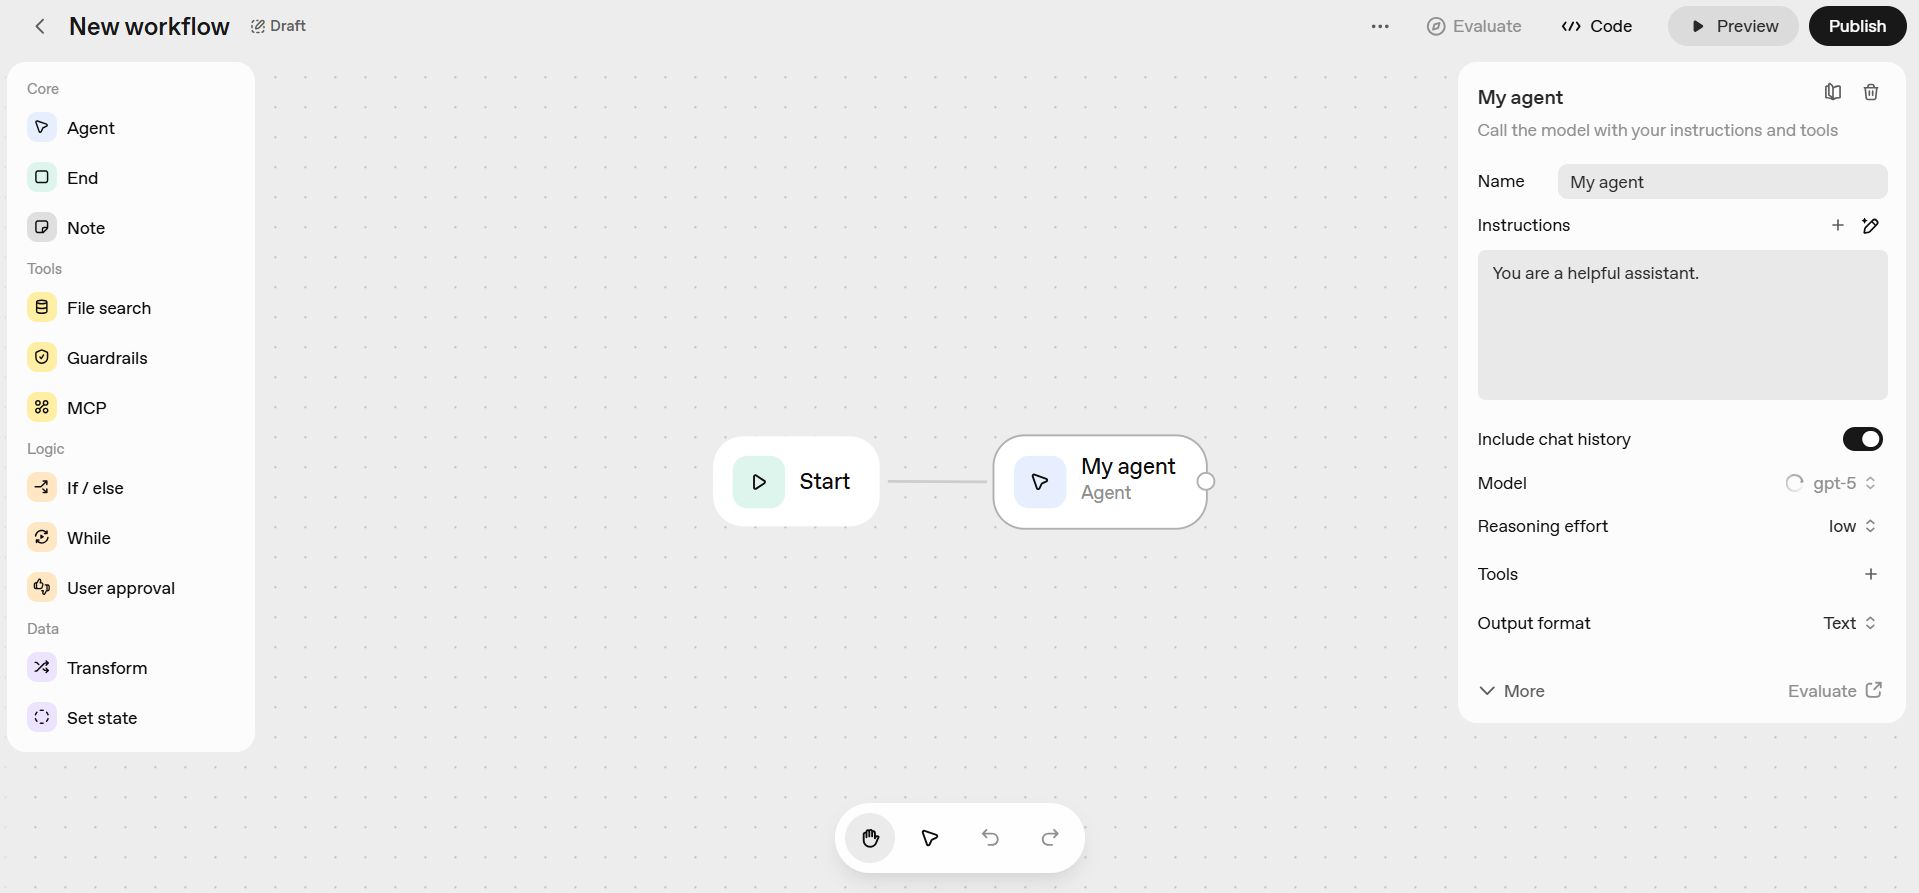
1. The "Agent" Block
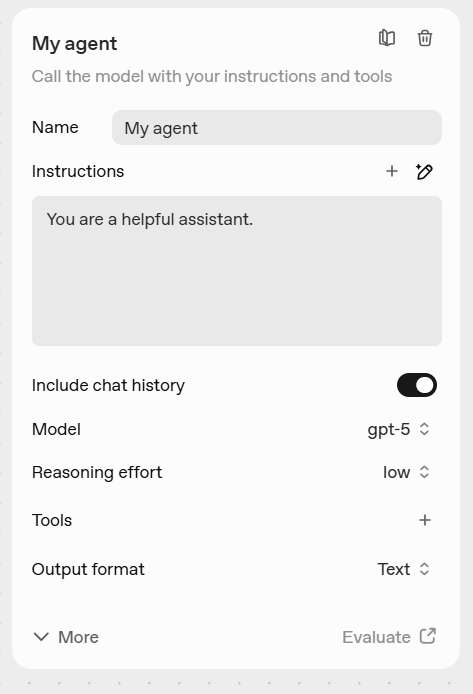
Think of this as the main "AI brain" in your workflow. It includes:
Instructions: These are the prompts (commands) you give the AI to tell it what to do.
Model: You choose which AI model will do the work, like GPT-4 (smarter) or GPT-3.5 (faster).
Reasoning Effort: How "hard" you want the AI to think.
Tools: Built-in tools like Web Search, File Search, and Code Interpreter.
The Agent block is the foundation. Without it, nothing works, because it is the actual AI doing the work.
2. The "End" Block
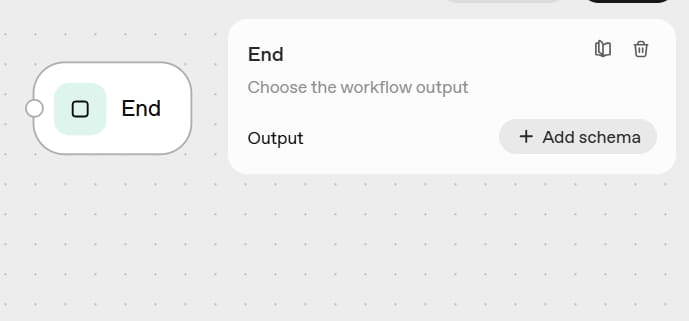
This block makes your workflow stop. When a workflow starts, it could keep running forever if you don't tell it to stop. The "End" block is like saying, "We are finished here."
For example, if someone just asks for simple information, you want the workflow to end right after giving the answer, not try to continue the chat.
3. The "Notes" Block
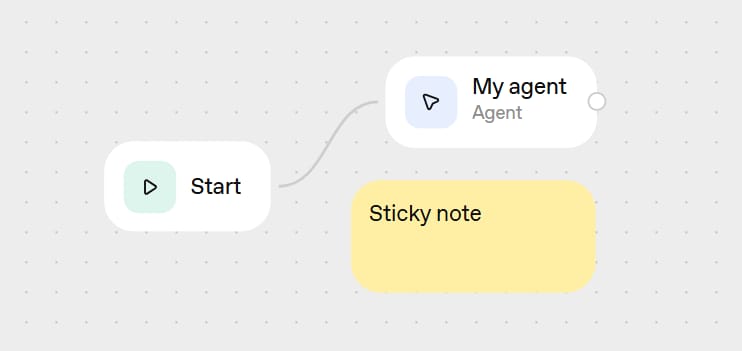
This is like writing comments in programming. You can write anything here - reminders, explanations, or even "I need to drink water" - and it will not change how your workflow runs. It is just for you to read and remember.
4. The "File Search" Block
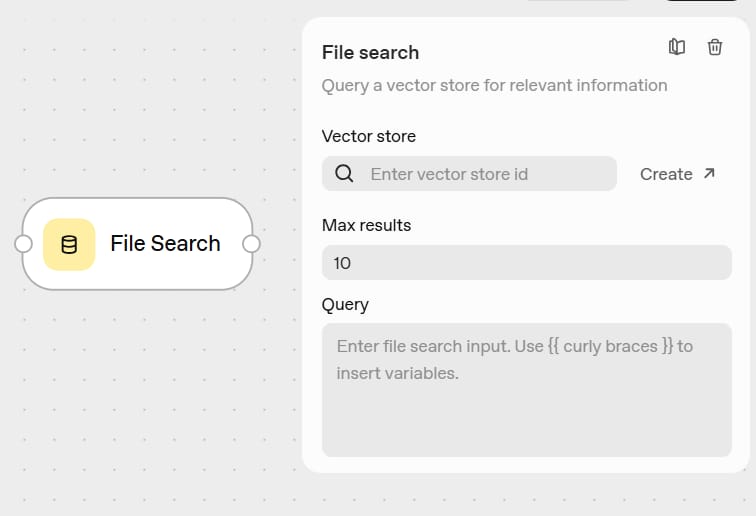
This block lets your AI look at files that you have stored. It can read PDFs, text documents, etc.
The files are stored in a place called "vector stores." This is a special kind of database that helps the AI find information in your files very fast. For example, you can upload 10 PDF files about your company's products. Then, the AI can use "File Search" to answer customer questions about those products.
5. The "Guardrails" Block
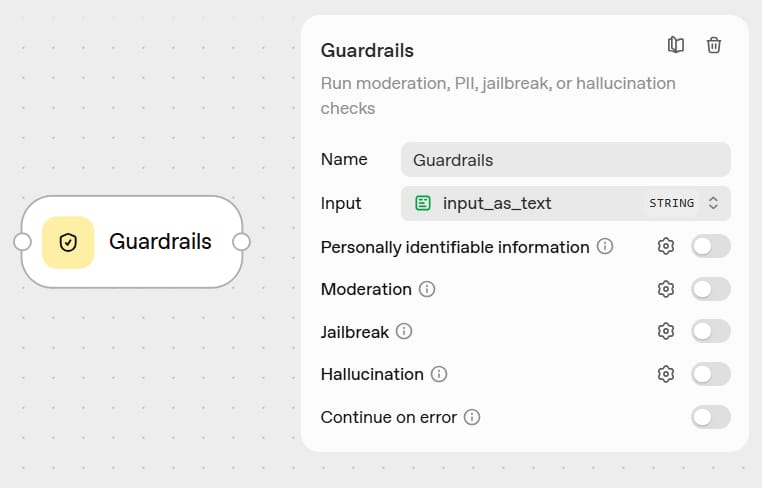
These are safety rules that are already set up for you. Think of them as "if-then" statements that are already made.
For example, you can add a guardrail that says "do not allow hate speech in this workflow." If someone tries to type something bad, the guardrail will stop it and give a safe answer.
6. The "MCP" (Model Context Protocol) Block
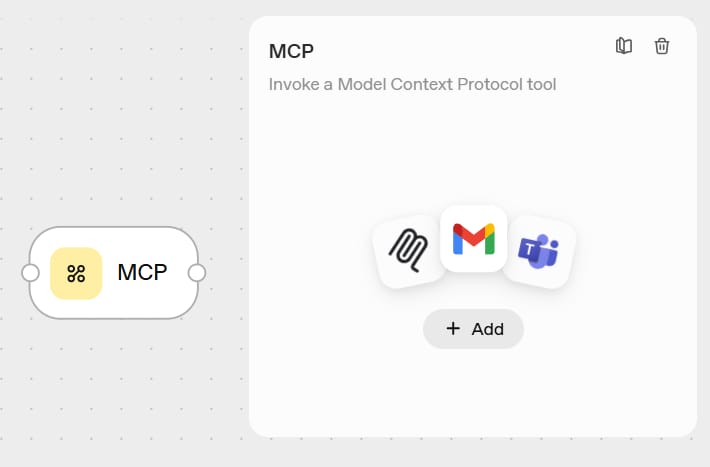
This block lets you connect to many different apps. Warning: this part is very technical and difficult. It is made for developers and needs its own guide. We will skip the details for now, but just know it is there for advanced connections.
7. The "If-Else" Block
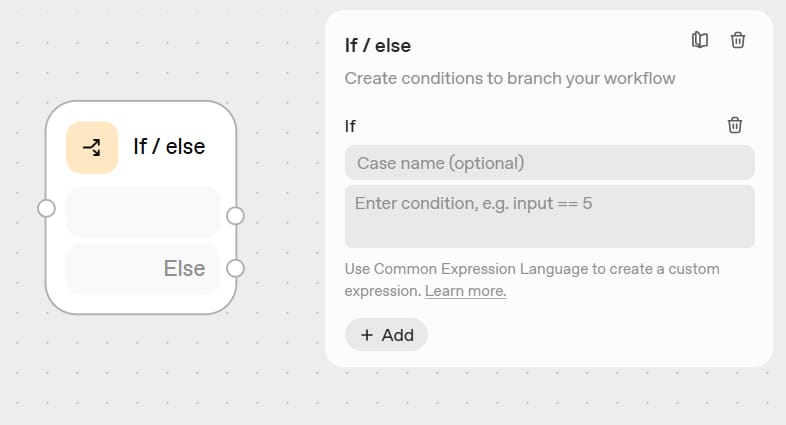
This is classic programming logic. You are saying, "if this condition is true, do action A; if it is false, do action B."
For example: "If the user asks about 'placing an order,' send them to the order agent; otherwise (else), send them to the normal question agent." This is one of the most important blocks for making your agent smart.
8. The "While" (Loop) Block
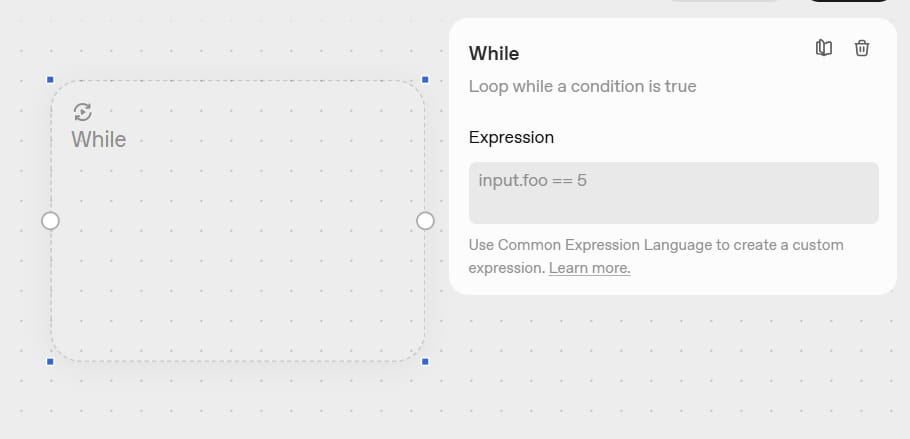
This block lets you repeat an action many times. But be careful—loops can be risky if you don't know what you are doing. An "infinite loop" (a loop that never stops) could cost you a lot of money by using up all your credits.
For now, you probably won't need to use this unless you are building something very advanced, like asking the AI to check a list of 100 items.
9. The "User Approval" Block
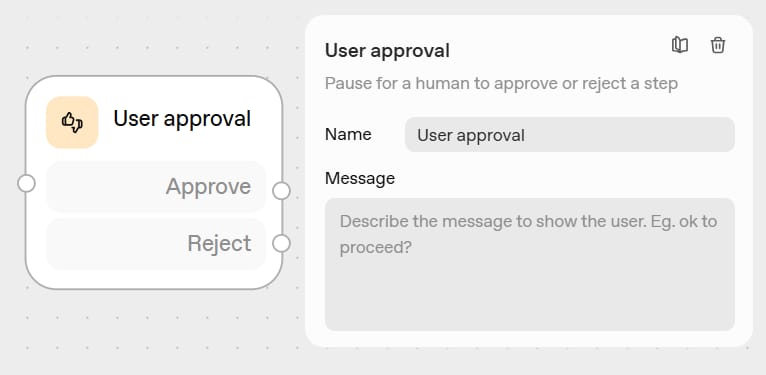
This is another type of "if-else" block, but it specifically asks a human for permission. The workflow will pause and ask, "Can I do this?" If you approve, it goes one way; if not, it goes another way.
For example: "I found a flight to Hanoi for 3,000,000 VND. Do you want me to book the ticket?" The workflow will wait for you to say "Yes" or "No" before it continues.
10. The "Transform" Block
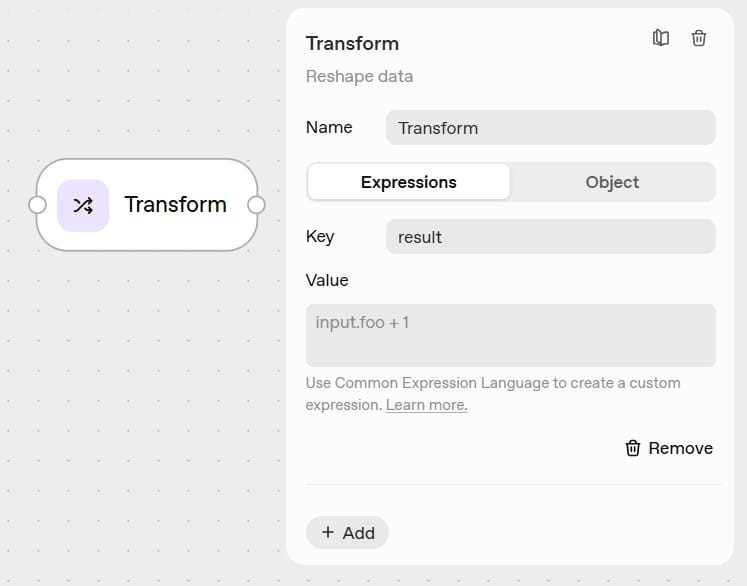
This block is very important. It lets you change data from one format to another format, so the next block can read it.
Think of it like a translator. Let's say Agent A gives a long sentence: "The customer's name is Nguyen Van An and he wants to know about order number 12345."
But Agent B (the order-checking agent) only needs the "order number."
You would use a "Transform" block in the middle. You tell it: "Take the sentence from Agent A and only get the 'order number'." The "Transform" block will pull out "12345" and pass it to Agent B.
11. The "Set State" Block
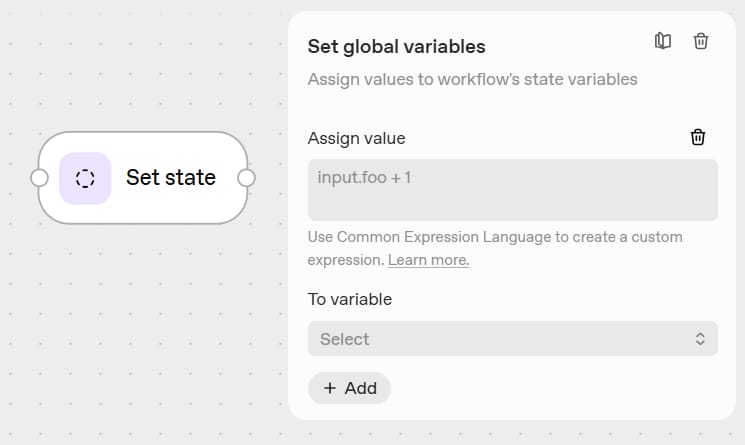
When your workflow starts, you might want to save some information to use later. That is what "Set State" does. It's like taking notes during a conversation so you can look at them later in the same workflow.
For example, when a user says: "My name is An." You can use "Set State" to save a variable called user_name = "An". Then, at the end of the workflow, another agent can say, "Thank you, An!" without asking for the name again.
Building Your First Workflow: A Real Example
That's enough theory. Let's build something real so you can see how it all works.
The Idea: We will create a "Movie Expert" bot. This bot can decide if a user's question needs to search the internet or not.
If the question needs current information (like "What movies are in theaters now?", "What are the reviews for the movie 'Mai'?"), it will use web search.
If the question is just about old facts (like "Who directed the movie 'The Godfather'?"), it will answer with its own knowledge.
Step 1: Set Up Your First Agent (The Classifier)
We will make an agent with a simple job: decide if the user needs the internet.
Drag an Agent block onto your workspace.

Give this agent a clear name, like: "Web Classifier".

In the Instructions box for the agent, type:
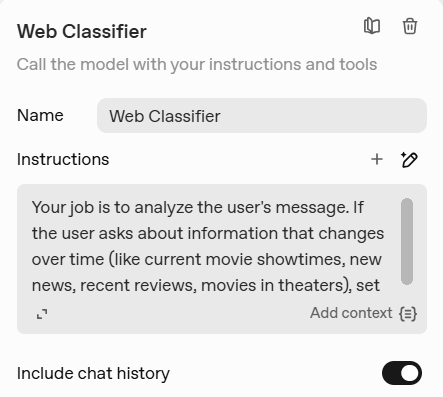
Your job is to analyze the user's message.
If the user asks about information that changes over time (like current movie showtimes, new news, recent reviews, movies in theaters), set 'needs_web_search' to 'true'.
If the user asks about facts or history (like the director of an old movie, actors, the release year of an old movie), set 'needs_web_search' to 'false'.
Step 2: Set Up The JSON Output
Now we need to format how this agent gives us its answer. We want it to answer "true" or "false".
Scroll down to Output Format in the agent's settings.

Choose JSON. (JSON is just a way to write data so computers can read it easily. Just select it).

In the Property Name box, type:
needs_web_search
For the Type, choose bool. (Bool just means true or false).

Click Update.
What did we just do? We just told the agent: "When you decide if the internet is needed, give me a simple 'true' or 'false' answer in a format called needs_web_search."
Step 3: Add The If-Else Logic
Now we need to create two paths: one for questions that need the internet, and one for questions that don't.
Drag an If-Else block onto your workspace.

Connect your "Web Classifier" agent to this if-else block (drag the small line from the agent to the if-else block).

Click on the if-else block's settings.
In the condition box, type:
needs_web_search == true
This means: "If the agent decided it needs the internet (needs_web_search = true), go down Path A. If not, go down Path B."
Step 4: Create The Web Search Agent (The 'True' Path)
For questions that need the internet:
Drag another Agent block onto your workspace.

Connect the "true" output from your if-else block to this new agent.

Name this agent "New Movie Searcher".

In this agent's settings, go to Tools and add Web Search.

In the Instructions, type:
"Use the web search to answer the user's question about movies in detail."
Add context by clicking Add context input as text. This takes the user's original question and gives it to this new agent.

Step 5: Create The Knowledge Agent (The 'False' Path)
For questions that do not need the internet:
Drag one more Agent block onto the workspace.

Connect the "false" output from your if-else block to this agent.
Name this agent "Movie Expert".

In the Instructions, type:
"You are an expert on movie history. Answer the user's question with your knowledge. DO NOT use web search."
Step 6: Test Your Workflow
Now let's see if it works:
Click Preview at the top.

Type:
"What actors are in the movie 'Mai' by Tran Thanh?" (This is a new movie, it needs the web).
Press Enter.
Watch what happens:
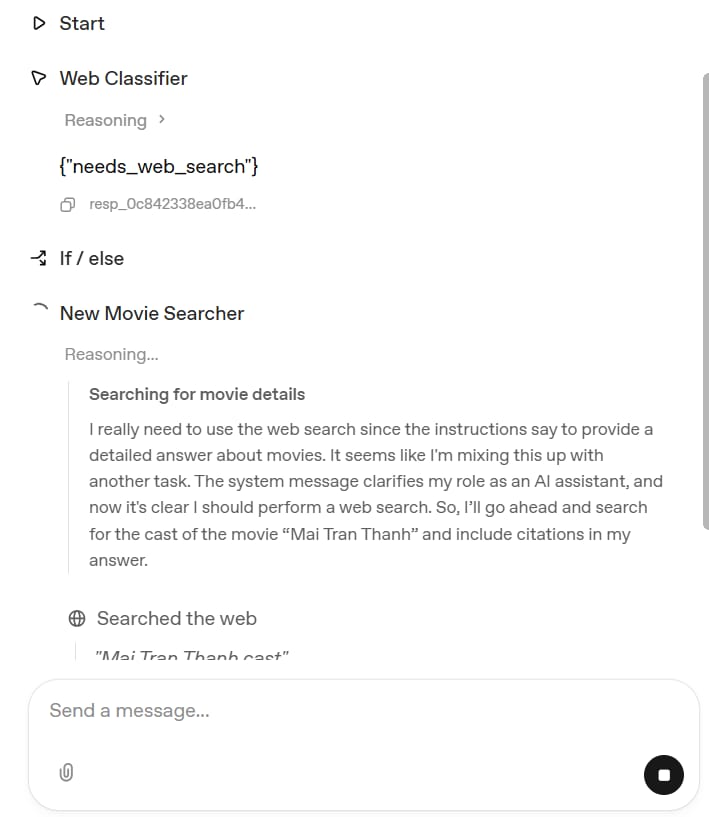
The "Web Classifier" agent gets your question.
It thinks: "Hmm, 'Mai' is a new movie... this needs the internet!"
It sets
needs_web_searchtotrue.The if-else block sees that it is 'true'.
It sends the question to the "New Movie Searcher" agent.
You get an answer using information from the web.
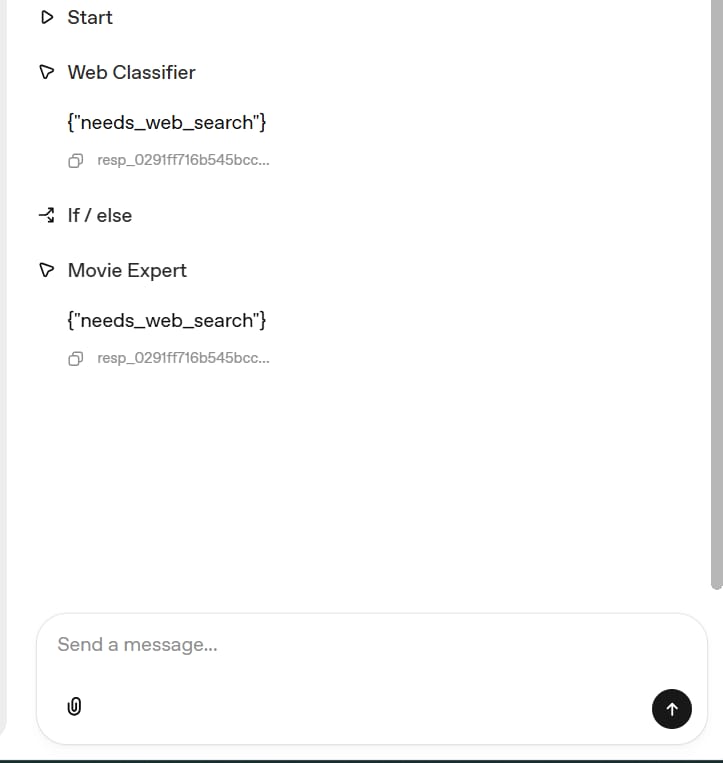
Now try a different question:
Click New Chat in the preview window.

Type:
"Who directed the movie The Godfather?"(This is an old movie, no web needed).
Press Enter.
This time:
You did it! You just built an AI workflow with logic.
Understanding The "Evaluate" Feature
If something goes wrong, or you want to see exactly what happened "inside":
Click Evaluate at the top.

This is like your error log or a "behind-the-scenes" view.
You can see:

How long each step took.
What the agent was "thinking".
What the output was at each step.
This "Evaluate" feature is super helpful to find out why something didn't work the way you wanted.
Adding Widgets To Make It Look Good
Text answers are fine, but widgets make your chatbot look professional. Let's add a "Movie Card" widget to our workflow.
Step 1: Get A Widget File
Normally, you have to build your own widget, but let's pretend OpenAI gives you some examples.
Go to the widgets section on OpenAI's platform.

Find the "Movie Card" widget example.

Click Open in Widget Editor.

Click Download. (This saves a
.widgetfile to your computer).
Step 2: Upload The Widget
Go back to your workflow.

In your "New Movie Searcher" agent (the one that uses web search), change the Output Format from Text to Widget.

Click Add Widget.

Click Upload.
Choose the
.widgetfile you just downloaded.
Click Add.
Creating Your Own Widgets (Advanced)
OpenAI has an app builder where you can create custom widgets. But, a warning: this feature is still in "beta" (testing). You will find annoying errors that are not your fault. The UI works about 90% of the time, but the last 10% can be frustrating.
My advice: for now, stick with the pre-made widgets until you are more comfortable. After you are good at the basics, you can try making your own custom designs.
Publishing Your Workflow
When you are happy with your workflow:
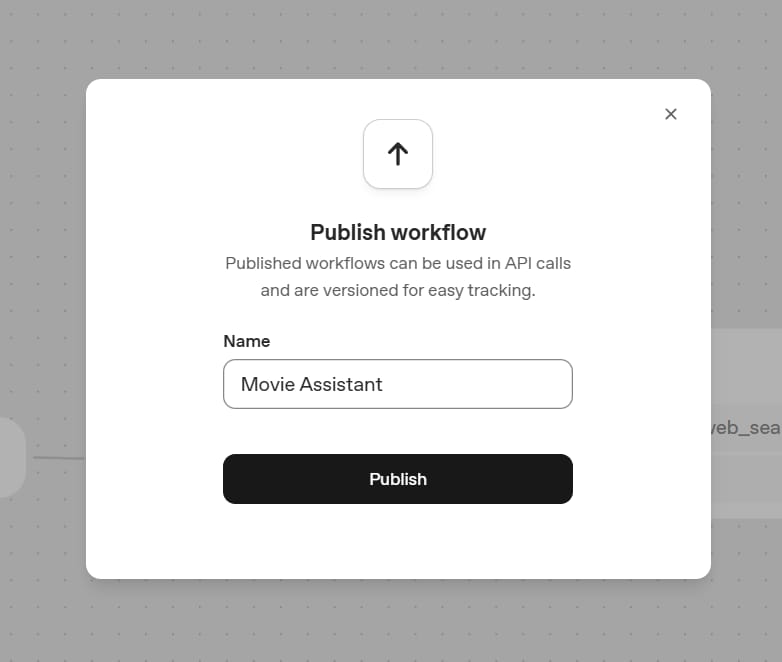
Click Publish at the top.
Give it a name (like "Movie Assistant").
Click Publish.
You will get:
A workflow ID.
A current version number.
Access to Chat Kit for embedding.
What Is Chat Kit And Why You Need It?
Remember I mentioned Chat Kit at the beginning? This is where it becomes important.
Chat Kit is what lets you take your workflow and put it on your website, in your app, or in your software. Think of it this way:
Agent Builder = Where you design the brain (the kitchen).
Chat Kit = How you give people access to that brain (the waiter who brings the food to the customer).
Chat Kit is basically an API. An API is a way for two computer programs to talk to each other.
Setting up Chat Kit correctly needs you to understand APIs and some coding, so that is a completely separate topic. The important thing to know now is: once you "Publish" your workflow, you can use Chat Kit to connect it to the outside world.
Common Mistakes To Avoid
After building many workflows, here are the mistakes people often make:

1. Not Testing Both Paths (True/False)
If you create an if-else statement, test both the "true" path and the "false" path. Don't just assume it works - actually try both situations. For our "Movie Expert" example, you must test both a new movie question and an old movie question.
2. Forgetting About Output Formats
If you tell an agent to output JSON, don't expect it to also give you normal text. If you tell it to output a widget, it cannot give you anything else. Plan for this.
3. Ignoring The "Evaluate" Feature
When something breaks, your first idea might be to rebuild everything. Instead, click "Evaluate" and see exactly where it went wrong. It will save you a lot of time.
4. Making Workflows Too Complicated At The Start
Start simple. Get one if-else block working before you try to build ten conditions inside each other. Learn to walk before you run.
5. Not Reading Error Messages
Yes, some errors happen because the platform is in beta (testing) and it's not your fault. But many errors tell you exactly what is wrong. Read them carefully.
6. Choosing The Wrong Model For The Job
In the "Agent" block, you can choose between models like GPT-4o, GPT-4, GPT-3.5-Turbo.
GPT-4o/GPT-4 are smarter. They are better at logic and following complex instructions. But they are slower and cost more.
GPT-3.5 is fast and cheap.
Mistake: Using GPT-3.5 for a very complex job (like our "Web Classifier" agent). It might not be smart enough to always make the correct "true" / "false" decision. Use GPT-4 for important logic tasks
What's Next?

You now understand the basics of OpenAI Agent Builder. You know:
The three main parts (Agent Builder, Chat Kit, Widgets).
What each building block does.
How to create a workflow with if-else logic.
How to test your workflow with "Evaluate".
How to add widgets for better-looking answers.
But this is just the beginning. There is so much more to learn.
Topics For Further Learning:

Connecting to Outside Apps (MCP):
This is a really powerful feature. MCP lets you connect to thousands of third-party apps. Imagine your agent can check your email, add an event to your Google Calendar, or get information from your company's database. This part is very technical, but it opens up many possibilities.
Advanced "File Search":
We talked a little about uploading PDFs. You can learn more about how to work with documents and build "vector stores." This lets you create agents that can answer deep questions about your company's internal documents, textbooks, or any document you give it.
Mastering the "Transform" Block:
This block is the key to making different agents work together smoothly. Learning how to use it to clean data, get specific information, and change data formats is a very important skill for building complex workflows.
Final Thoughts
OpenAI Agent Builder is a powerful tool, but it is definitely not as beginner-friendly as it looks. It is somewhere between no-code tools like Zapier and full programming. You don't need to be a developer, but you do need to think logically about how data moves through your workflow.
The good news? Once you get past the first learning part, you can build some really impressive AI agents that solve real problems.
Start with simple workflows, like the "Movie Expert" example we built together. Get comfortable with if-else logic. Understand how agents, widgets, and Chat Kit work together.
Then, after you are good at the basics, you can move on to more complex projects. Remember: this tool is still in "beta" (testing). Some things will break, and it's not your fault. Some features work 90% of the time. That's okay. Keep trying, keep testing, and don't give up when you get stuck.
The future of AI agents is here, and you are now ready to start building. Take it one step at a time, test everything, and soon you will be creating workflows that seemed impossible just a few weeks ago.
Now go and build something cool.
If you are interested in other topics and how AI is transforming different aspects of our lives or even in making money using AI with more detailed, step-by-step guidance, you can find our other articles here:
The Most UNDERRATED Google AI Tool Is Also The Most Powerful
The FREE AI Tools That Give You An Unfair Advantage
*indicates a premium content, if any
How would you rate the quality of this AI Workflows article? 📝 |
Reply