- AI Fire
- Posts
- 🤯 Canva Code 2.0: I Built A Real App In 10 Mins. (No Code!)
🤯 Canva Code 2.0: I Built A Real App In 10 Mins. (No Code!)
I tested Canva Code 2.0 to see if you can really build apps. I made a habit tracker that saves data. Here's my full step-by-step process for non-tech people.
Neil Phan
November 03, 2025

Have you ever wanted to build your own simple app? |
Table of Contents
Have you ever had a great idea for a small app? Like a habit tracker, a shared to-do list, or a simple RSVP form for your party? And then you realized... oh, I have to know how to code.
That used to be a big problem. But things are changing. Canva - the tool we all use to make beautiful designs - just released something called Canva Code 2.0.
Simply put, this is a tool that lets you talk to an AI. You describe the app you want, and the AI builds it for you, right there. You don't need a single line of code.
I spent time testing this new version. In this article, I will explain everything for you like a beginner. I will show you exactly how it works, what the biggest new features are, and we will build a real habit tracker app together from start to finish. By the end, you will be able to build one yourself.
Part 1: What Is Canva Code 2.0?

Canva Code is a feature inside Canva that lets you create small apps and interactive experiences just by using simple text prompts. Think of it like you are talking to an AI coder. You say, "I want a red button," and it makes a red button.
The "2.0" version is a big upgrade. The old version was fun, but it was more like a toy. The apps you made couldn't save anything.
Canva Code 2.0 changed the game with three big upgrades:
Data Collection: This is the most important thing. Your apps can now save information to something called Canva Sheets (like Google Sheets or Excel, but built-in).
Easy Customization: You can change the text and colors of your app right in the Canva editor, just like you change the color of a square.
Quick Publishing: You can publish your app as a working website right from the Code area.
Who Can Use It?
The great thing is Canva Code is available for everyone.
Free users: You get 20 messages per day.
Paid users: You get 60 messages per day.
A "message" is just each time you type a prompt or a follow-up request. 20 messages is more than enough to build and test a simple app every day.
How To Find Canva Code
Getting started is simple. Here is the step-by-step process:
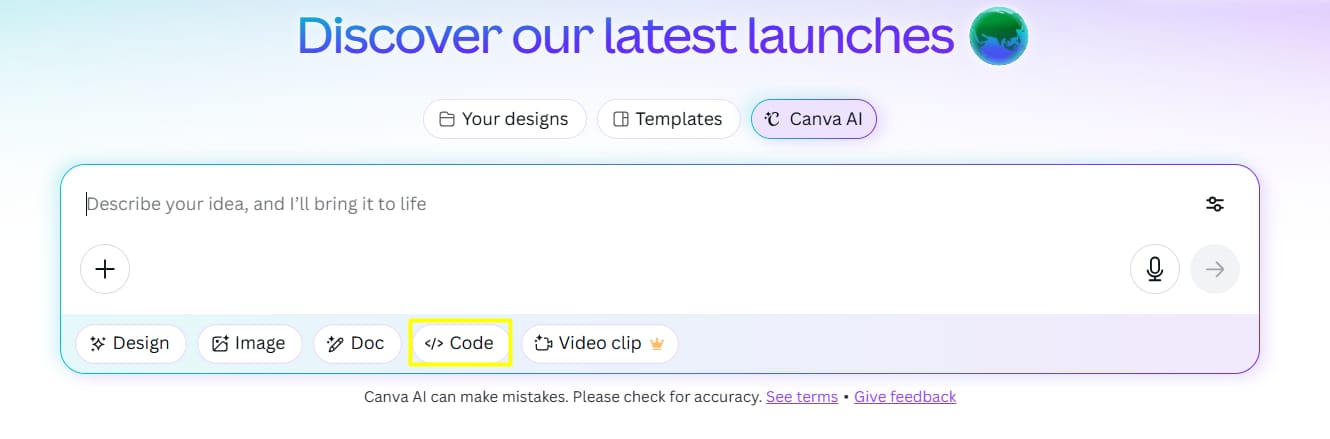
Step 1: Go to your Canva homepage.
Step 2: Click on the "Canva AI" button (it's usually in a main spot, or you can click the button on the sidebar).
Step 3: Choose "Code for me" from the options.
Once you are in, you will see a chat screen. This is where the magic happens. You can pick one of their templates or start typing your own idea.
Learn How to Make AI Work For You!
Transform your AI skills with the AI Fire Academy Premium Plan - FREE for 14 days! Gain instant access to 500+ AI workflows, advanced tutorials, exclusive case studies and unbeatable discounts. No risks, cancel anytime.
Part 2: Building My First App: The Habit Tracker (Step-By-Step)
To show you how it works, let's build something real. I'm not going to use a boring shopping list example. Instead, let's create a Habit Tracker.
Version 1: The Basic Idea
I'll start with a very simple prompt. I want a place to type a habit and a list.
My first prompt:
"Create a simple habit tracker. I need a text box to type the habit name and an 'Add' button. Below it, show a list of the habits I've added. Each habit in the list needs a checkbox next to it."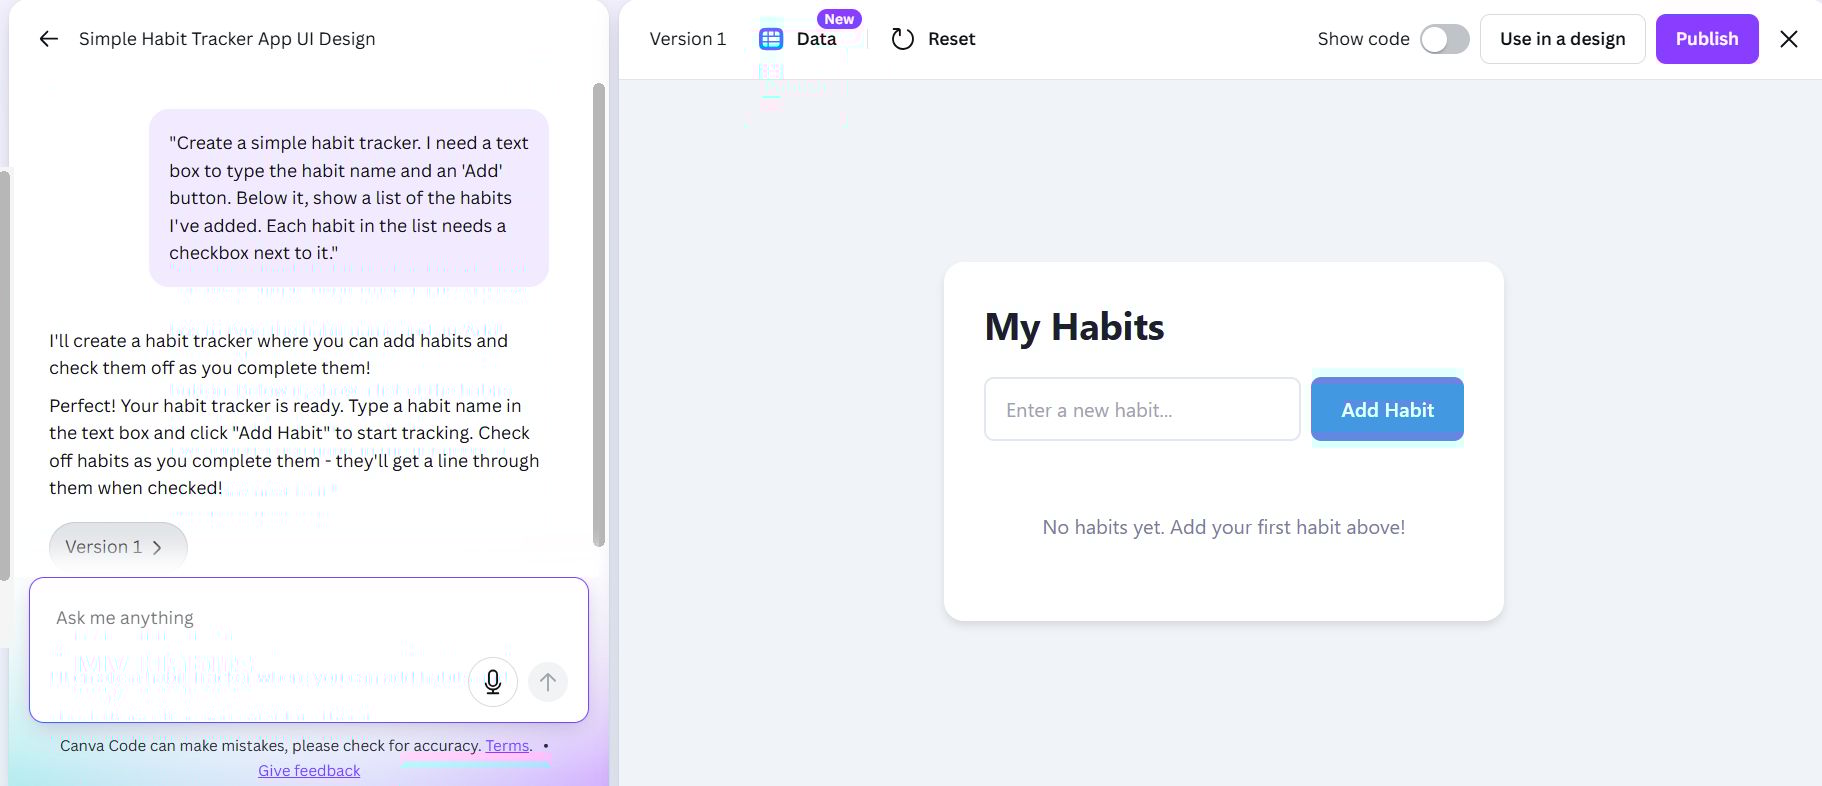
That's it. I typed that and pressed Enter.
The result:
Canva Code made a small app. It had:
A title: "My Habit Tracker"
A text box.
An "Add" button.
An empty list below.
I tried it. I typed "Drink water" and pressed "Add." It appeared in the list with a checkbox! Then I typed "Read book" and pressed "Add." It also appeared. I could check the boxes.
It worked. But it was pretty basic.
The Big Discovery: Data Collection
This is where things get interesting. At the top of the app, there was a new button that says "Data". When I clicked it, I found out my app was connected to a Canva Sheet.

Think of it like an automatic spreadsheet. Every time I added a habit, it saved it to this sheet.
The columns in my Canva Sheet looked like this:
Created at: The date and time
HabitName: "Drink water"
Status: False (meaning not checked)
This is a huge improvement. Version 1.0 couldn't do this. Now, your app can remember things. This opens up so many possibilities:
Survey forms that save answers.
Event sign-up apps.
Quizzes that track answers.
Voting systems.
The data saves in real-time.
Version 2: Making It Better (Adding Categories)
The app worked, but what if I have 20 habits? It will become a long, messy list. I wanted to organize them.
So, I gave a follow-up prompt in the same chat:
My second prompt:
"This is good, but I want to add categories. When I add a new habit, give me a dropdown menu to pick a category. Please make three categories: 'Health,' 'Work,' and 'Personal'."
The AI thought for a moment and updated the app.
What changed in Version 2:
Now, next to the text box, there was a dropdown menu.
I typed "Meditate 5 minutes."
I selected "Health" from the dropdown.
I pressed "Add."
The app now showed my list organized by category.
HEALTH
$$ $$
Drink water
$$ $$
Meditate 5 minutes
WORK
(empty)
PERSONAL
$$ $$
Read book
This was much better. Now it was an organized tool. My Canva Sheet also updated automatically. It added a new column called "Category".
Version 3: Adding Emojis And Delete
It worked well, but it looked a bit boring. And I realized: I can't delete a habit!
My third prompt:
"Great. Now, please make two changes.
When a habit is shown in the list, automatically add a matching emoji next to its name.
Add a 'Delete' button (a small trash can icon) next to each habit so I can remove it."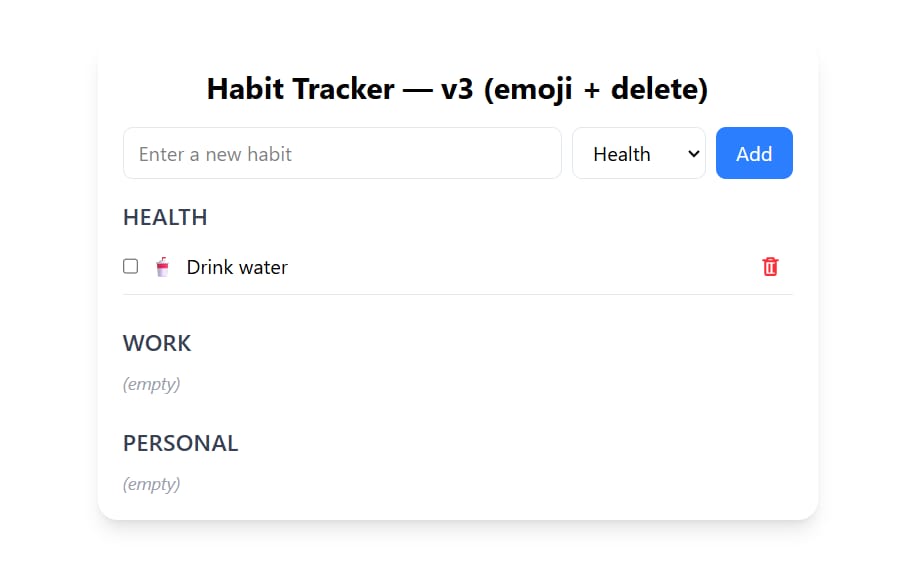
The AI updated it again.
How Version 3 works:
Now my list looked great!
HEALTH
$$ $$
💧 Drink water (X)
$$ $$
🧘 Meditate 5 minutes (X)
PERSONAL
$$ $$
📖 Read book (X)
It automatically found the emojis! And the "X" (Delete) button worked perfectly. When I clicked it, the habit disappeared from the app and from the Canva Sheet.
Now I had a fully working app. It was time to make it look good.
Part 3: Customization: Making The App Your Own
This is where version 2.0 really shines. Before, you were stuck with the default look (usually blue). Now you can change it.
1. Customizing Text
Step 1: Click the "Use in a design" button (choose the "Website" option).
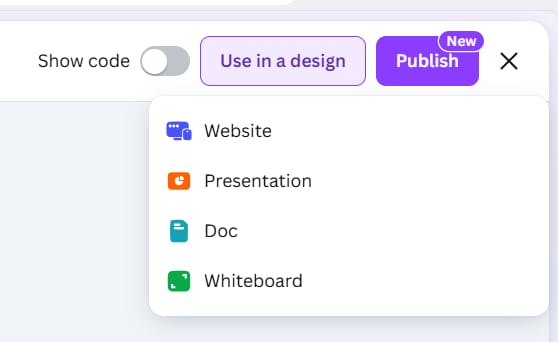
Step 2: Canva creates a website and puts your app on it.
Step 3: Click on the app, and you will see a small menu with an "Edit" button.

Step 4: Click "Edit" and you will see text fields you can change:
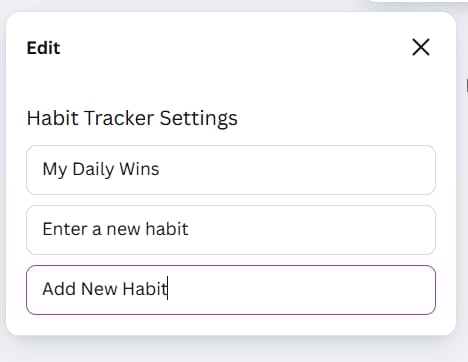
Title: Change "My Habit Tracker" to anything you want (like "My Daily Wins").
Button text: Change "Add" to "Add New Habit" or whatever you like.
This is a big improvement because before, you had to go back to the code and ask the AI to change the text for you. Now you can edit it yourself.
Note: Right now, you can only edit the text content, not the font. But I expect Canva will add font customization soon.
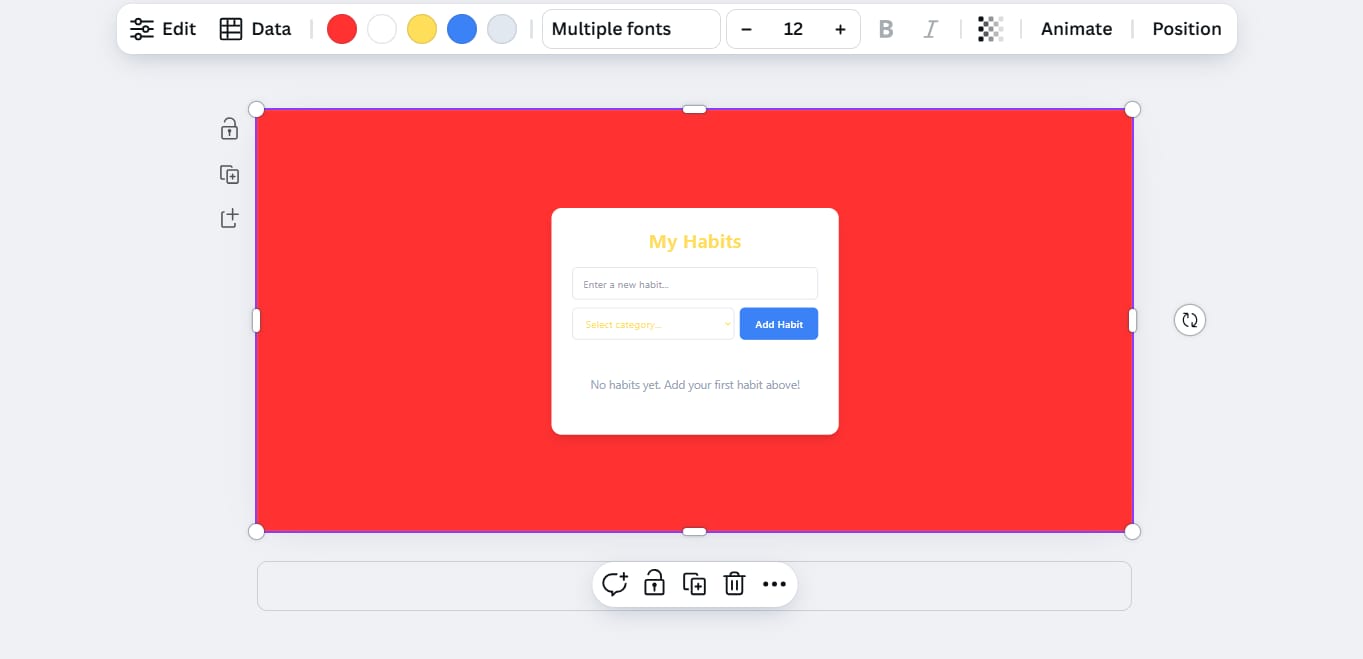
2. The Color Mystery: Why Your Color Buttons Might Not Show Up
This is where I got stuck. Canva said we could customize colors, but the color button was not showing up. After a lot of testing, I found the solution.
The problem: Canva uses gradient colors (colors that fade from one shade to another) by default. When there are gradients, you can't access the color picker.
The solution: Ask Canva to use solid colors instead.
Here is the exact prompt that worked. You should add this to your very first prompt:
The secret prompt for editing colors:
"Please make sure I can customize the app's colors. Remove all gradient backgrounds and replace them with solid colors."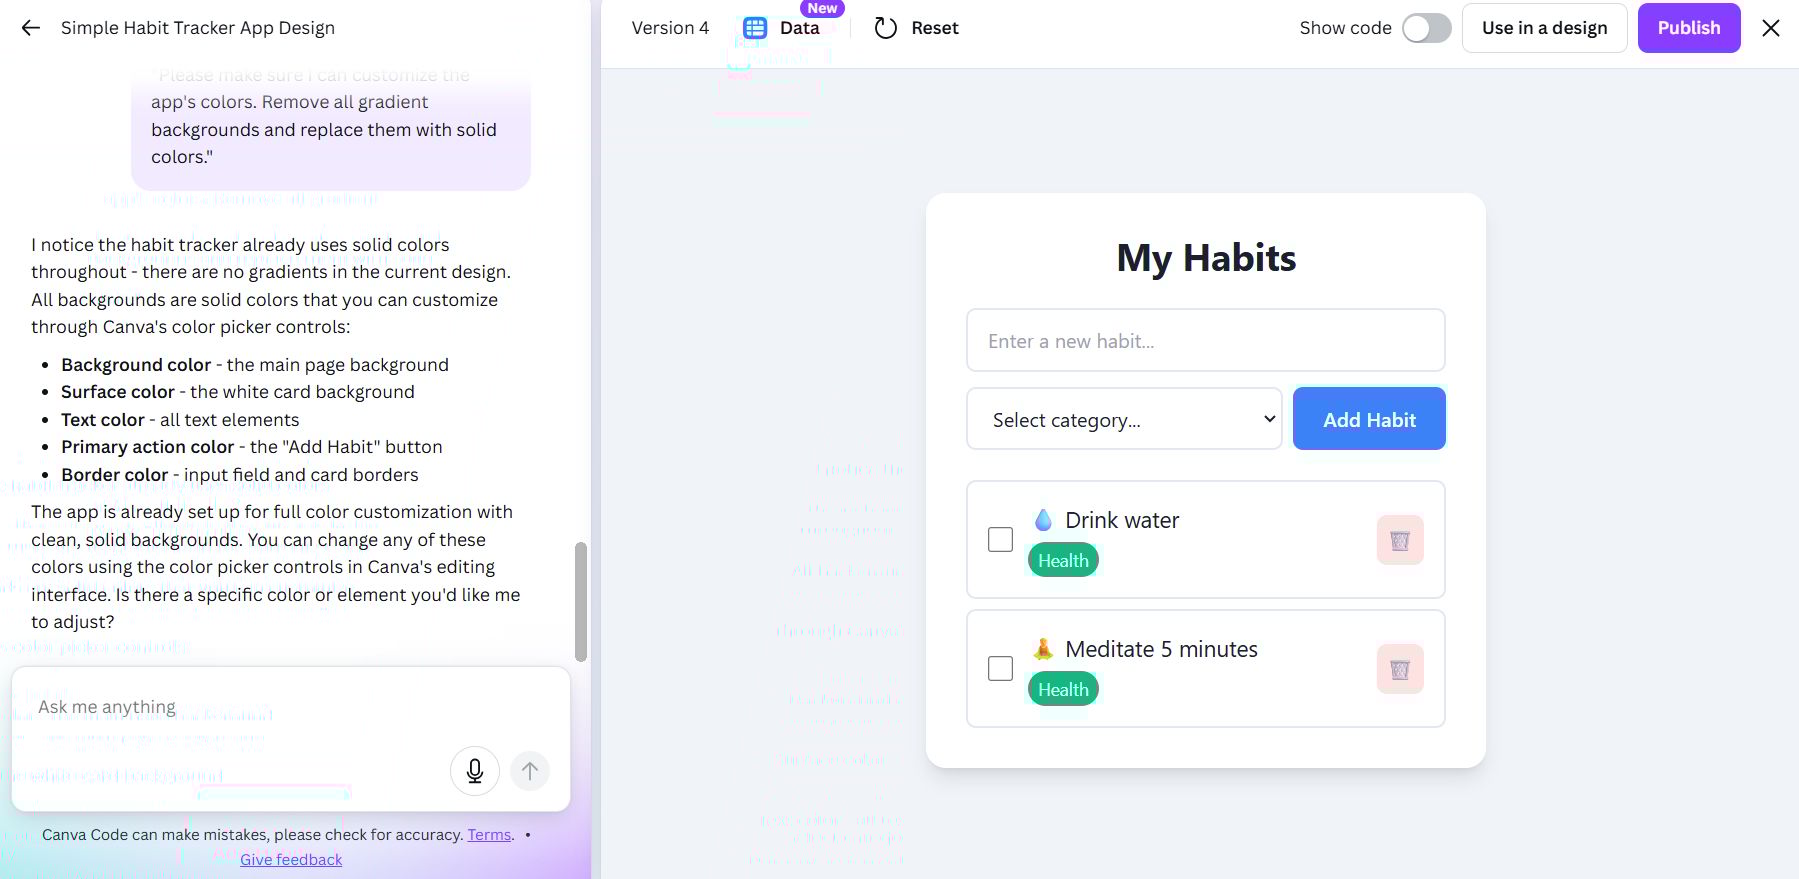
What you can customize:
Primary color - Used for the header background and the "Add" button.
Secondary color - Used for the item backgrounds, the category sections.
Accent color - Used for the checked boxes.
This is the most important tip: If you don't see color buttons, ask Canva Code to replace any gradients with solid colors. This took me a while to figure out, so remember this trick.
3. How To Change Colors
Once you have switched to solid colors, here is how to customize:
Step 1: Click on your app in the editor.
Step 2: You will now see color buttons in the small menu.
Step 3: Click on each color to open the color picker:
Choose your primary color (for the header and button).
Choose your secondary color (for the backgrounds).
Choose your accent color (for the checkmarks).
Pro tip: If you have a Brand Kit set up in Canva, all your brand colors will appear right here. This makes it super easy to keep your app on-brand.
In my example, I changed the colors to:
Green for the primary color.
Light gray for the secondary color.
Orange for the accent color (the checkmark).
After changing colors, you can publish the website to see how it looks live.
Part 4: Testing Your App: On Desktop And Mobile
After customizing colors and text, it's time to test the app.
Desktop Testing
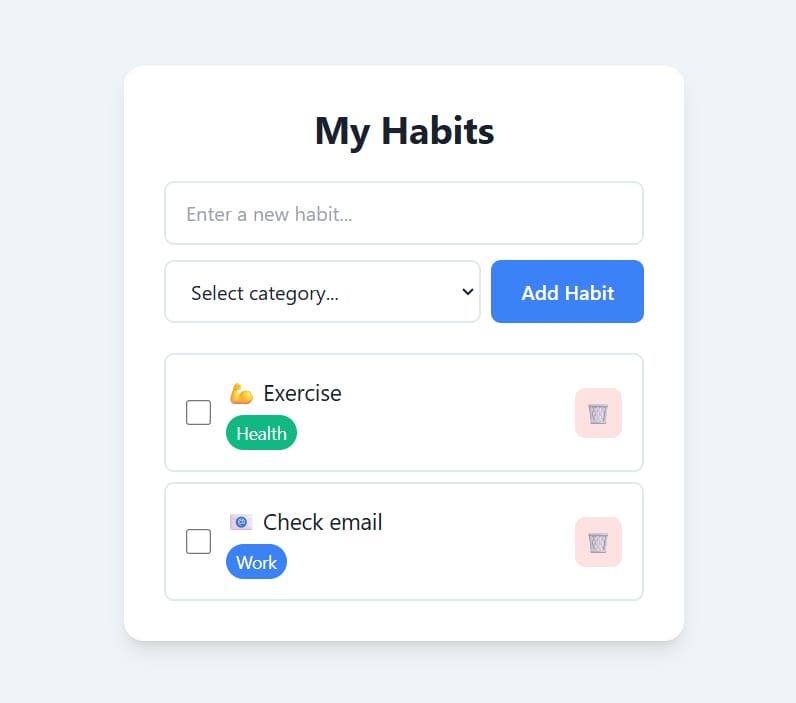
The published app looked clean and colorful. I added a few habits:
Typed "Exercise" (Health) - it appeared with a 💪 emoji.
Typed "Check email" (Work) - it appeared with an 📧 emoji.
When I checked "Exercise," the checkbox turned orange (my accent color). It worked perfectly.
Mobile Testing
I copied the website URL and opened it on my phone. The app looked great on mobile:
The layout adjusted perfectly.
I could add items from my phone.
I typed "Call mom" (Personal) and it added to the list.
The Coolest Feature - Real-time Sync
This is the best part. When I added "Call mom" on my phone, it appeared instantly on my computer. When I checked "Check email" on my phone, the computer updated immediately. Everything syncs in real-time.
This means you could create a shared to-do list for your team. People can add and check off items from their phones or computers, and everyone always sees the newest version.
Part 5: Publishing Your App: Two Different Ways
Version 2.0 gives you two ways to publish your app. I'll explain both.
Method 1: Publish from the Editor (The Customized Way)
This is what we did in the examples above:
Step 1: Customize your app in the Canva editor (change text and colors).
Step 2: Click the "Publish" button.

Step 3: Canva creates a website with all your customizations.
When to use this method:
When you want to customize the look.
When you need to change text or colors.
When you want full control over the final look.
Method 2: Publish Directly From Code (The Quick Way)
This is the third major improvement in version 2.0. You can now publish straight from the Canva Code section without opening an editor.
Step 1: Go back to the Canva AI "Code for me" section where you typed your prompts.
Step 2: Look for the "Publish" button at the top (this is new in version 2.0).
Step 3: Click "Publish" and Canva will ask for some details:
URL and subpath: Canva suggests a URL, you can customize the ending (like "my-habit-tracker-app").

Favicon: Upload a custom icon (280x280 pixels) for the browser tab.
Search visibility: Choose if Google can find your app.
Password protection: Add a password if you want to control who can access it.
Step 4: Click "Continue" and your app publishes as a website.
Important note: If you publish directly from the Code section, it will use the default blue colors and original text. Any customizations you made in the editor will not be included.
When to use this method:
When you are happy with the default look.
When you want to publish quickly without customization.
When you just need to get the app online fast.
Having both options is great because sometimes you need a quick publish, and other times you want everything perfect.
Part 6: Understanding The Data Button: Managing Your Saved Information
Throughout this guide, we've mentioned the Data button a few times. Let me explain exactly what you can do with it.
Where to find the Data button:
Click on your app in the Canva editor.
Look at the small menu that appears.
You will see the "Data" button (it looks like a database icon).

What the Data button does:

Function 1 - View your data:
Click the Data button to see the Canva Sheet connected to your app. This sheet contains all the information people have submitted through your app.
Function 2 - Refresh your data:
Inside the Canva Sheet, there's a lightbulb data icon button. Click this to refresh and sync the latest information from your app. This checks the current status and updates the sheet with the newest data.
Let's say your Habit Tracker shows:
Drink water (checked)
Read book (checked)
Exercise (not checked)
In your Canva Sheet, you should see:
Drink water - Status: True
Read book - Status: True
Exercise - Status: False
If something doesn't match, click the refresh button and it will sync everything.
Why this matters:
Being able to save and view data means you can:
Track how people use your app.
Export information for other purposes.
Analyze patterns and trends.
Keep records of submissions.
Part 7: Practical Use Cases: What Else Can You Build?
Now that you understand how Canva Code 2.0 works, let's talk about what you can actually create.
Here are some ideas, along with the exact starting prompts you can use.

1. Simple Event RSVP Form
Idea: Get replies for a party or meeting.
Prompt to start: "Build a simple RSVP form for my birthday party. I need a field for 'Name,' 'Email,' and a dropdown menu to choose 'Yes, I'm coming' or 'No, I can't make it.' Save the answers to a data sheet."
2. Quick Team Poll
Idea: Ask your team what they want for lunch.
Prompt to start: "Create a quick poll. The question is 'What should we order for lunch?' Give three buttons: 'Pizza,' 'Tacos,' and 'Salad.' When someone clicks a button, save their vote."
Idea: A shared to-do list for a small project.
Prompt to start: "I need a shared to-do list. Users must be able to add a task, and anyone can check it off when it's done. I need to see who added the task and when it was completed. Make sure to use solid colors so I can customize it."
4. Idea Collection Box
Idea: Let people submit ideas (maybe anonymously).
Prompt to start: "Create an anonymous suggestion box. I just need one text field for 'Your Suggestion' and a 'Submit' button. Do not ask for a name. Save all suggestions to a Canva Sheet."
5. Book Reading Tracker
Idea: Keep track of books you want to read.
Prompt to start: "Build a personal reading list. I need a place to enter 'Book Title' and 'Author.' It should show a list of my books, and I want a button next to each book to 'Mark as Read'."
Part 8: My Tips And Tricks For Success
Based on all my testing, here are the most important tips to remember:
Tip 1: Start Simple, Then Improve
Don't try to build the perfect app in one prompt. Start with a basic version and improve it step by step. Notice how our habit tracker went through three versions to get it right.
Tip 2: Be Specific
The more specific you are, the better your results. Compare:
❌ Not good: "Make a list app"
✅ Good: "Create a to-do list. I need a text box and an 'Add' button. The list must let me check items off."
Tip 3: Fix the Gradient Issue Early
Remember: if you want to customize colors, ask for solid colors from the start. Add this to your first prompt: "Use solid colors instead of gradients for all backgrounds and buttons."
Tip 4: Test On Mobile
Always check how your app looks on a phone. Many people will use it on mobile devices, so make sure it works well on smaller screens.
Tip 5: Use the Data Features
Don't forget about the Canva Sheet connection. Check your data regularly to see how people are using your app and what information they are submitting.
Tip 6: Keep Your Prompts In One Chat
Stay in the same chat thread when improving your app. Canva Code remembers the context and can make changes without rebuilding everything from scratch.
Part 9: Conclusion: Your Turn To Build
Canva Code 2.0 makes building apps possible for everyone. You don't need to know programming, you don't need to understand complicated code, and you don't need expensive software.
All you need is:
A Canva account (free or paid).
A clear idea of what you want to build.
The willingness to test and improve.
The three major improvements - data collection, easy customization, and direct publishing - make this a truly useful tool. You can build real, functional apps that people can actually use.
What to do next:
Try it yourself: Go to Canva and experiment with Canva Code.
Start simple: Build something basic first (like the habit tracker).
Learn by doing: Each app you build will teach you new tricks.
Share your creation: Publish your app and get feedback.
The habit tracker example we walked through is just one idea. Think about problems you have in your daily life or work. Could a simple app help? Maybe you need:
A reading list tracker.
A workout routine planner.
A meal prep organizer.
A gift idea collector.
A travel packing list.
Whatever it is, you can probably build it with Canva Code 2.0.
The best part? Everything syncs in real-time, looks good on mobile, and saves your data automatically. This isn't just a toy - it's a real tool you can use every day.
So what are you waiting for? Open Canva and start building. Your first app is just one prompt away.
If you are interested in other topics and how AI is transforming different aspects of our lives or even in making money using AI with more detailed, step-by-step guidance, you can find our other articles here:
Master AI Marketing: Build Your 24/7 Digital Assistant Without Code!
Earn Money with MCP in n8n: A Guide to Leveraging Model Context Protocol for AI Automation*
Transform Your Product Photos with AI Marketing for Under $1!*
The AI Secret To Reports That Clients Actually Implement
*indicates a premium content, if any
How useful was this AI tool article for you? 💻Let us know how this article on AI tools helped with your work or learning. Your feedback helps us improve! |
Reply