- AI Fire
- Posts
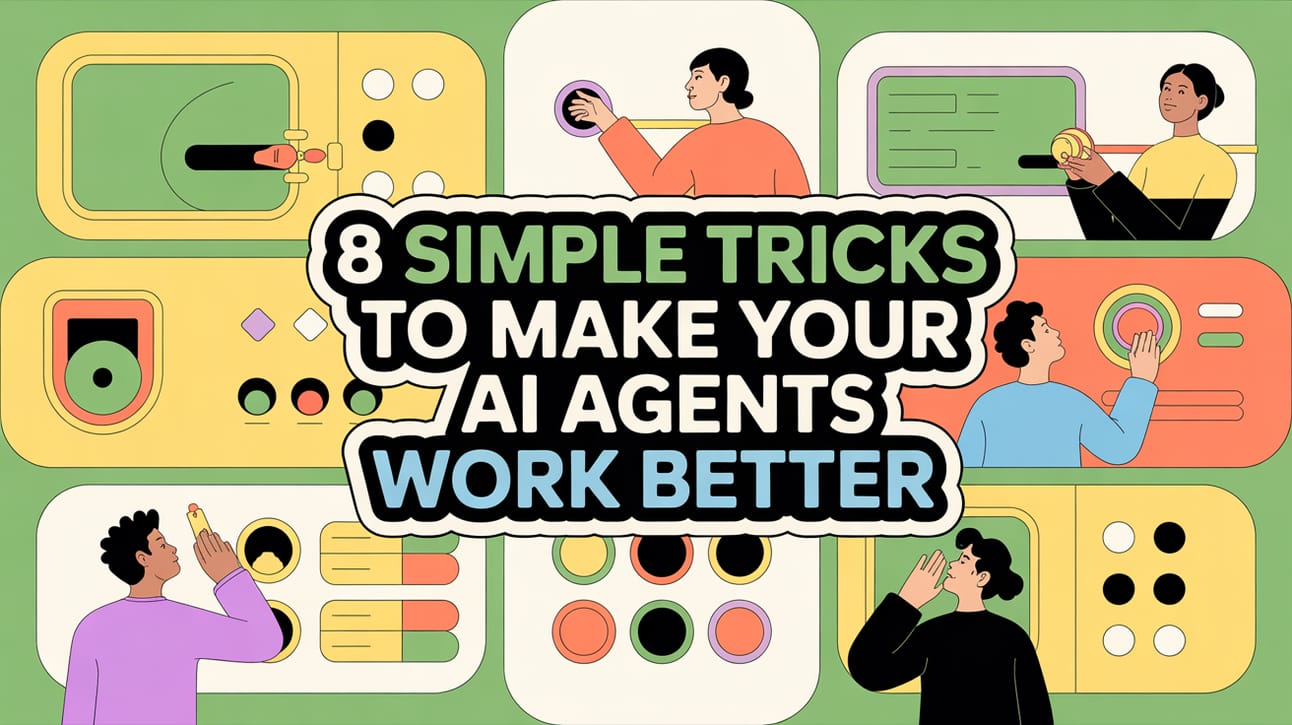
- 🛠️ 8 Simple Tricks To Make Your AI Agents Work Better
🛠️ 8 Simple Tricks To Make Your AI Agents Work Better
Get better answers from your AI agents. This guide shows 8 simple settings to stop repetition, control response length, and make them more creative
Neil Phan
July 21, 2025
What's your BIGGEST challenge with AI agents right now? |
Table of Contents
Introduction
Have you ever built an AI agent that just doesn't quite hit the mark? Sometimes the responses are off, it repeats itself, or it just doesn't follow instructions the way you intended. The solution often isn't a more complex prompt or a more expensive model; it's hidden in a series of powerful settings that most users overlook.
In this guide, we'll demystify 8 of these "hidden" settings that give you fine-grained control over your AI's behavior. These are simple adjustments, not complicated code, that can dramatically improve the performance and reliability of your AI agents.
Whether you're automating business processes, building content assistants, or creating intelligent chatbots, mastering these settings will allow you to tune your AI's performance to perfection. Let's dive in and unlock the true potential of your AI agents.
What Are These Advanced AI Settings?
When building with AI, most of the focus goes to the prompt and the choice of model (like GPT-4 or Claude 3). However, there's a powerful layer of control that operates behind the scenes: model parameters. These are the knobs and dials that influence how an AI model generates its response.
Think of them as the advanced settings on a professional camera. While "auto mode" (the default settings) works for most shots, a professional photographer adjusts aperture, ISO, and shutter speed to get the perfect picture. Similarly, these AI settings control everything from creativity and randomness to response length and topic focus.
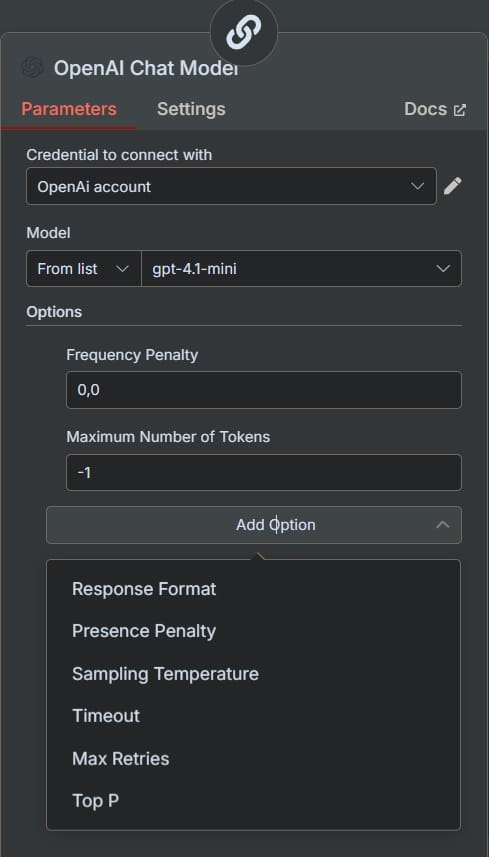
The best part is that these parameters are standardized across most major AI models and platforms, especially when using an API aggregator like OpenRouter within tools like n8n. This means the skills you learn here are transferable and will make you a more effective AI builder, regardless of the specific model you use.
Here's a quick overview of the settings we'll cover:
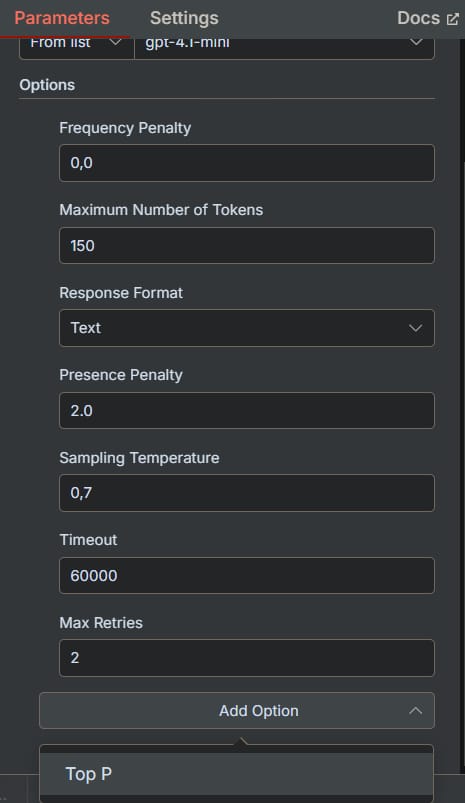
Setting | What It Controls | Best For |
|---|---|---|
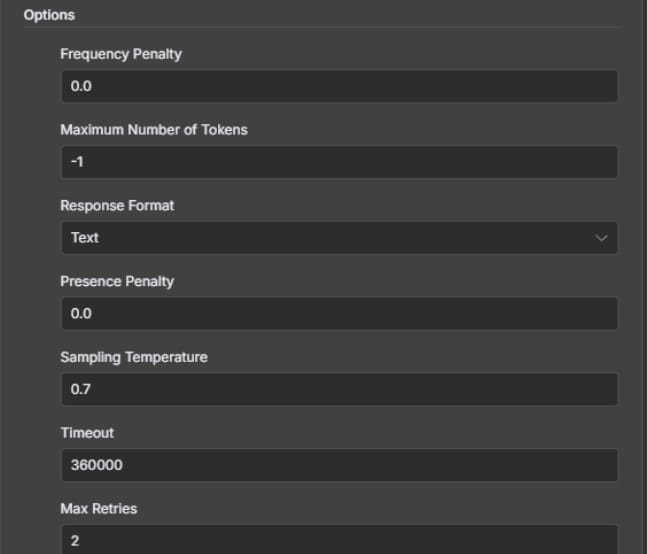
Frequency Penalty | Reduces word/phrase repetition. | Making responses more diverse and less robotic. |
Max Tokens | Sets the maximum response length. | Ensuring concise answers and controlling costs. |
Response Format | Forces output into Text or JSON. | Structuring data for use in applications. |
Presence Penalty | Encourages introducing new topics. | Brainstorming and creative idea generation. |
Temperature | Adjusts creativity vs. predictability. | The most critical setting for tuning AI personality. |
Timeout | Sets how long to wait for a response. | Balancing speed and reliability in real-time apps. |
Max Retries | Determines how many times to retry on failure. | Ensuring critical tasks complete successfully. |
Top P | An alternative method to control creativity. | Fine-tuning the vocabulary and "uniqueness" of words. |
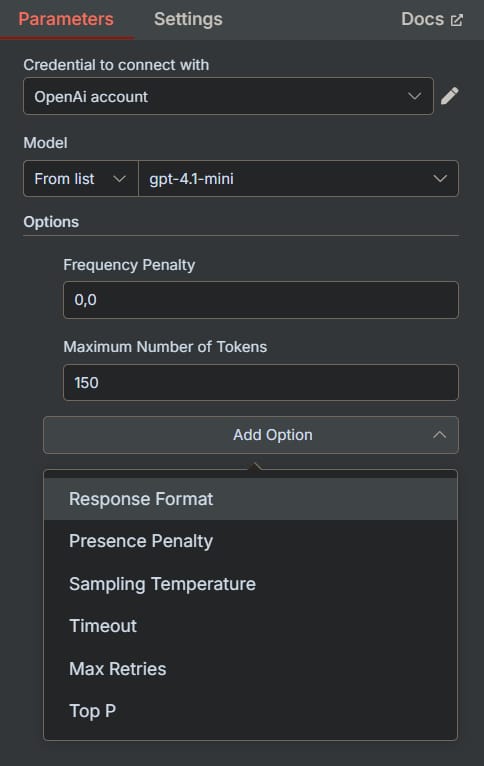
Setting #1: Frequency Penalty - Stop Sounding Like A Broken Record
What It Does

The Frequency Penalty parameter discourages the AI from repeating the same words and phrases within its response. It's the perfect tool for when your AI sounds unnatural or robotic due to repetition.
Learn How to Make AI Work For You!
Transform your AI skills with the AI Fire Academy Premium Plan – FREE for 14 days! Gain instant access to 500+ AI workflows, advanced tutorials, exclusive case studies, and unbeatable discounts. No risks, cancel anytime.
How It Works
The setting is a number, typically between -2.0 and 2.0.
0 (Default): No influence. The AI uses its natural repetition patterns.
Positive Values (e.g., 0.5 to 2.0): The AI is penalized for using a word it has already used, making it more likely to choose different words. Higher values mean a stronger penalty.
Negative Values (e.g., -0.5 to -2.0): The AI is encouraged to repeat words, which can be useful for reinforcing key terms.
When to Use It
Increase the Penalty (+0.5 to +1.5) when:
You are generating marketing copy or blog posts and need varied, engaging language.
Your chatbot's responses feel canned and repetitive.
You want to promote linguistic diversity in the output.
Decrease the Penalty (-0.5 to -1.5) when:
You are creating educational materials where repeating key terms is important for learning.
You are generating technical documentation that requires consistent terminology.
You need the AI to stick to specific brand messaging or legal phrases.
Setting #2: Max Tokens - Control Your Response Length
What It Does
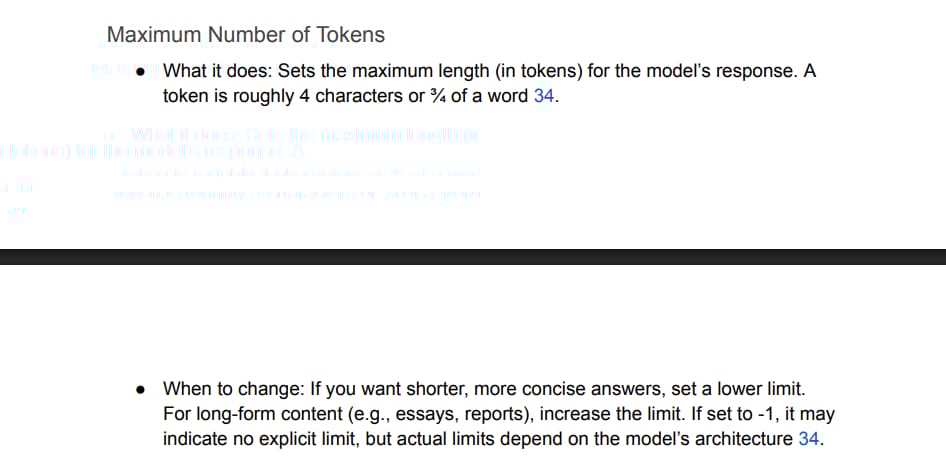
This setting defines a hard limit on the length of the AI's response. A "token" is a piece of a word, where roughly 100 tokens equal 75 words. This is one of the most practical settings for controlling both output and cost.
How It Works
-1 or Unset (Default): The AI will generate a response up to the model's maximum context limit, which can be thousands of tokens.
A Positive Number (e.g., 150): The AI will stop generating text once it reaches this number of tokens.
When to Use It
Set a specific limit when:
You need concise outputs, like a headline, a tweet, or a product description.
You are sending AI-generated texts via SMS or other platforms with character limits.
You want to strictly manage your API costs, as you are charged per token.
The output needs to fit neatly into a specific UI element in your application.
Leave it unlimited when:
You are generating long-form content like articles, reports, or detailed analyses.
You need the most comprehensive answer possible to a complex question.
Practical Tips
For Headlines/Tweets: Set to 25-50 tokens.
For Email Summaries: Set to 150-250 tokens.
For Blog Paragraphs: Set to 300-500 tokens.
For Detailed Articles: Leave at -1 or set to 2000+.
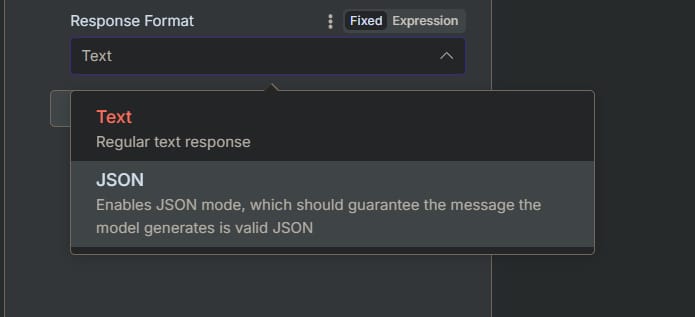
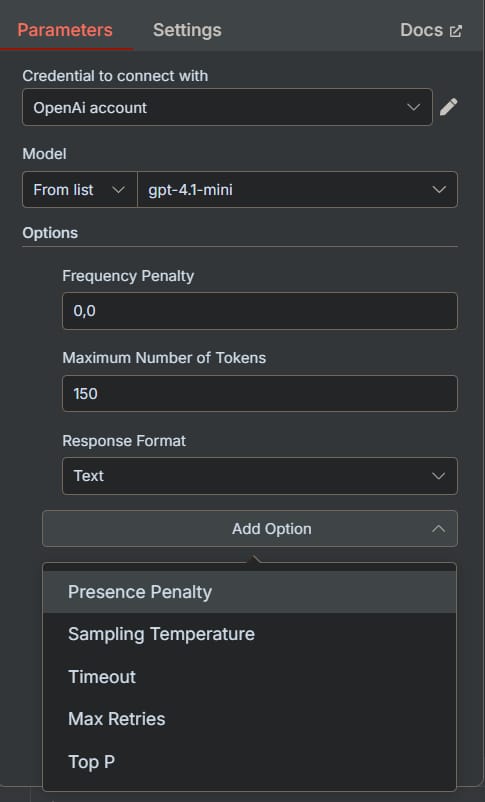
Setting #3: Response Format - Get Structured Data Every Time
What It Does
This powerful setting forces the AI to output its response in a specific format, most commonly JSON (JavaScript Object Notation) instead of plain text. This is essential for building reliable automations.
How It Works
Text (Default): The AI provides a standard, conversational text response.
JSON: The AI is constrained to generate a valid JSON object. You must describe the desired JSON structure in your prompt.
When to Use JSON Format
Choose JSON when:
You need to pass the AI's output to another application or API.
You are tired of parsing messy text and want perfectly structured data.
You need to extract specific pieces of information, like names, dates, or sentiment scores.
Reliability is critical, and you want to prevent formatting errors from breaking your workflow.
Real Example
Suppose you're building a tool to analyze customer feedback. You can instruct the AI to respond in JSON format. Prompt: "Analyze the following review and provide the sentiment, a list of key issues, and a suggested follow-up action. Respond in JSON format with the keys 'sentiment', 'key_issues', and 'action_item'." Guaranteed Output:
{
  "sentiment": "Negative",
  "key_issues": ["Late Delivery", "Damaged Packaging"],
  "action_item": "Issue a partial refund and offer a discount on the next order."
}
Setting #4: Presence Penalty - Encourage New And Diverse Ideas
What It Does
Similar to Frequency Penalty, but instead of penalizing repeated words, Presence Penalty penalizes repeated topics. It encourages the AI to introduce new concepts and avoid getting stuck on a single idea.
How It Works
It uses the same -2.0 to 2.0 scale.
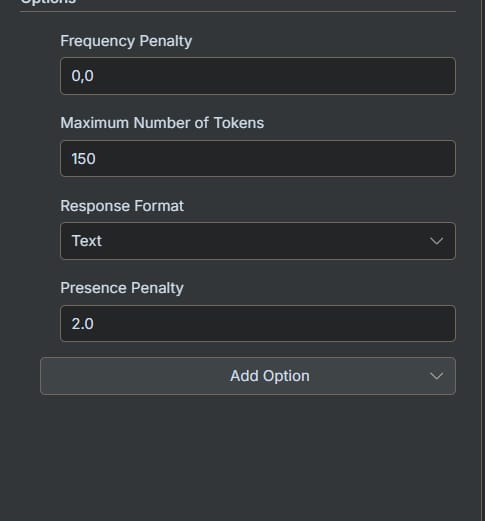
0 (Default): No influence on topic selection.
Positive Values (e.g., 0.5 to 2.0): The AI is encouraged to discuss new topics that haven't been mentioned yet.
Negative Values (e.g., -0.5 to -2.0): The AI is encouraged to stay highly focused on the topics already introduced.
When to Use It
Increase the Penalty (+0.5 to +1.5) when:
You are brainstorming and want a wide range of creative ideas.
You're creating a travel itinerary and want diverse suggestions (e.g., historical sites, restaurants, outdoor activities).
Your AI agent seems to get "stuck" in a conversational loop.
Decrease the Penalty (-0.5 to -1.5) when:
You are building a specialized expert agent (e.g., a legal or medical assistant) that must stay laser-focused on a specific topic.
You are asking for a deep dive into a single subject and want to prevent tangents.
Real Example
If you ask an AI to brainstorm marketing angles for a new app, a high Presence Penalty (+1.0) would ensure it suggests ideas across different channels (social media, content marketing, influencer outreach, PR) instead of just giving ten variations of Facebook ads.
Setting #5: Temperature - The Creativity Dial
What It Does

Temperature is arguably the most important setting for controlling the "personality" of your AI. It adjusts the randomness and creativity of the response.
How It Works
The scale typically runs from 0 to 1 (or sometimes 2).
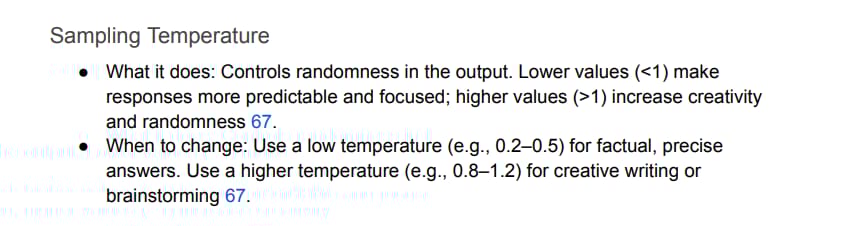
Low Temperature (e.g., 0.1 to 0.3): More predictable, deterministic, and focused. The AI chooses the most logical and common words. Think of a precise technical writer.
Medium Temperature (e.g., 0.4 to 0.7): A good balance between consistency and creativity. Great for most general-purpose tasks.
High Temperature (e.g., 0.8 to 1.0): More creative, surprising, and even risky. The AI is more willing to choose less common words, leading to more unique outputs. Think of a brainstorming artist.
When To Use Different Settings
Low Temp (0.1 - 0.3): For tasks where accuracy and consistency are key: summarizing legal documents, extracting data, classification tasks, writing code.
Medium Temp (0.4 - 0.7): For general business communication: writing emails, creating drafts of reports, acting as a general-purpose chatbot.
High Temp (0.8 - 1.0): For creative endeavors: brainstorming marketing slogans, writing stories, generating script ideas, creating artistic content.
Pro Tip
If your responses are too boring, turn the temperature up. If they are too random or nonsensical, turn it down. Start at the default (often around 0.7) and adjust from there.
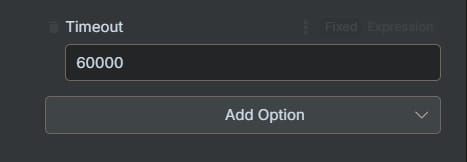
Setting #6: Timeout - Don't Wait Forever For An Answer
What It Does
The Timeout setting determines how long your system will wait for a response from the AI model before giving up and throwing an error. It's measured in milliseconds (ms).
How It Works
Default (e.g., 360,000ms): A long default, often 6 minutes, to accommodate very complex requests.
Custom Value (e.g., 30,000ms): Set a specific duration. For example, 30,000ms is 30 seconds.
When to Adjust It
Set a lower timeout (e.g., 20,000 - 60,000ms) when:
You are building a real-time chatbot where users expect a fast reply.
The AI's response is part of a user-facing application where a long wait would create a poor user experience.
Set a higher timeout (e.g., 600,000ms+) when:
You are running a background process to generate a very long report or analyze a large document.
The task is complex, and you'd rather wait longer for a successful result than get a timeout error.
Practical Recommendations
Live Chatbots: 15-30 seconds (15,000 - 30,000ms)
Content Generation: 3-5 minutes (180,000 - 300,000ms)
Complex Data Analysis: 10+ minutes (600,000ms+)
Setting #7: Max Retries - How Persistent Should Your Agent Be?
What It Does
This setting controls how many times your workflow will automatically try the request again if it fails (e.g., due to a temporary network issue or a model overload).
How It Works
Default (e.g., 2): If the first attempt fails, it will try two more times.
0: Give up immediately on the first failure.
Higher Number (e.g., 5): Keep trying more times before failing the entire workflow.
When to Adjust It
Set it lower (0-1) when:
You are in a development or testing phase and want to see errors immediately.
A fast failure is preferable to a long wait.
Set it higher (3-5) when:
The AI task is a critical part of your workflow (e.g., processing a customer order).
You are dealing with APIs that can be intermittently flaky.
Important Warning
Be cautious with high retry counts. If the API call costs money, a setting of 5 retries could result in you being charged up to 6 times (the initial attempt + 5 retries) for a single, problematic request.
Setting #8: Top P - An Alternative To Temperature
What It Does
Top P (also known as nucleus sampling) is another method for controlling randomness. Instead of considering all possible words, it tells the AI to only consider the most probable set of words that add up to a certain probability (P).
How It Works
1.0 (Default): Considers all words in the vocabulary.
0.5: Considers only the smallest group of most likely words whose combined probability is 50%.
0.1: Considers only the top 10% most probable words, leading to very safe and predictable text.
Temperature vs. Top P
Most experts recommend using either Temperature or Top P, but not both at the same time, as they can have conflicting effects.
Use Temperature for general control over the "feel" of creativity. It's more intuitive.
Use Top P for more direct control over the "uniqueness" of the vocabulary. It can prevent the AI from picking very strange or "out of left field" words, even at high-creativity settings.
Your 4-Step Optimization Workflow
Step 1: Define The Problem

First, identify what's wrong. Is your AI too repetitive? Too random? Too slow? Be specific.
Too repetitive? -> Adjust Frequency Penalty.
Too boring? -> Increase Temperature.
Too chaotic? -> Decrease Temperature.
Responses too long/short? -> Set Max Tokens.
Needs structured data? -> Use Response Format: JSON.
Step 2: Change One Setting At A Time
Resist the urge to change everything at once. Make a small adjustment to a single setting and test the result. This is the only way to know what actually worked.
Step 3: Test With Realistic Scenarios
Test your changes using the same kind of prompts you expect to use in the final application. Don't just test with "tell me a joke." Use real customer emails, real data, and real-world tasks.
Step 4: Document And Create Profiles
Keep a record of what works. You might find you have a "Creative Profile" (High Temp, High Presence Penalty) and a "Professional Profile" (Low Temp, Low Presence Penalty) that you can reuse for different agents.
Conclusion
Remember, the journey to optimization is iterative. Start with the most impactful settings - Temperature and Max Tokens - as they solve the most common issues. From there, layer in adjustments to other parameters like Frequency Penalty to refine the output further. By making small, deliberate changes and testing thoroughly, you can build AI agents that are not just powerful, but also reliable, efficient, and perfectly suited to their task.
The future of automation isn't just about accessing powerful AI models; it's about skillfully directing them. With these settings in your toolkit, you are now equipped to build the next generation of intelligent, effective AI agents.
If you are interested in other topics and how AI is transforming different aspects of our lives, or even in making money using AI with more detailed, step-by-step guidance, you can find our other articles here:
*indicates a premium content, if any
How would you rate the quality of this AI Workflows article? 📝 |
Reply