- AI Fire
- Posts
- 🤯 I Copied A $800k/Month App's Design... With AI!
🤯 I Copied A $800k/Month App's Design... With AI!
My step-by-step tutorial on using the AI tool Rork to reverse-engineer and rebuild a professional wellness app from scratch
Max Anh
July 20, 2025
📱 What's Stopping You From Building Your Dream App?Most people have a great app idea but never build it. What's the single biggest hurdle that has held you back? |
Table of Contents
I Used AI to Copy an iPhone App Making $800K in 12 Months (Complete Tutorial)
The app design landscape has been completely and irrevocably transformed. The old rules no longer apply. The idea that you need years of coding experience, an expensive team of developers, and a hefty amount of startup capital to build a real, functional application is a myth now.
Today, I'm going to show you exactly how I reverse-engineered and recreated the core functionality of VibeMood, a popular wellness app that is reportedly generating an astonishing $800,000 a month, and I did it using nothing but AI prompts and powerful no-code tools, completing the entire app design and build process in a fraction of the traditional time.
The Reality Check: Building Apps in 2025
Now, before we start the technical process, let’s take a moment for brutal honesty. While I am about to demonstrate how incredibly accessible app design and development have become, this is not a get-rich-quick scheme. Building a successful app does not guarantee money. The truth is, most apps don't generate significant revenue immediately, and many of them never become profitable at all. This tutorial is designed to show you what is now technically possible, not to promise you instant wealth.

However, the barrier to entry has fundamentally changed. What was once a mountain is now a molehill. You can now:
Build complex, multi-featured apps without writing a single line of code.
Get a functional prototype of your idea running on your own phone in a matter of minutes.
Create sophisticated features, from data visualization to user authentication, with simple, plain-English text prompts.
Test and iterate on your app design ideas at a speed that was previously unimaginable.
The Tool That Changes Everything: Rork
The secret weapon that is making this incredible transformation possible is a platform called Rork. It is an AI-powered app development platform that translates your natural language descriptions into fully functional, professional-grade mobile applications. Unlike traditional no-code tools that require you to learn complex visual interfaces and drag-and-drop editors, Rork simply builds what you describe.
Its key advantages are what make it a true game-changer:
Zero Coding Required: You can describe complex features in plain English, just as you would to a human developer.
Instant Mobile Testing: Rork generates a simple QR code that you can scan to test a live, working version of your app design on a real device immediately.
Automatic Backend Integration: It can connect to powerful backend services like Supabase to handle user accounts and data storage, without you needing to do any complex setup.
Self-Healing Capabilities: The AI is smart enough to catch and often fix its own issues during the building process.
Analyzing the $800K Success: The VibeMood Framework
Before we build our own version, I spent time analyzing what makes the VibeMood app so successful and sticky for its users. I broke its core value down into seven key components:
Mood Tracking: A simple, frictionless way for users to log their emotions, with visual feedback through charts and analytics.
Educational Content: Bite-sized, psychology-based micro-lessons that help users understand the "why" behind their feelings.
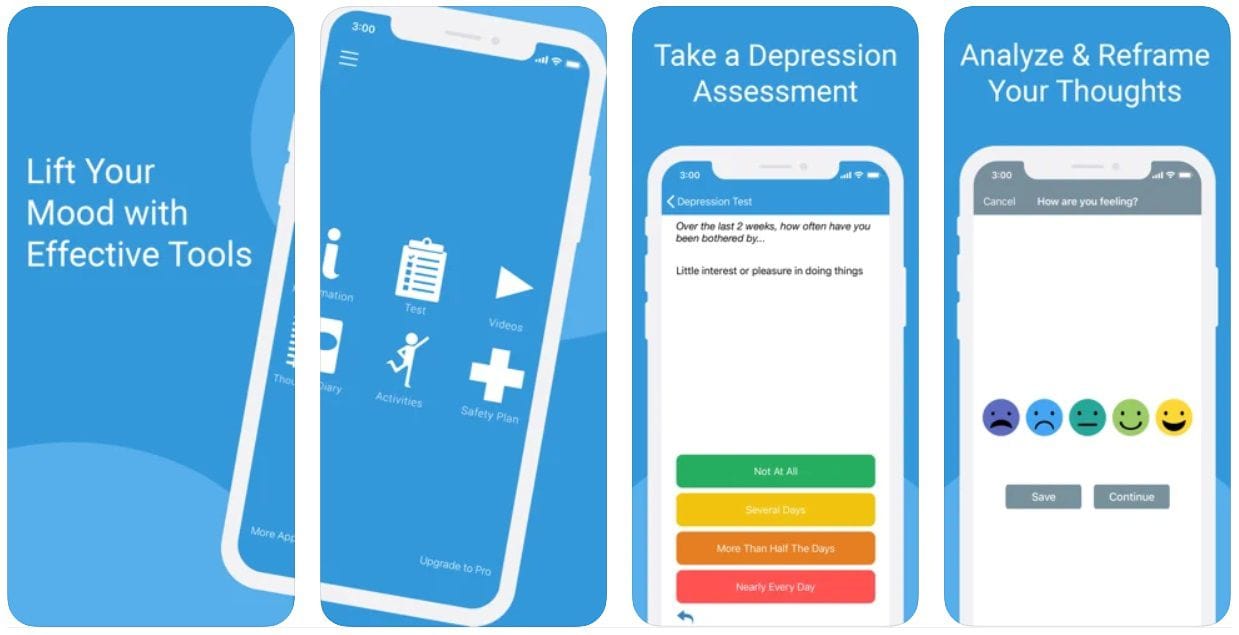
Wellness Assessments: Quick, engaging quizzes that provide users with a snapshot of their current self-evaluation.
Reframing Tools: Practical, cognitive techniques that help users actively manage their mental health.
Ambient Audio: A library of background sounds to help with focus, relaxation, and sleep.
Goal Setting: A structured system for creating personalized action plans.
Progress Tracking: The ability to see trends and improvements over time, which is crucial for user retention.
Now, let's build our own version of this successful app design framework, step by step, using only AI.
Learn How to Make AI Work For You!
Transform your AI skills with the AI Fire Academy Premium Plan - FREE for 14 days! Gain instant access to 500+ AI workflows, advanced tutorials, exclusive case studies and unbeatable discounts. No risks, cancel anytime.
Step 1: Building the Core – The Mood Tracker
The foundation of any wellness app is the ability for a user to track their emotions. This needs to be a fast, simple, and visually rewarding experience. Here is the exact prompt I used to build this core feature:
Create a mood tracker that lets users select from a list of common emotions (e.g., happy, sad, anxious) or type in their own custom feeling. Show a visually appealing history of emotional states over time using a line or bubble chart. Each mood entry should be stored by day in a Supabase database. Users can view and review their mood patterns over any period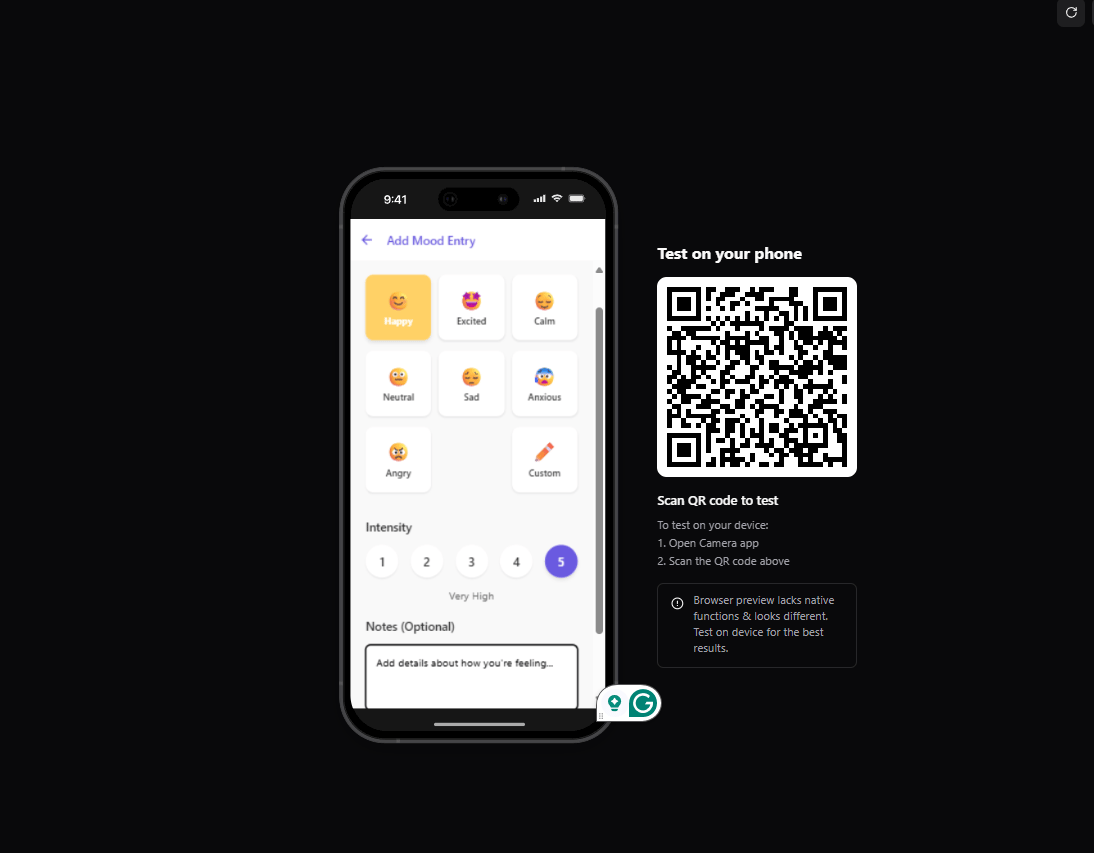
What Rork Generated: In a matter of minutes, the AI didn’t just create a single screen; it built a complete, functional system.
A dynamic mood selection interface with beautifully designed buttons for pre-set emotions (like happy, anxious, motivated).
A custom text input field that allows users to type in more specific, personalized entries.
An interactive, color-coded chart that automatically populates with the user's data, showing their emotional trends over time.
The system automatically handled the timestamping of each entry and the association of that entry with the correct user profile.
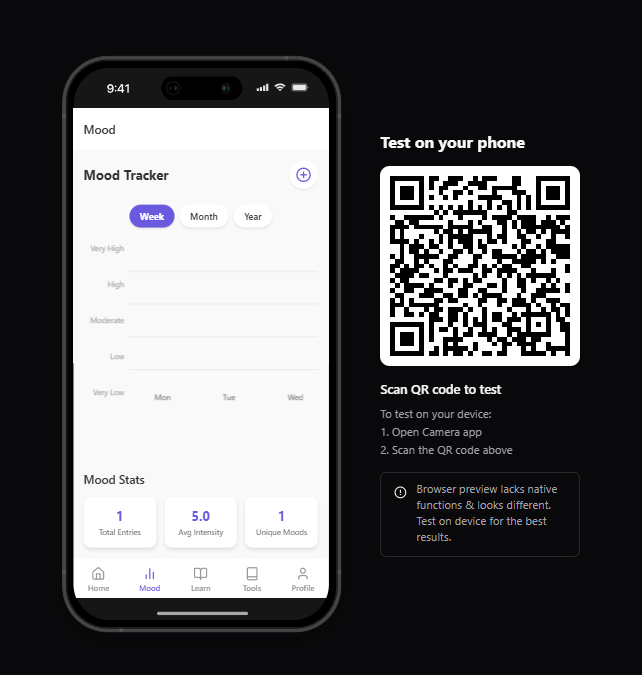
The result was a fully functional mood tracking system that would have typically required weeks of front-end and back-end development, created with a single prompt.
Step 2: Adding Value – Psychology-Based Educational Content
A good app design doesn’t just let users track data; it helps them understand it. The next step was to create an educational component that would provide context for their emotions.
Add a section with psychology-based educational cards. Each course module should have:
- A clear title
- A short, friendly explanation
- A “Read More” button that expands to show detailed content
Use engaging illustrations or emojis to make each card approachable and visually appealing. Users should be able to browse and expand cards at their own pace.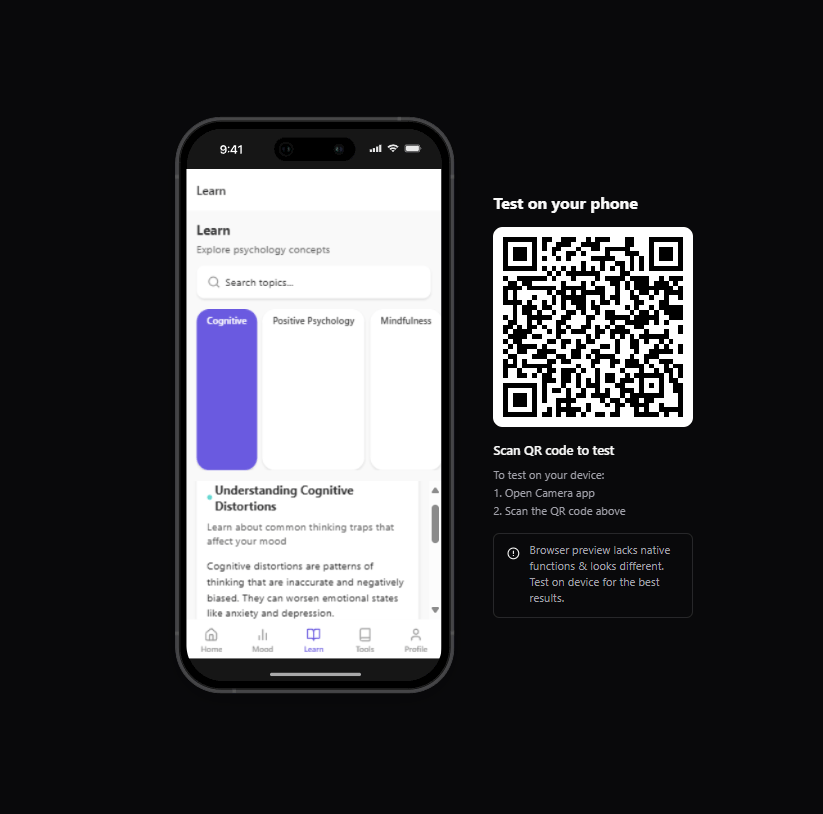
Generated Features:
A beautiful, scrollable, card-style interface displaying different psychological insights.
Expandable content sections covering complex topics like the fear response, the function of dopamine, and cognitive overload, all written in simple, easy-to-understand language.
A system for tracking which courses a user has started or completed.
The AI automatically integrated relevant emojis and illustrations to make the content more engaging.
Step 3: Creating Engagement – The Emotional Wellness Assessment
Quick, interactive self-evaluation tools are a fantastic way to provide immediate value to a new user.
Add a quiz page that starts by asking for the user’s gender and age. Show five questions designed to assess emotional well-being, using slider inputs or emoji scales for responses. At the end of the quiz, display a personalized summary with feedback and suggestions based on the user’s score range. Store all quiz results in Supabase linked to the user profile
System Output:
A multi-step quiz flow that first collects demographic data.
A five-question assessment with intuitive, easy-to-use slider interfaces.
Fun, emoji-based rating scales for the emotional responses.
An automatic scoring algorithm that categorizes the user's results into different levels (e.g., low, mild, or high stress).
The system generated a personalized summary page based on the user's total score.
The AI also automatically handled the data integration, ensuring that the quiz results were saved to the correct user's profile in the Supabase database.
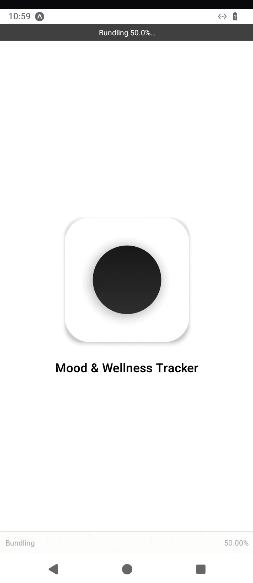
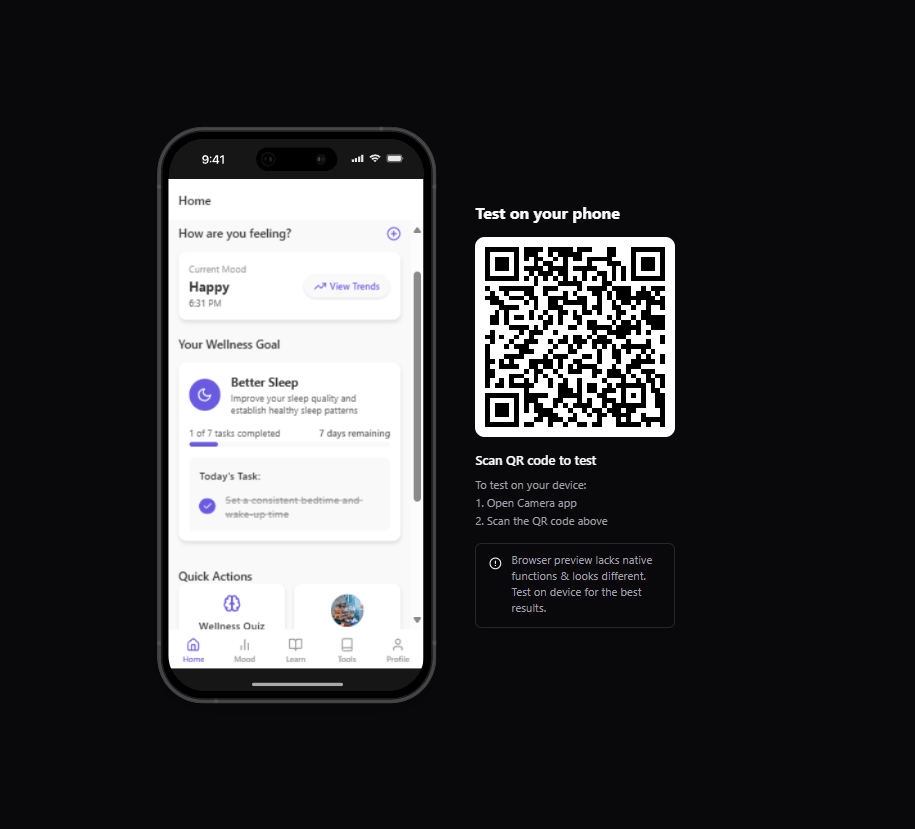
Step 4: Real-Device Testing (The Moment of Truth)
Before continuing with the development, it was crucial to test the app design on an actual mobile device.
The Testing Process:
Rork generates a simple QR code for instant device access.
I scanned the code with the free Expo Go app on iPhone/Android.
The app loaded instantly on the phone, just like a real, installed application.
I then tested all the features we had built so far in a real mobile environment.
User Experience Observations:
The interface was clean, intuitive, and had smooth, professional-looking transitions between screens.
The design was fully responsive and worked perfectly on my mobile device.
All the features felt seamlessly integrated into a single, cohesive application.

Step 5: Building Practical Tools – Cognitive Reframing
A great mental wellness app design needs to provide practical tools that can help users actively manage their thoughts and feelings.
Add a Tools section that features psychology-based cognitive reframing techniques. For each tool, include:
- A reflection question for the user
- Practical guidance on how to adjust negative or unhelpful thoughts
Let users mark each tool as “Used” or “Helpful” for future reference. Store the status of each tool in Supabase for each user.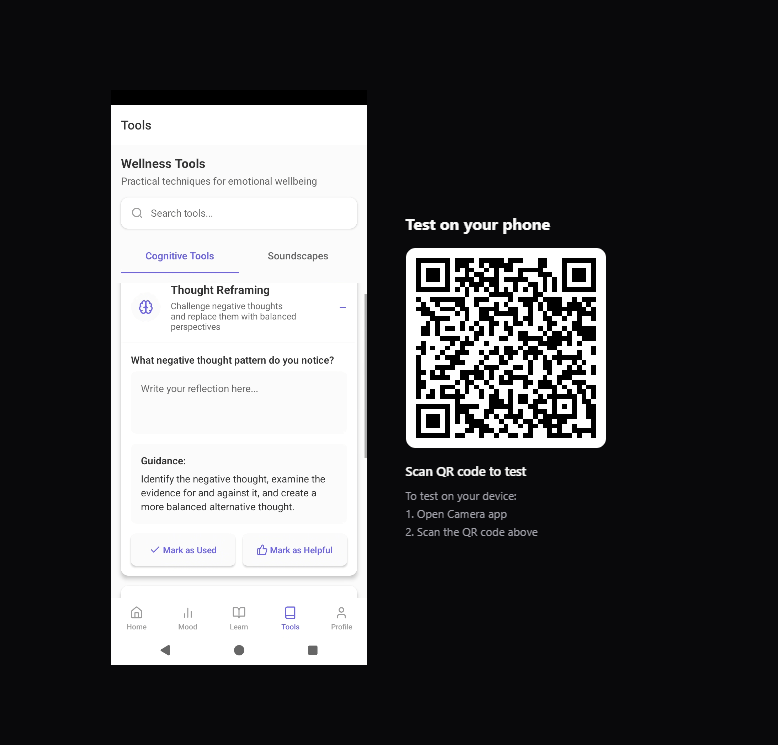
Generated Functionality:
A scrollable library of guided reflection tools.
Each tool was structured around a powerful question, like "Why did I feel overwhelmed today?" or "What’s a more empowering way to look at this situation?"
The guidance included practical strategies like journaling prompts and mindset shifts.
The system also included user interaction tracking, allowing users to rate which tools they found most effective, which gives helpful data to personalize their experience.
Step 6: Enhancing the Experience – Ambient Audio Integration
Background audio can be a powerful tool for enhancing a wellness experience. A thoughtful app design considers all senses.
Create a soundscape player for background audio tracks. Include options for “Focus,” “Calm,” and “Sleep.” Each track should have:
- Play and pause buttons
- A short, clear description
- Looping and volume control options
Allow users to play tracks in the background while using the app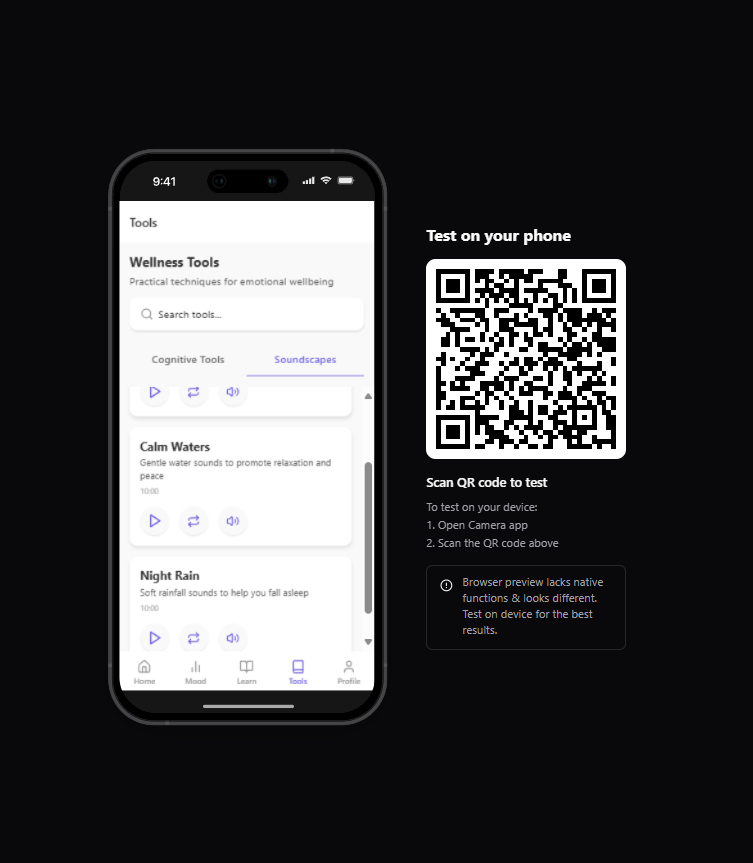
Generated Audio Features:
A beautifully designed audio player with three ambient tracks: "Deep Focus," "Calm Waters," and "Night Rain."
Complete playback controls, including play, pause, volume, and a looping function.
The ability for the audio to continue playing in the background even when the user locks their screen or switches to another app.
Step 7: Driving Action – Personalized Goal Setting
The final core feature is a system that helps users turn self-awareness into action. A good app design motivates users.
Create a personalized goal-setting flow where users choose one of three main goals (for example: “Better Sleep,” “Emotional Balance,” “Self-Confidence”). Based on the results of their wellness quiz, automatically generate a suggested 7-day action plan. Each plan should offer small, achievable daily tasks tailored to their chosen goal. Show progress over the week and allow users to check off completed tasks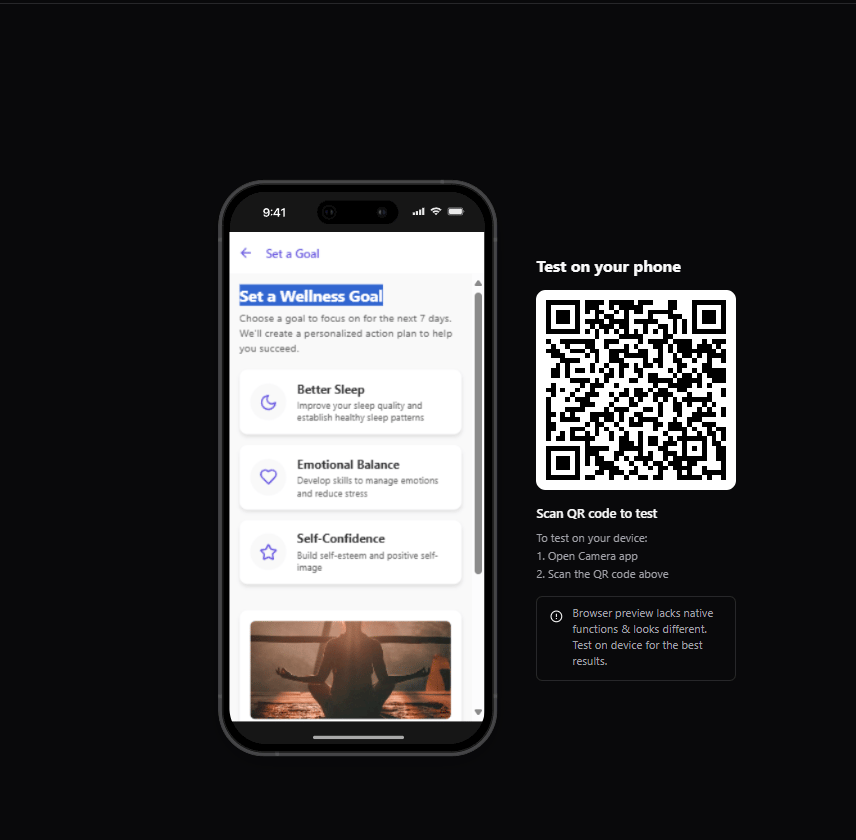
Generated Goal System Features:
A clear, three-option goal selection screen.
An AI-powered system that generates a unique, 7-day action plan with daily tasks tailored to the user's goals and assessment results.
The tasks were simple and actionable, like "Write down three things you're grateful for before bed."
A system that reveals only one new task per day to keep the user focused and prevent them from feeling overwhelmed.
Progress tracking with streak counters to build momentum and encourage consistency.
Step 8: Backend Integration with Supabase
An app without a backend is just a pretty calculator; it can't remember anything. To make our app design truly useful, all the user data—their moods, their quiz results, their goals—needs to be stored securely and scalably.
Connect the app to a Supabase backend to securely store:
- User profiles
- Quiz results
- Mood tracking entries
- Cognitive reframing tools marked as “Used” or “Helpful”
Include a secure authentication system with email and password sign-up and login. Ensure all user data is private and safely stored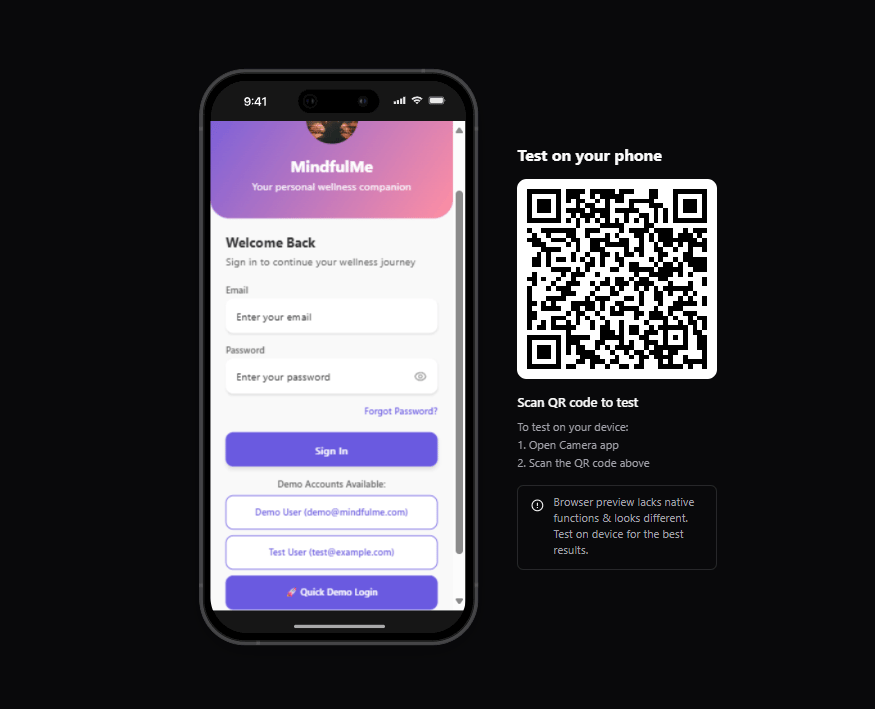
Backend Implementation: The AI agent took this prompt and automatically built and configured a complete backend system.
Secure User Authentication: It built a full signup and login system, ensuring that each user's data is private and secure.
Real-time Data Synchronization: It sets up the connection so that any data entered into the app is saved to the database in real-time.
Persistent User Sessions: It implemented a system to keep users logged in, so they don't have to enter their password every time they open the app.
Comprehensive Data Storage: It created the necessary database tables to store all the different types of data: moods, quiz results, user progress, and more.
Automatic API Key Management: It handled all the complex API key and security configurations behind the scenes.
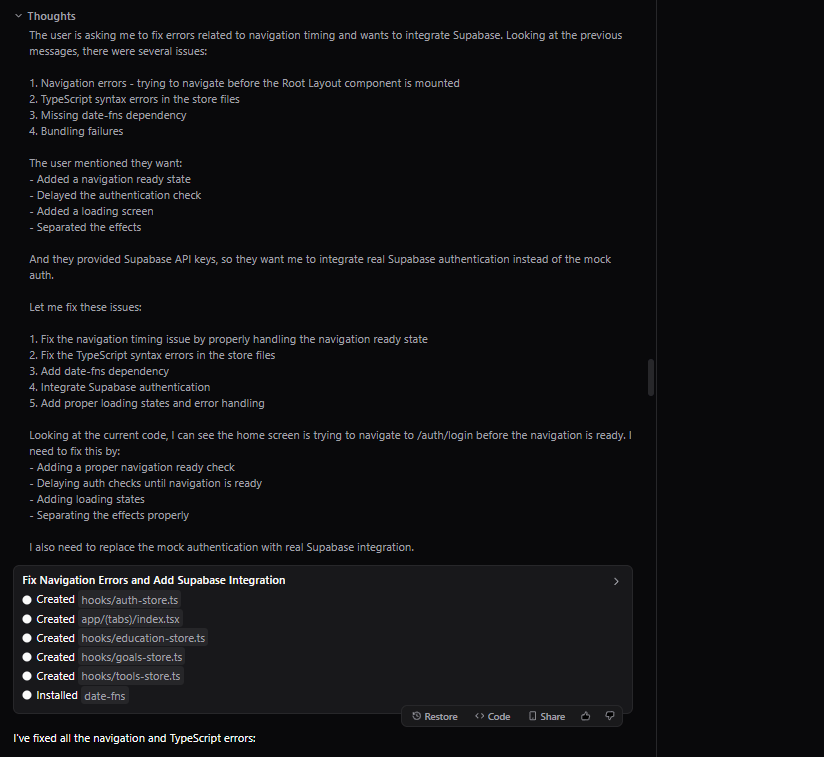
Step 9: Comprehensive App Testing
With all the features and the backend now fully integrated, it was time for a final, thorough end-to-end test of the entire application.
The Testing Checklist: I went through the app as a new user and tested every single feature to ensure it worked as expected.
✅ Mood tracking: I added custom entries and verified that they appeared correctly in the history chart.
✅ Educational content: I consumed the content and made sure the progress tracking worked.
✅ Quiz completion: I completed the quiz and confirmed that the results were accurate and saved to my profile.
✅ Reframing tools: I interacted with the tools and made sure my ratings were saved.
✅ Audio playback: I tested the background audio functionality.
✅ Goal setting: I set a goal and made sure the daily tasks were generated correctly.
✅ Data persistence: I closed and reopened the app to ensure all my data was still there, proving that the real-time synchronization with the backend was working.
Performance Results:
The animations and transitions between screens were smooth and fluid.
The interface was highly responsive on my mobile device.
The data storage and retrieval from the backend were fast and reliable.
All the different features felt seamlessly integrated into a single, professional user experience.
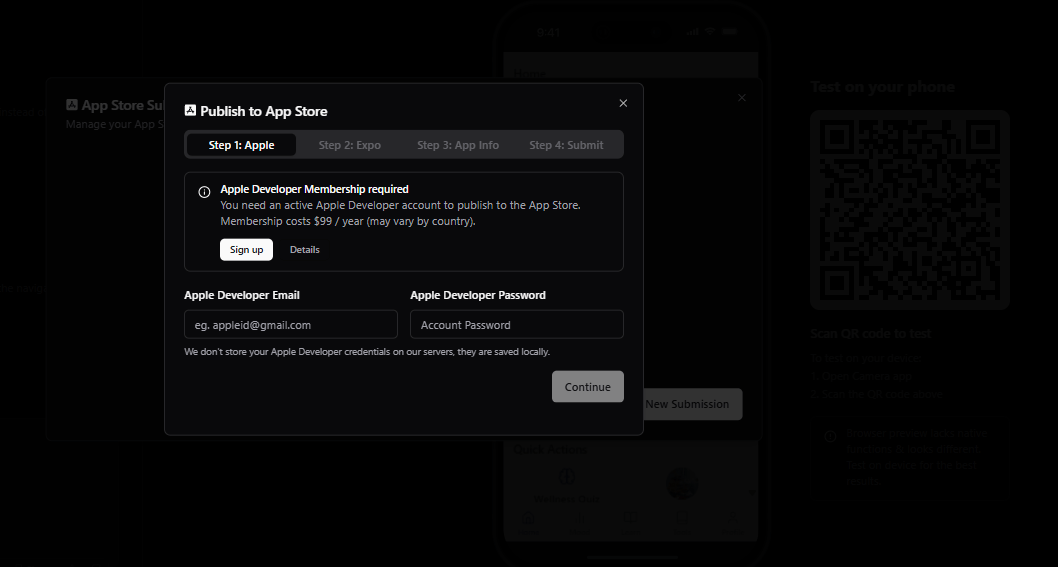
Step 10: The Final Polish – App Store/Google Play Publishing
A tool like Rork doesn't just stop at building a functional prototype; it provides a clear pathway to a production-ready application. The platform includes a built-in publishing workflow that demystifies the often-intimidating process of submitting an app to the App Store/Google Play.
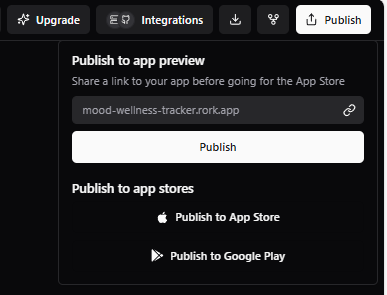
Publishing Features:
It provides a complete App Store/Google Play submission process walkthrough, guiding you through the necessary steps like preparing your app's metadata, screenshots, and privacy policy.
It allows for test data integration, so you can see a preview of how your app will look on its App Store page.
It enables friend sharing before official publication, allowing you to send a pre-release version of your app to a small group for final feedback without needing to go through a complex beta testing setup.
This entire prototype-to-production path is built in, meaning you don't need to use a host of other external tools to get your app ready for launch.
The Economics: The New Reality of App Development
Let's talk about the numbers, because this is where the true disruption lies. The economic model for building an application has been completely upended.
A Traditional App Development Approach:
Time: A 6-12 month development cycle is standard for an app of this complexity.
Cost: You could expect to pay between $50,000 and $200,000+ for a team of 3-5 developers, designers, and project managers.
Maintenance: Ongoing costs for bug fixes, updates, and maintenance would be significant.
The AI Development Approach:
Time: The total development time for this entire application was 2-3 hours.
Cost: The only direct cost is a $20-$50/month subscription to the AI tool.
Team: A single, non-technical person can build and maintain the application.
Maintenance: Iterations and updates are as simple as writing a new prompt, making the app incredibly easy to improve over time.

Creating quality AI content takes serious research time ☕️ Your coffee fund helps me read whitepapers, test new tools and interview experts so you get the real story. Skip the fluff - get insights that help you understand what's actually happening in AI. Support quality over quantity here!
From Build to Business – Strategy and Monetization
Building the app is now the easy part. The harder and more important part is turning it into a successful business. This requires a deep understanding of your users, a smart monetization strategy, and a clear-eyed view of the competitive landscape.
Key Success Factors for Wellness Apps
Based on analyzing the success of the original app and building our replica, several key principles emerged:
Simplicity First: Users in this space want quick, frictionless interactions. The mood tracking should take less than 10 seconds.
Visual Feedback: Charts and progress indicators are crucial. They provide a sense of accomplishment and make the user's progress tangible, which drives engagement.
Personalization: The app must feel like it's for them. Tailored content and personalized action plans based on the user's own data are what make the experience valuable.
Consistency and Habit Formation: Features like daily tasks and streak tracking are not just gimmicks; they are powerful tools for building the daily habits that lead to long-term user retention.
Ambient Experience: The inclusion of background audio enhances immersion and makes the app a calming space that users want to return to.
Educational Value: Psychology-backed content builds trust and positions the app as a trusted resource, not just a basic tracker.
Data Privacy: You are handling sensitive emotional data. Secure, transparent, and ethical data handling is non-negotiable.

Monetization Strategies for Your App
There are several proven ways to turn your wellness app into a revenue-generating business.
The Freemium Model:
Free Tier: Offer the basic mood tracking and a limited amount of educational content for free. This allows you to build a large user base.
Premium Tier: Offer advanced features for a monthly subscription (e.g., $4.99-$9.99/month). These could include detailed analytics and trend reports, personalized goal plans, and access to a larger library of content and audio.
Content Monetization:
You can sell one-time premium purchases within the app, such as specialized psychology courses, expert-led audio sessions, or personalized coaching integrations.

Data Insights:
On a much larger scale, you can offer anonymized trend reporting to wellness research institutions or corporate wellness programs.

Legal and Ethical Considerations
Important Disclaimers: You must be crystal clear that your mental health app is not a medical device and is not a substitute for professional care from a licensed therapist or doctor.
Data Privacy: Implement robust data privacy measures, have a transparent data usage policy, and make it easy for users to delete their accounts and their data.

Your Action Plan and The Reality of App Success
Your Step-by-Step Action Plan
Week | Action |
|---|---|
Week 1: Planning and Research | Choose your app niche. |
Analyze successful competitors. | |
Define your core features and the ideal user journey. | |
Set up your Rork account and start learning the basics of prompting. | |
Week 2: Development and Testing | Build the core features of your app using AI prompts. |
Test on real devices constantly. | |
Iterate on the design and functionality based on feedback from a small group of friends. | |
Integrate your backend data storage. | |
Week 3: Polish and Launch | Improve the design based on your testing. |
Prepare your App Store materials (screenshots, description). | |
Submit your app for review and start planning your marketing and user acquisition strategy. |
Common Pitfalls to Avoid
Feature Creep: Don't try to build every possible feature at once. Start with one core feature and do it exceptionally well.
Ignoring User Testing: Test your app early and often with real people.
Overlooking the Backend: Plan for your data storage and user management needs from the very beginning.
Underestimating Marketing: Building the app is just the first step. You need a plan to get it in front of users.

The Reality of App Success
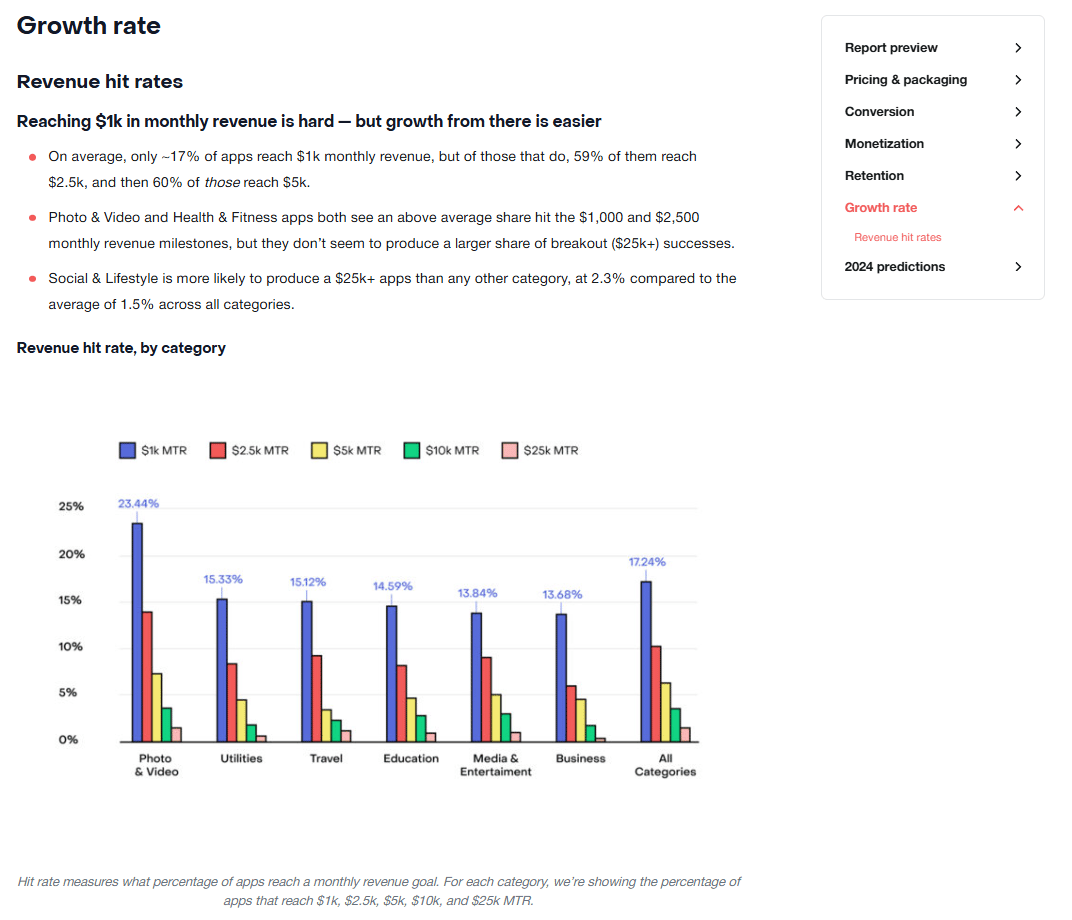
The Truth About App Revenue: Most apps (over 80%) generate less than $1,000 per month. Success requires a combination of a great product, effective marketing, and a solid user retention strategy.
The Sustainable Approach: Start with one core feature done exceptionally well. Build your user base gradually. Listen to their feedback. Reinvest any profits you make back into improving the app. Focus on solving real user problems, and you will be on the right path.

Conclusion: The Future is Here
The transformation in the world of app design is real, and it is accelerating. While building a successful app business still requires a great idea, a solid marketing strategy, and a deep understanding of your users, the immense technical and financial barriers that once stood in the way have been almost completely removed.

You can now build professional-quality, feature-rich applications that would have required a massive team and a huge budget just a few years ago. The key is no longer just about your ability to code; it's about your ability to understand a user's needs and to clearly describe a solution.
The hardest part isn't building the app anymore. It's understanding your users, marketing effectively, and iterating based on real feedback. But with the AI handling the immense technical complexity, you’re now free to focus on what matters most: creating real value for users.
The tools are ready. The only question remaining is: what problem will your app solve?
If you are interested in other topics and how AI is transforming different aspects of our lives or even in making money using AI with more detailed, step-by-step guidance, you can find our other articles here:
This AI "Master Builder" Creates Full n8n Workflows In 30 Secs!*
AI Integration: 11 Ways To Make Your AI Agent Everywhere!
*indicates a premium content, if any
How would you rate this article on AI Tools?Your opinion matters! Let us know how we did so we can continue improving our content and help you get the most out of AI tools. |
Reply