- AI Fire
- Posts
- 💡 AI Video's Biggest Flaw & The Simple Workflow To Fix It
💡 AI Video's Biggest Flaw & The Simple Workflow To Fix It
Making great AI video isn't about one magic tool; it's a learnable process. We show you the 4-step technique for keeping characters visually and vocally stable.
Neil Phan
October 09, 2025
What's your biggest hurdle with AI video right now? |
Table of Contents
Introduction
If you read the news about Artificial Intelligence (AI), you might think that soon, AI will make movies just like Hollywood. The headlines can make it seem like creating amazing videos is very easy – just type a few words and press a button. But the truth is, we are not there yet.

This is not to say that AI video tools are not good. They are very powerful! You can create beautiful, 8-second video clips that look like they came from a real movie. The problem comes when you try to make a full video. Creating a longer story with many different scenes, where characters always look and sound the same, is very difficult.
The number one challenge is consistency. Making a character look the same, have the same voice, and act the same way from one scene to the next is the hardest part. This is where many AI video projects have problems. But do not worry. There is a special method that fixes this problem, and this article will show you every step of that method in a clear and simple way.
Why Consistency Is So Important For AI Video
Let’s think about it with a simple example. If you use an AI writing tool like ChatGPT and ask it to write the first part of a story, it will create characters, a place, and what they say. If you then ask it to write the next part of that same story, it will remember everything. The characters are the same, the story continues, and the world stays the same.

AI video tools do not work like this. Every time you ask an AI to make a video clip, it starts fresh, with no memory of what it made before. Even if you use the exact same words to describe your character, the AI will make a person who looks a little different. Their voice will change, their clothes might change, and your story will feel broken.
Imagine you create a perfect 8-second clip of a brave knight in shining armor. You love it. Then, you ask the AI to make the next scene where the knight walks into a castle. Suddenly, the knight’s armor is a different color, his face looks older, and he sounds like a completely different person. The feeling of a continuous story is lost.
This is the problem we need to solve. Luckily, there is a 4-step process that works very well to keep your videos consistent. Let's look at exactly how to do it.
The 4-Step Method For Consistent AI Videos
This process is designed to build your video piece by piece, making sure your character stays the same from beginning to end.
Step 1: Create Your Character Reference Image
This first step might seem strange because we are making a video, but we will start by making a single, still picture. This picture will act like the "DNA" for your character. It is the main reference that we will show the AI again and again to remind it exactly what our character looks like.
What you will need:

An AI image generation tool. We will discuss using the technology behind Google’s image models, which can be found in products like Google AI Studio.
A very clear idea and description of your character.
Here is how to do it:
Open your AI image tool. We will use an example based on Google's technology, which is available for free.

Write a detailed description (a "prompt") for your character. You need to be very specific. Think about their hair, eyes, clothes, and the style you want.
Bad Prompt:
a robotGood Prompt:
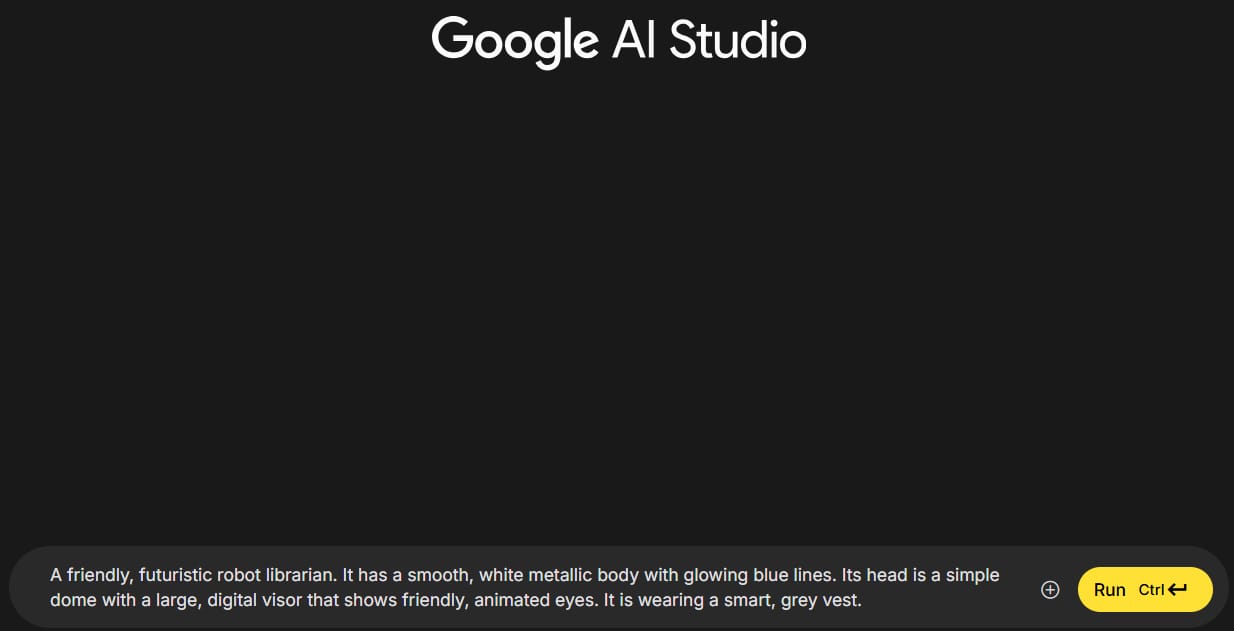
A friendly, futuristic robot librarian. It has a smooth, white metallic body with glowing blue lines. Its head is a simple dome with a large, digital visor that shows friendly, animated eyes. It is wearing a smart, grey vest.An important setting: When you first create the character, you might see an option like "reference" or "style consistency." Turn this feature off for the first generation. This allows the AI to be more creative and give you different ideas for your character.

Generate many pictures. Don't just accept the first picture you get. Create 3 or 4 sets of images. This gives you many options to choose from, so you can find the perfect one.

Choose the best image. Look for a picture where the character is facing forward and you can see their face and body clearly. A "full-frontal view" is usually best. This will be your main reference image.
Learn How to Make AI Work For You!
Transform your AI skills with the AI Fire Academy Premium Plan - FREE for 14 days! Gain instant access to 500+ AI workflows, advanced tutorials, exclusive case studies and unbeatable discounts. No risks, cancel anytime.
A tip for making small changes:
What if you love the character but want to change one small thing, like the color of its eyes?

Select the image you like.
Find a "refine" or "edit" button.
Now, you need to turn on a setting like "precise reference" or "structure reference." This tells the AI to keep the picture almost exactly the same and only change one small part. In Google’s tools, this feature is very powerful.
In the prompt box, describe only the change you want to make. For example:
change the glowing lines to a warm orange color.Generate the image again. The AI will now give you back the same character, but with that one small change.
This "precise reference" idea is the secret to keeping your character looking the same. After this step, you will have one perfect picture of your character that you will use in all the next steps.
Step 2: Create Your Starting Frames For Each Scene
Now that we have our perfect character picture, it's time to put that character into the different scenes of our video. A "starting frame" is a still picture that shows the beginning of a video clip. It sets the scene and shows what is happening.
The process:
Stay in your image generation tool. Look for an area where you can upload an image as a reference.

Upload your character reference image from Step 1. This is the most important part of this step.

A critical setting: Make sure the "precise reference" or a similar "character lock" feature is turned on. This tells the AI:
"Use this exact character in the new picture you are making."
Write your prompt for the scene. Now, you describe the background, any other people, and what your character is doing.
Let's continue with our robot librarian example. We want to create a short video with two scenes.
Scene 1: The robot helps a young student in the library.
Character Reference: Upload the picture of our friendly robot librarian.
Scene Prompt:
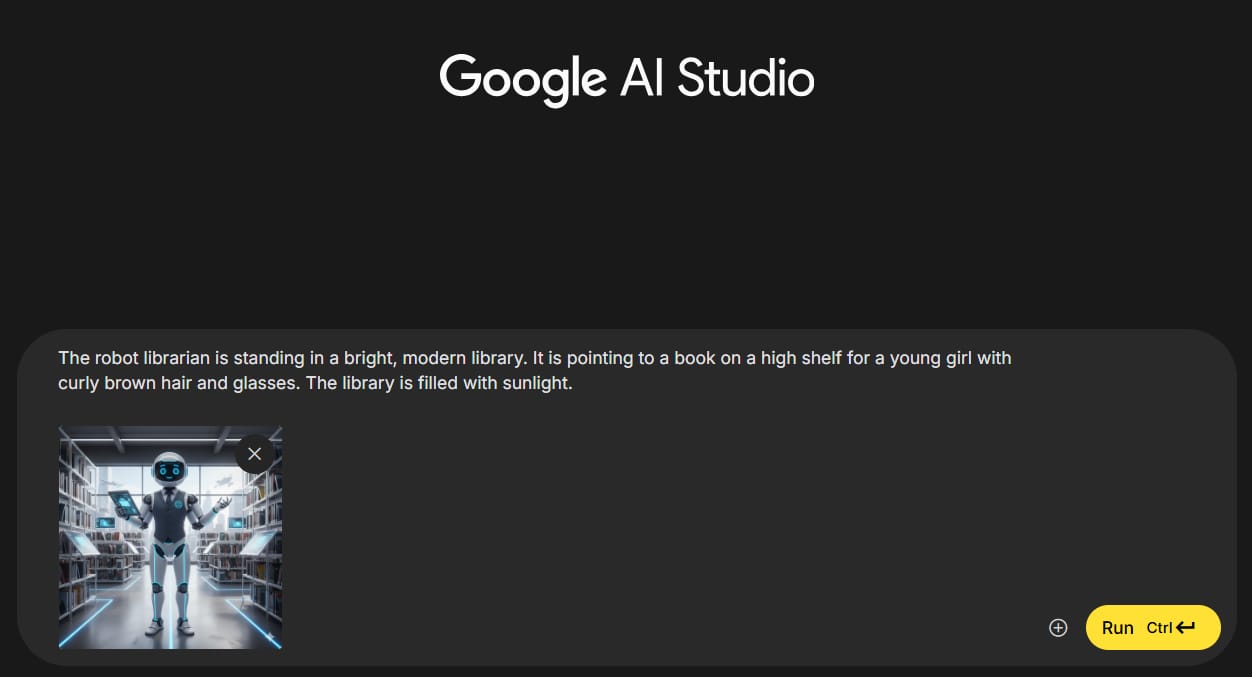
The robot librarian is standing in a bright, modern library. It is pointing to a book on a high shelf for a young girl with curly brown hair and glasses. The library is filled with sunlight.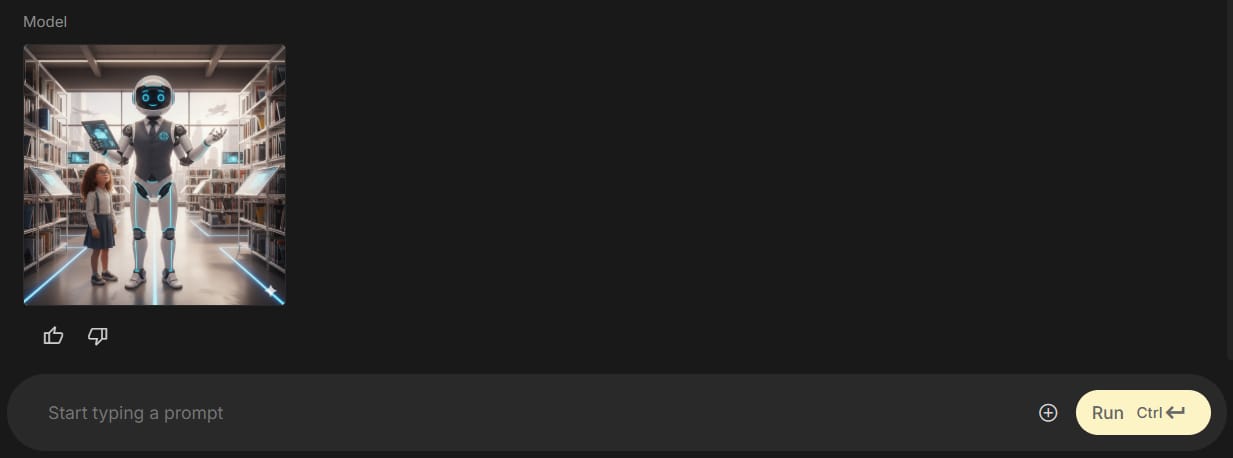
Scene 2: The robot talks to an elderly man.
Character Reference: Use the exact same picture of the robot librarian.
Scene Prompt:

The robot librarian is in a quiet corner of the library, talking to an elderly man with a kind face and a white beard. The man is sitting in a comfortable armchair. The robot is leaning forward slightly, as if listening carefully.
Why this is so important:

If you did not upload the reference image and turn on the "precise" setting, the AI would create a different-looking robot for each scene. One might be tall and thin, the other short and round. But with this method, the robot librarian in Scene 1 and Scene 2 will look identical. The consistency is maintained.
You will repeat this process for every single scene in your video. Always use the same character reference image but change the scene prompt each time. At the end of this step, you will have one starting picture for each video clip you plan to make.
Step 3: Generate Your Videos From The Frames
This is the most exciting part. We will now take our still pictures (the starting frames) and turn them into short, moving videos.
Tools needed:

An AI video generation tool. We will use an example based on Google’s Veo model, which is a powerful text-to-video AI. Some apps may offer access to this or similar models.
Your starting frame images from Step 2.
The video generation process:
Open your AI video tool. Many of these tools have an option called "image-to-video" or "frame-to-video." Select this option.

Upload your starting frame for the first scene. You may need to crop the image to fit the right video size (like a rectangle for a computer screen).
Adjust the settings:

Choose the right format (e.g., "landscape" for wide screens).
If possible, ask the AI to generate more than one video for each prompt (e.g., 4 outputs). This uses more of your credits, but it gives you a much better chance of getting a great result. Not every video will be perfect.
Write your video prompt. This is very important. You need to tell the AI what movement should happen in the video.

The robot librarian points its finger up at the book. Its blue visor blinks slowly. The young girl looks up from the robot to the book, her eyes wide with wonder. The camera slowly pushes in towards the girl's face. Both characters are still. The movement is very gentle. The scene is 8 seconds long.
Generate and review the videos. Look through the different options the AI created. Choose the one that looks the best and most natural.
An advanced tip: Create a smart prompt helper.
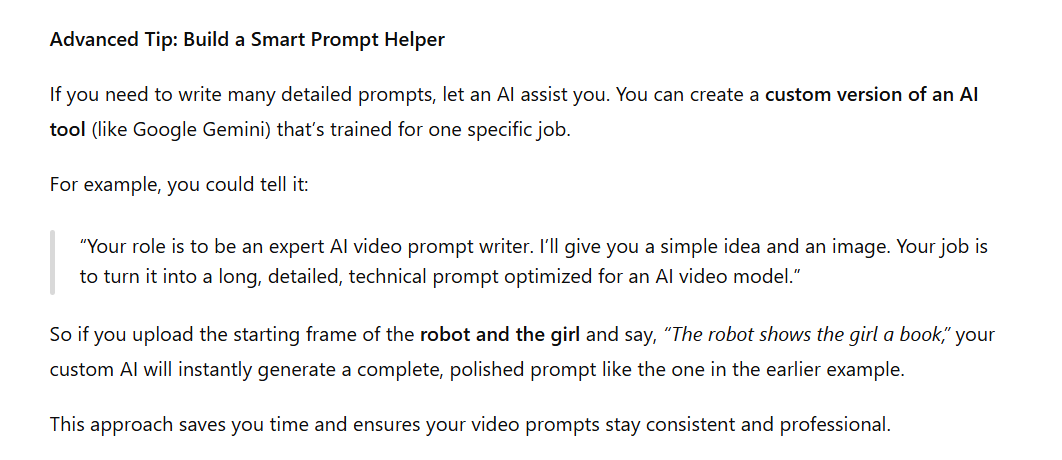
If you have to write many detailed prompts, you can use an AI assistant to help you. You can create a custom version of an AI like Google Gemini for a special task. You could tell it: "Your job is to be an expert AI video prompt writer. I will give you a simple idea and a picture. You will write a very detailed, technical prompt for me that is perfect for an AI video model."
For example, you could give it the starting frame of the robot and the girl and say: "The robot shows the girl a book." The custom AI would then automatically write a long, detailed prompt like the example above for you. This can save a lot of time and help you get better videos.
Step 4: Fix The Audio To Make It Consistent
We have now solved the visual consistency problem. Our robot librarian looks exactly the same in every scene. But there is one more problem: the audio. Each time an AI video tool creates a clip, it also creates a new, random voice for the character. So, our robot will sound different in every scene. This final step fixes that.
What you'll need:
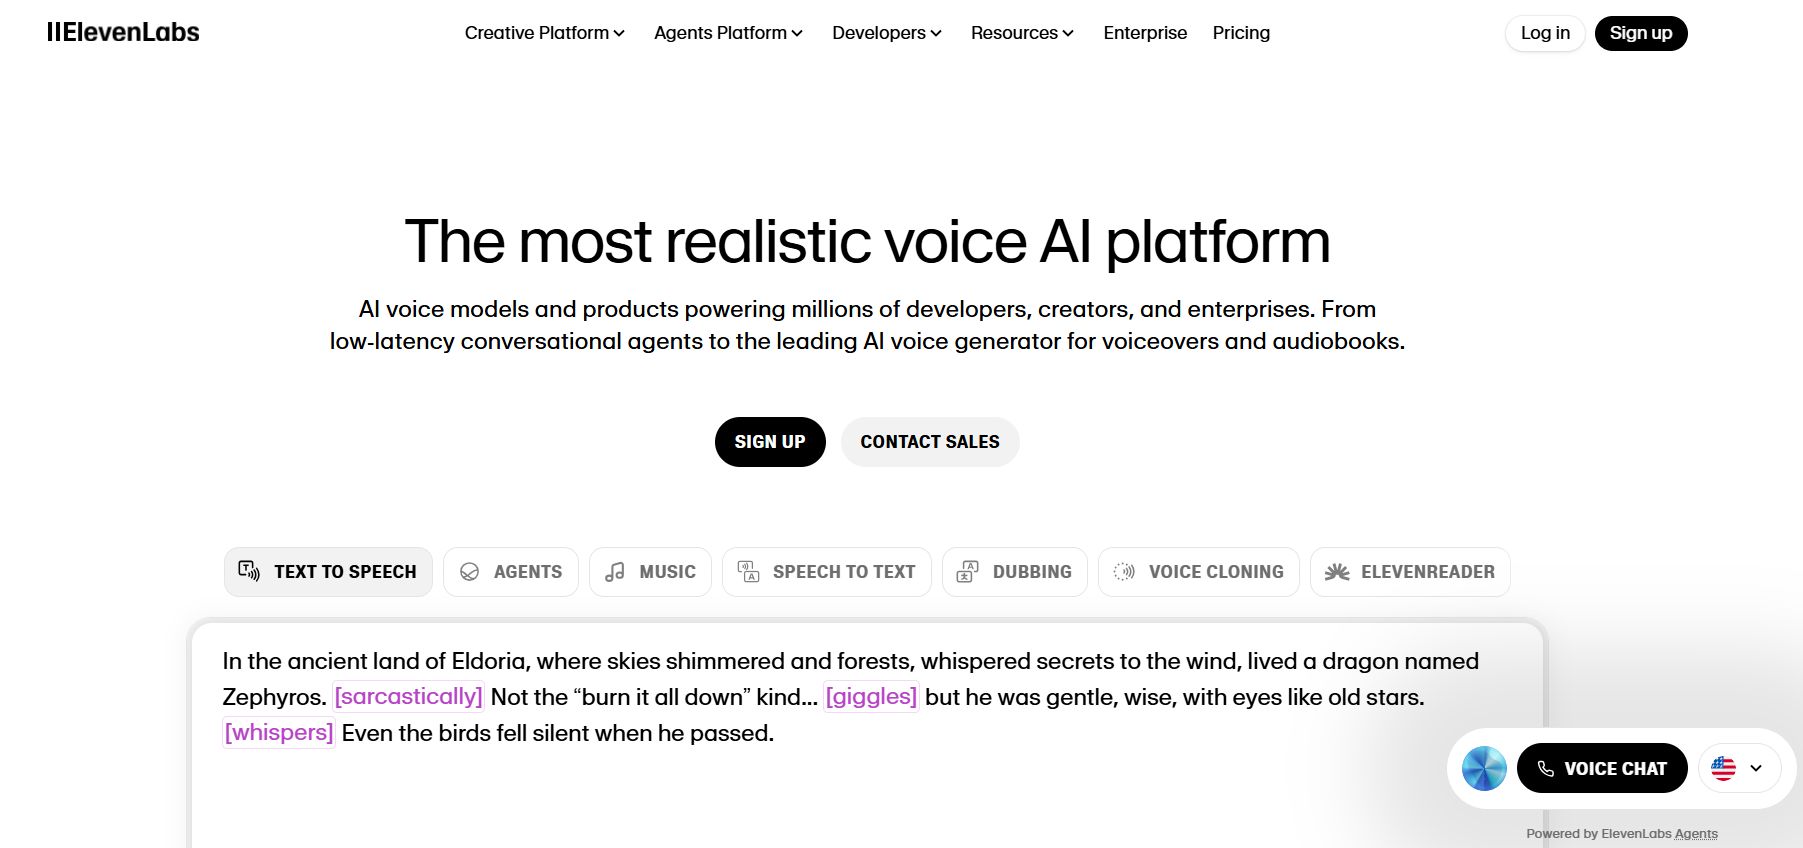
A voice-changing or voice-cloning service. A popular one is ElevenLabs.
The audio workflow:
Go to the voice-changing tool (like ElevenLabs) and find their "voice changer" or similar feature.

Upload your first video clip. The tool will analyze the audio in it.

Choose a single, consistent voice for your character. These services have a library of different voices. Find one that fits your character. For our robot, we might choose a calm, clear, slightly robotic voice. Let's say we pick a voice named "Rachel."

Generate the new audio. The tool will replace all the voices in your video with the new one you selected.

Repeat this for every single video clip. For Scene 2, upload that video and choose the exact same voice ("Nova"). It is very important to use the same voice every time.
Putting it all together in a video editor:

The final stage is assembling everything in your video editing software. First, import both your original video clips from Step 3 and the new, consistent audio files into your project. Arrange the video clips on your timeline in the correct story order. Next, perform a very important step: detach or mute the original audio from all video clips to eliminate the old, inconsistent voices. Finally, place the new audio track onto the timeline, carefully aligning it with its corresponding video.
The final polishing step requires careful attention. The voice tool likely changed all the voices in the clip, including any human characters. Your task is to listen closely and cut out the parts of the new audio where human characters are speaking, allowing their original voices to play instead. This ensures you replace only your main character's lines with the new, consistent voice, preserving the natural sound of other actors. To add an extra layer of realism, you can mix in some quiet background sounds, like the soft hum of a library or people whispering, to complete the scene.
Advanced Ideas And Common Problems
How To Create Multiple Consistent Characters

So, what if your story has two AI characters? The method is the same, you just need to manage a few more details at each stage. First, during character creation (Step 1), you'll need to generate a separate reference image for each character - for example, one for our robot and another for its floating drone sidekick. When creating your starting frames (Step 2), you must upload both of these reference images, and your scene prompt will need to describe both characters.
The video generation process (Step 3) remains exactly the same. The main difference comes in the audio phase (Step 4). In the voice tool, you'll need to select two distinct, consistent voices - a calm "Nova" voice for the robot and a high-pitched, beeping "Sparky" voice for the drone. During the final video edit, your job is to replace the audio for each character individually: you’ll replace all the robot's lines with the "Nova" audio and all the drone's lines with the "Sparky" audio, ensuring both characters sound consistent throughout the video.
Working With Other Tools

You may see other tools like Pika or Kling that say they can do everything in one place. While these tools are getting better, you will often find that you still need to follow a similar process to get the best results. You will likely still need to:
Create a very good starting image to guide the video generation.
Fix the audio separately to make sure the voices are consistent.
Use a video editor to put everything together perfectly.
These tools do not make the process automatic. They are just different options you can use within this 4-step method.
Quality Checkpoints: A Simple Checklist

At each step, stop and check your work.
After Step 1 (Character Image): Ask yourself, "Does this character look exactly the way I want? Is the picture clear?" If not, make a new one.
After Step 2 (Starting Frames): Look at all your starting pictures next to each other. "Does my main character look identical in every single picture?" If not, go back and fix them.
After Step 3 (Videos): Watch your video clips. "Is the movement good? Is anything strange happening?" Remember to generate multiple options so you can choose the best one.
After Step 4 (Audio): Listen to your final video. "Does my character sound exactly the same every time they speak?"
Easy Traps To Avoid

Not Making a Reference Image: This is the biggest mistake people make. If you just describe your character in text for each scene, they will never look the same.
Forgetting to Use "Precise Reference": If you upload your character image but forget to turn on this setting, the AI will ignore it and create a new character.
Only Generating One Video: AI video generation is not perfect. Sometimes it makes mistakes. Always create 3-4 versions of each clip so you have choices.
Ignoring the Audio: Viewers will immediately notice if a character's voice keeps changing. It makes the video feel cheap and strange.
Rushing the Steps: Each step in this process builds on the one before it. If your character image is not good, your starting frames will not be good, and your final video will not be good. Take your time.
What New Technology Means For This Process
You may have heard of new AI models like Sora from OpenAI. These new models are very powerful and have some new features. Let's look at two of them.
1. A "Cameo" Feature:
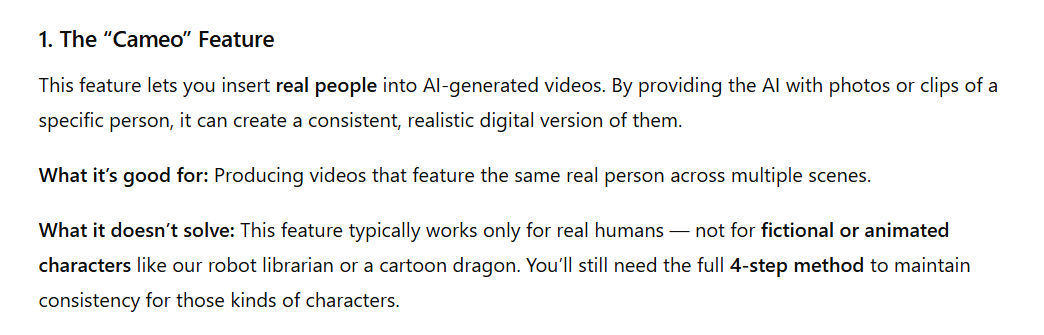
This feature is designed to let you put real people into an AI video. You would give the AI pictures or videos of a specific person, and it would create a consistent digital version of them.
What it's good for: Making videos with consistent-looking real people.
What it doesn't solve: This feature is usually only for real people, not for animated characters like our robot librarian or a cartoon dragon. You still need the 4-step method for fictional characters.
2. A "Recut" or "Continuity" Feature:
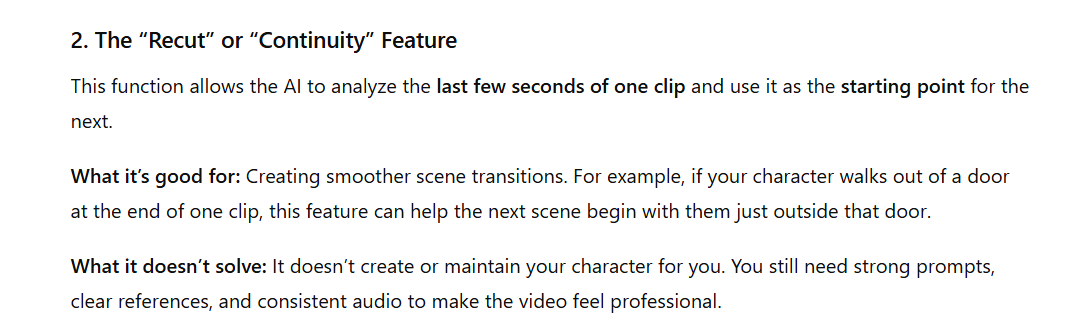
This feature allows the AI to look at the last few seconds of your first video clip and use it as the starting point for the next one.
What it's good for: It could make the connection between two scenes smoother. For example, if a character is walking out of a door, this feature can help the next scene start with them just outside the door.
What it doesn't solve: You still need to create the character in the first place. You still need to write good prompts. And you will almost certainly still need to fix the audio to make the voice consistent.
These new features are helpful improvements, but they do not replace the 4-step method we have talked about. They are just new tools you can use within the process.
The Realistic View

AI video tools are amazing, but they are just that: tools. To be successful, you need to understand what each tool is good at and combine them in a smart way. There is no single "magic button" that does everything for you.
Think about what we did for our robot librarian story:
Used an image tool for the main character design.
Used the same image tool to create the starting scene pictures.
(Optional) Used an AI assistant to help write better prompts.
Used a video tool to make the pictures move.
Used a voice tool to create a consistent voice.
Used a video editor to put it all together.
That's up to six different tools working together to make one short, consistent video.
Real-World Uses For This Method
You can use this 4-step process for many kinds of projects:

Marketing videos that feature a company mascot.
Educational videos with a teacher or presenter who always looks the same.
Short animated stories for social media with repeating characters.
Product demonstration videos with the same person showing how to use something.
Training videos for companies with a consistent instructor.
The most important thing is to plan your scenes ahead of time and always use your character reference image.
Conclusion
Making consistent AI videos is not about finding one perfect, all-in-one tool. It is about learning a reliable process that works. The method in this article is effective because it directly solves the biggest problem in AI video today: consistency from one scene to the next.
Yes, it is more work than just typing a sentence and getting a perfect movie. But with this process, you can create high-quality videos with characters that look and sound the same from start to finish.
The world of AI is changing very fast, and new tools will keep coming out. But the basic ideas of good storytelling will not change. A good story needs consistent characters and a clear narrative. This method helps you achieve that.
The best way to learn is by doing. Don't wait for the perfect tool to be invented. Start today with a small project and practice this 4-step method.
If you are interested in other topics and how AI is transforming different aspects of our lives or even in making money using AI with more detailed, step-by-step guidance, you can find our other articles here:
How useful was this AI tool article for you? 💻Let us know how this article on AI tools helped with your work or learning. Your feedback helps us improve! |
Reply