- AI Fire
- Posts
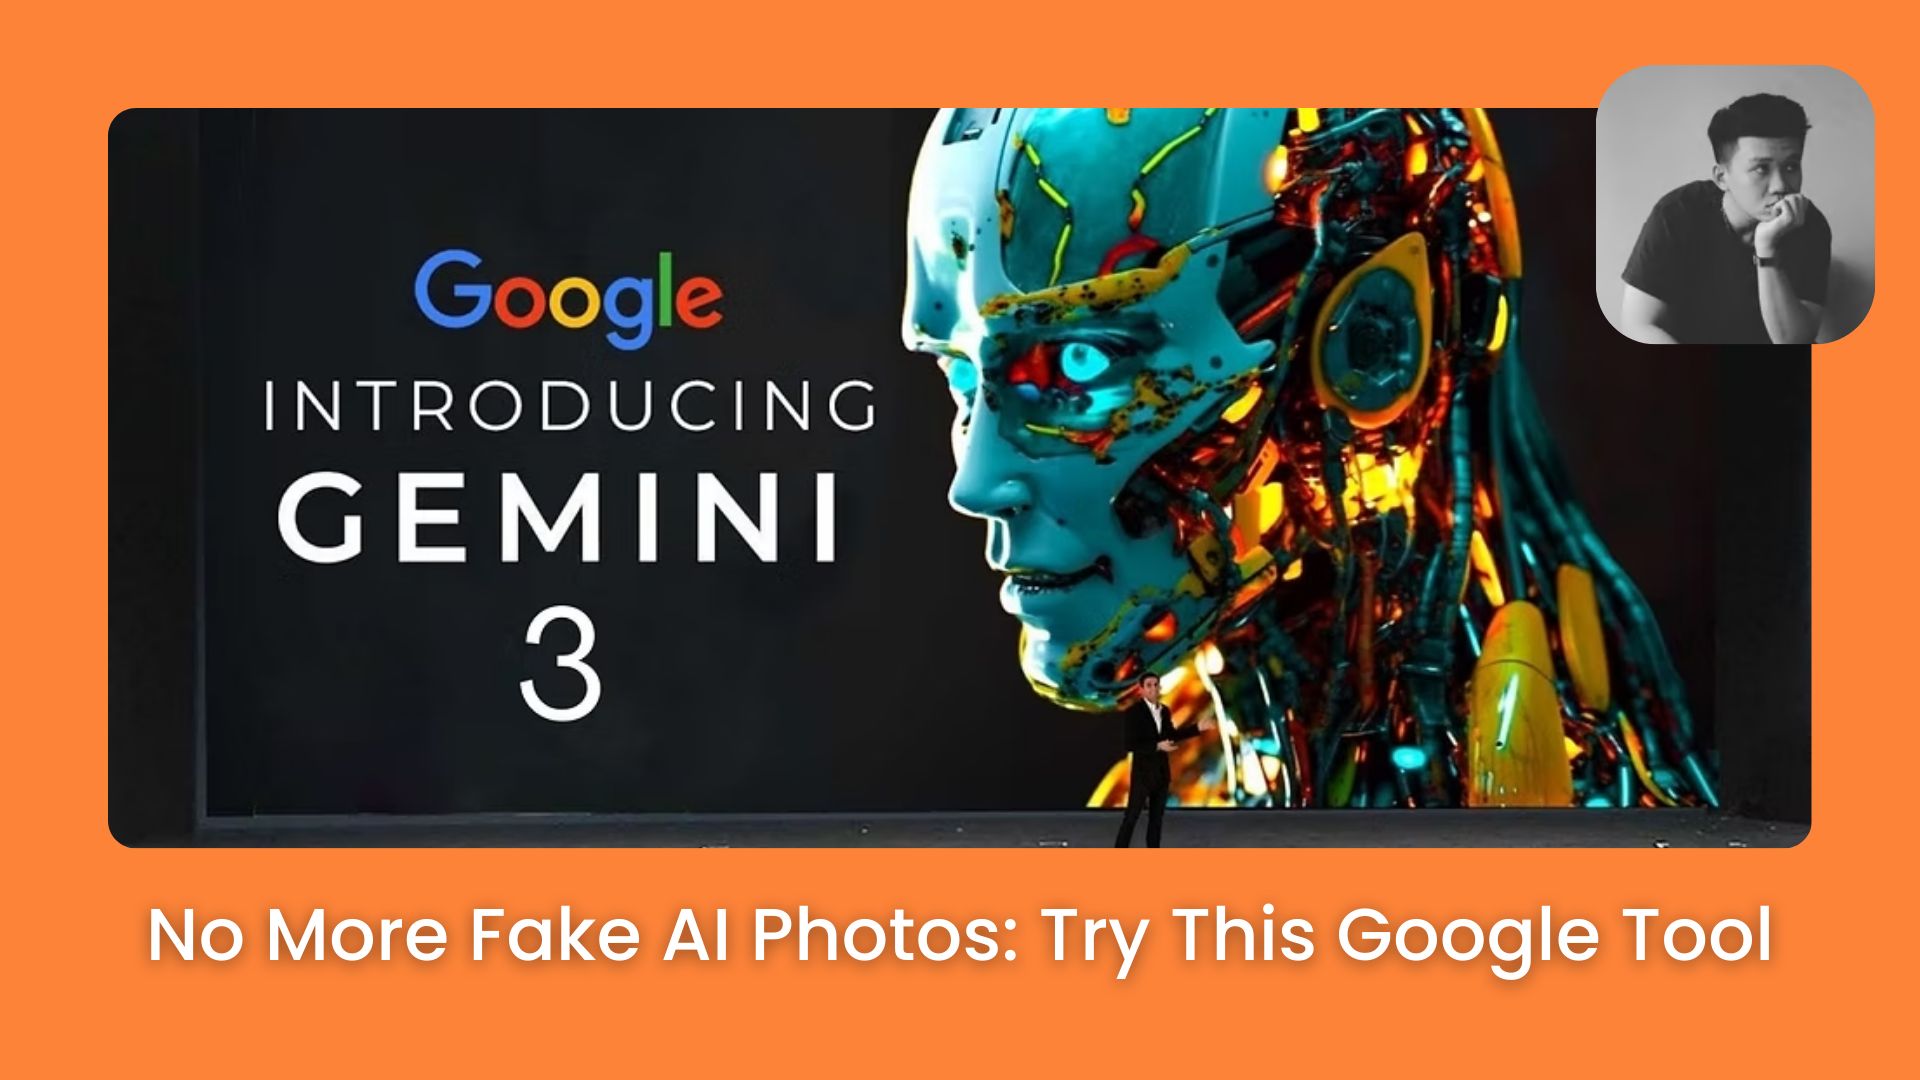
- 📸 Finally! AI Photos That Don't Look Fake. Try This Google Tool Now
📸 Finally! AI Photos That Don't Look Fake. Try This Google Tool Now
Most AI images look like plastic toys. This new update changes that completely. See the shocking difference and learn how to create real photos.
Neil Phan
November 27, 2025
TL;DR
Google's Gemini 3 update fixes AI image issues by introducing a thinking process that ensures realistic textures. It allows users to edit images continuously without losing the original context.
This tool eliminates the plastic look of previous models by understanding physical details like skin pores. It transforms image generation into a professional tool for ads and portraits.
You will learn to access this model for free and use specific prompts to build consistent brand assets using the new continuous editing workflow.
Key points
Free users typically get 3 to 5 high-quality generations daily.
Uploading reference objects before portraits often distorts the face.
Type "Next" to generate consistent variations of the same subject.
Critical insight
The main value is retaining character identity across different scenes, making this tool finally viable for commercial storytelling.
What frustrates you most about creating AI images? 😤🎨 |
Table of Contents
Introduction
Have you ever tried to use AI to make a picture of a group of people? Usually, it is a disaster. One person has three hands, another person has a messy face, and the lighting looks fake. For a long time, AI images were fun toys, but they were not good enough for real work.
I have been testing a new update from Google for the past few weeks, and I have to tell you: everything has changed.
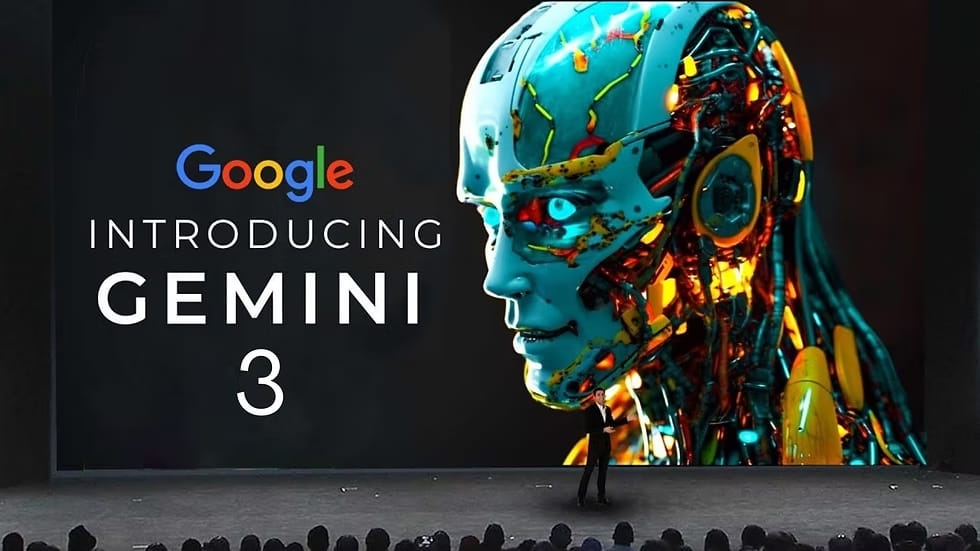
Google has released a new version of their image generator inside Google Gemini. In the tech world, some people are calling this update "Nano Banana Pro," but officially, you will see it as Gemini 3 or Imagen 3.
I have run over 50 different tests with this tool. I did not just make funny pictures; I tried to use it for real tasks like making ads, creating family photos, and fixing bad pictures. The results are shocking. It is no longer just a small step forward; it is a giant leap.
In this guide, I will show you exactly why this tool is different, how you can use it for free, and I will give you the exact words (prompts) I used to get amazing results. I will explain everything simply, just like I am sitting next to you teaching you.
Part I: Why Is Everyone Talking About This New Update?
You might be asking, "Why do I care about another AI update?"
Let me give you a simple example. Imagine you have photos of five different friends, and you want to put them all into one group photo on a beach.
Before this update, if you asked an AI to do this, the result would look like a cartoon or a bad video game. The skin would look too smooth (like plastic), and the faces would not look like your friends.
With Gemini 3, the AI understands texture. It knows that human skin has pores and small imperfections. It understands how light hits a face in the real world.
Here is a quick breakdown of the big improvements I found:
It actually thinks: This is the coolest part. When you ask for an image, the AI doesn't just start drawing immediately. It takes a moment to "think" and plan the image, just like a human artist would.
Realism: The "plastic" look is gone. Photos look like they were taken with a real camera.
Text handling: If you want a sign in the background that says "Coffee Shop," it actually spells it correctly. Old AI would write "Cofee Shop" or weird symbols.
Consistency: This is the most important for work. You can keep the same character or style across many different images.
Feature | Old AI Models | New Gemini 3 (Nano Banana Pro) |
Skin Texture | Smooth, plastic, fake | Realistic, natural, detailed |
Group Photos | Messy faces, missing people | Clear faces, everyone is included |
Lighting | Flat and boring | Cinematic and dramatic |
Editing | You have to start over every time | You can edit the same image endlessly |
Learn How to Make AI Work For You!
Transform your AI skills with the AI Fire Academy Premium Plan - FREE for 14 days! Gain instant access to 500+ AI workflows, advanced tutorials, exclusive case studies and unbeatable discounts. No risks, cancel anytime.
Part II: How Can You Start Using It Today?
You do not need to install complicated software or have a powerful computer. You can use this right now in your web browser.
How To Set It Up For Free
I use the free version for most of my quick tests, and it works great.
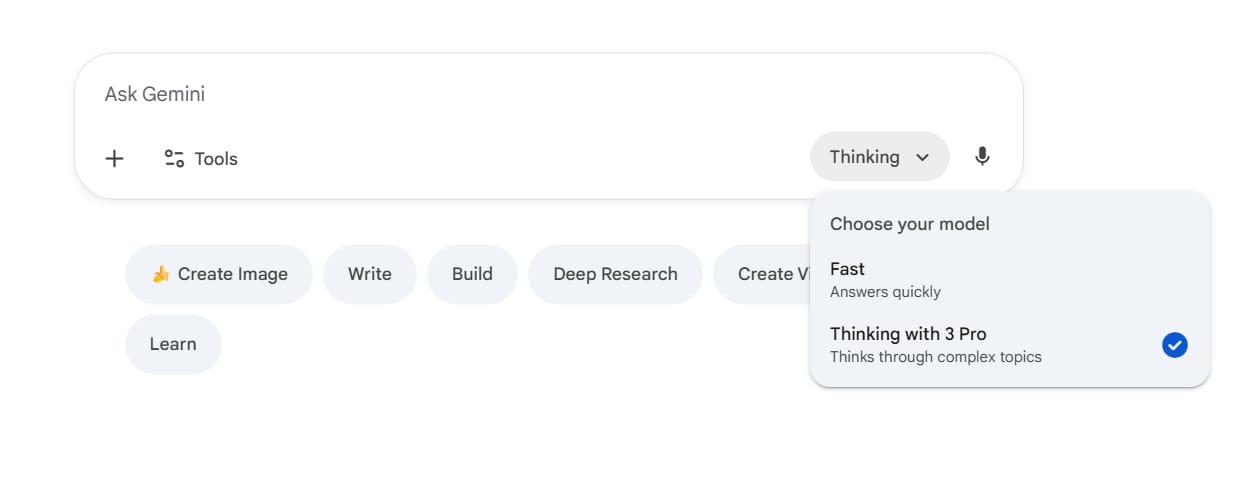
Open your web browser and go to Google Gemini.
On the right side, you might see a menu to choose your "model."
Make sure you are using Gemini Advanced or look for the model called "Thinking with 3" (or Gemini 3).
Simply type in the chat box: "Create an image of..."
Important limits for free users:
You might only get a few free image generations per day (usually around 3 to 5 high-quality ones).
The images will have a small digital watermark (invisible to the eye, but software can see it).
If you need more, you might need to upgrade to the Google One AI Premium plan, which is about $20/month.
Part III: How Does The New 'Continuous Editing' Feature Work?
This is the feature that made me say "Wow."
In the past, if I asked AI to "Make a picture of a cat," it gave me a cat. If I then said, "Make the cat wear a hat," it would give me a completely new picture of a different cat wearing a hat. This was very annoying because I lost the original cat I liked.
With Gemini 3, the AI remembers the context. This is called Continuous Context Editing.
My "Coffee Shop" Experiment
Let me show you how I used this to create a full story for a fake coffee brand.
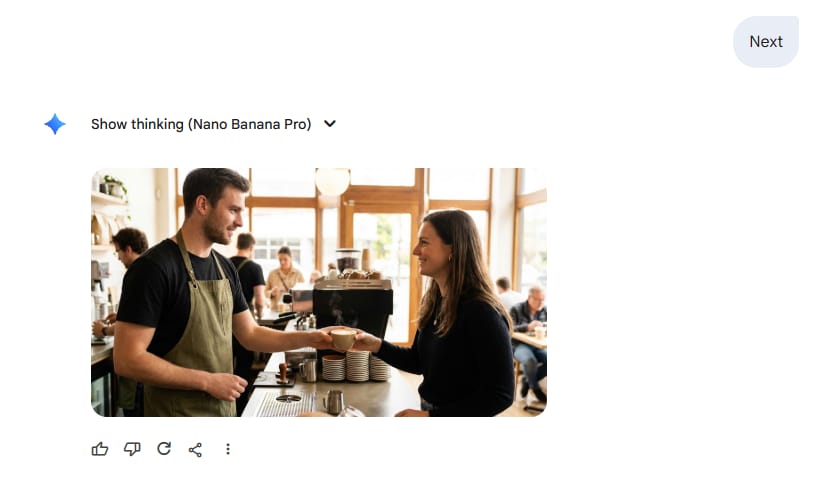
Step 1: The First Image
I typed:
"Create a realistic, cinematic photo of a young male barista making coffee in a modern cafe. He is wearing a green apron. Warm lighting. 16:9 aspect ratio."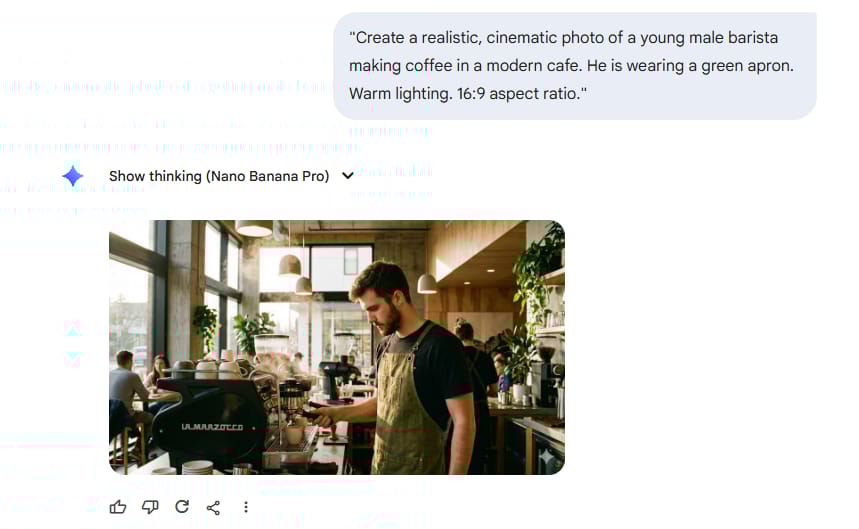
The AI created a great image of a guy pouring milk.
Step 2: The Magic Word "Next"
Instead of writing a long prompt again, I just typed: "Next."
Because the AI remembers what we are doing, it created a new angle of the same guy in the same cafe. It looked like a second photo from the same photoshoot.
Step 3: Changing the Scene
Then I typed:
"Now show him serving the coffee to a customer."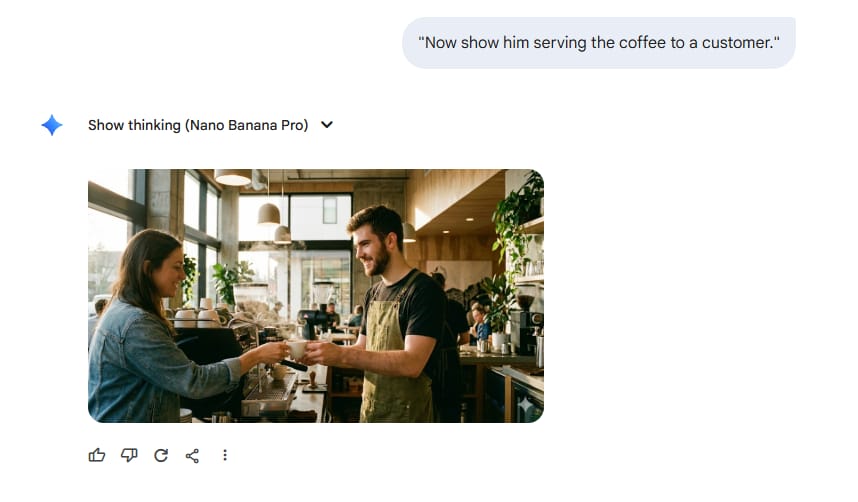
It kept the same barista (same face, same green apron) and just changed the action.
Why is this helpful?
If you run a business, you can create a brand mascot or a model and generate hundreds of photos of them for your Instagram without paying for a photographer every single day. You just set it up once, and then keep saying "Next" or making small changes.
Part IV: What Are Some Real Examples Of Better Prompts?
I want to give you some new examples so you can see the difference between a "beginner prompt" and a "pro prompt" with this new tool. I tested these yesterday.
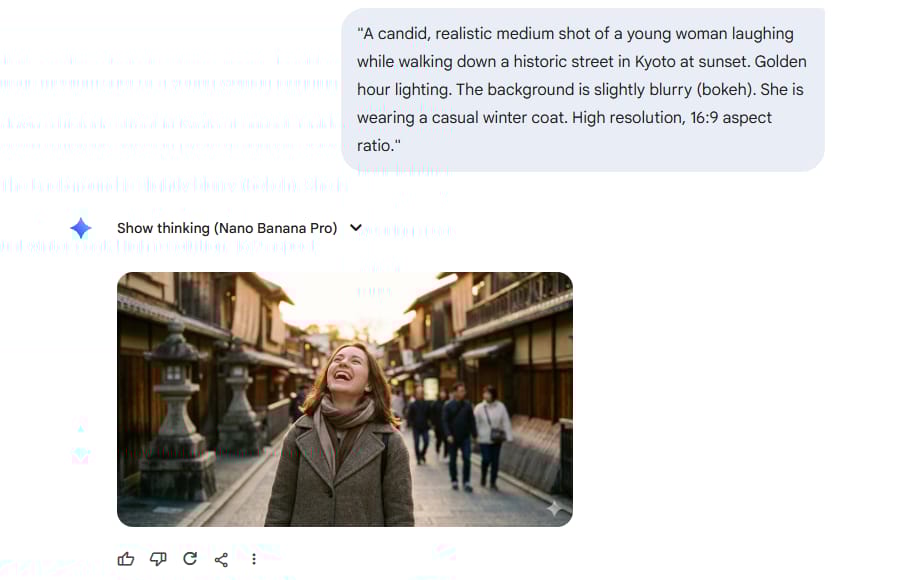
Example 1: The Travel Blogger Photo
Goal: Create a stunning travel photo of a woman in Kyoto, Japan.
Bad Prompt: "Woman in Japan street."
My Pro Prompt:
"A candid, realistic medium shot of a young woman laughing while walking down a historic street in Kyoto at sunset. Golden hour lighting. The background is slightly blurry (bokeh). She is wearing a casual winter coat. High resolution, 16:9 aspect ratio."Result: This looked like it was taken by a professional travel photographer. The light hit her hair perfectly, and the background blur made it look expensive.
Example 2: The Delicious Burger Ad
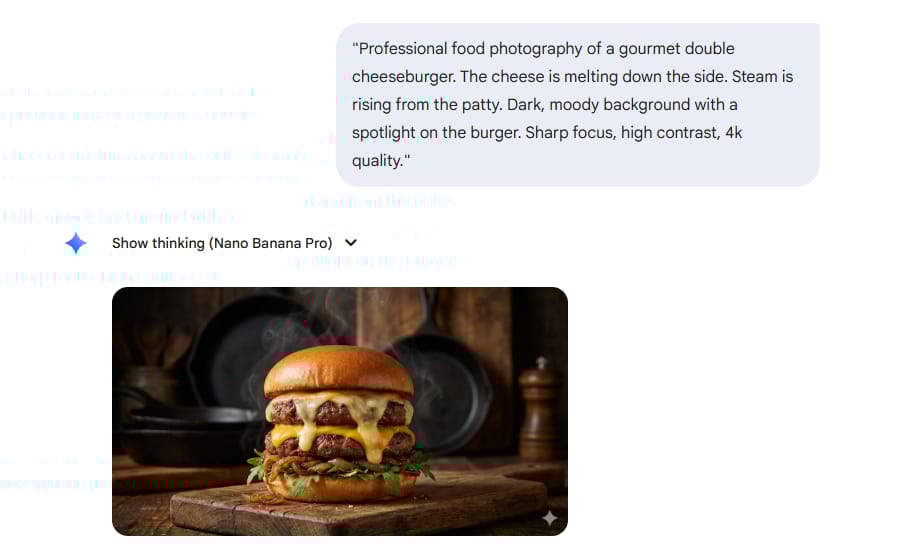
Goal: Make a food advertisement that makes people hungry.
Bad Prompt: "Picture of a burger."
My Pro Prompt:
"Professional food photography of a gourmet double cheeseburger. The cheese is melting down the side. Steam is rising from the patty. Dark, moody background with a spotlight on the burger. Sharp focus, high contrast, 4k quality."Result: You could see the texture of the bun and the shine on the meat. It looked ready for a billboard.
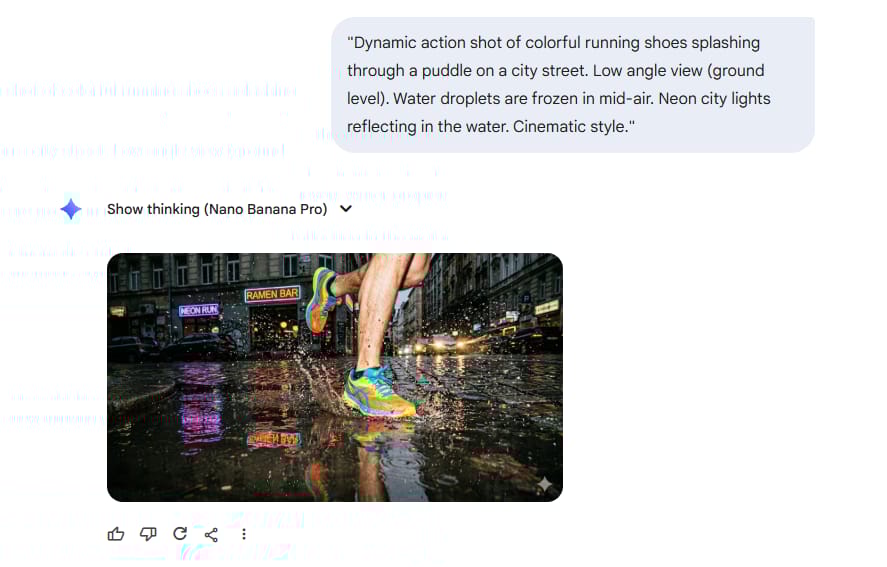
Example 3: The Sneaker Product Shot
Goal: Show a pair of shoes in an exciting way.
Bad Prompt: "Running shoes on a road."
My Pro Prompt:
"Dynamic action shot of colorful running shoes splashing through a puddle on a city street. Low angle view (ground level). Water droplets are frozen in mid-air. Neon city lights reflecting in the water. Cinematic style."Result: Incredible energy. The water splash looked 100% real.
Part V: How Can You Use This For Your Work Or Business?
This is not just for fun. I found several ways you can use this to save time and money.
1. For Real Estate Agents
If you have a photo of an empty room, it looks boring. You can upload that photo to Google Gemini and type:
"Renovate this room. Add a modern grey sofa, a rug, and some plants. Keep the windows and walls exactly the same."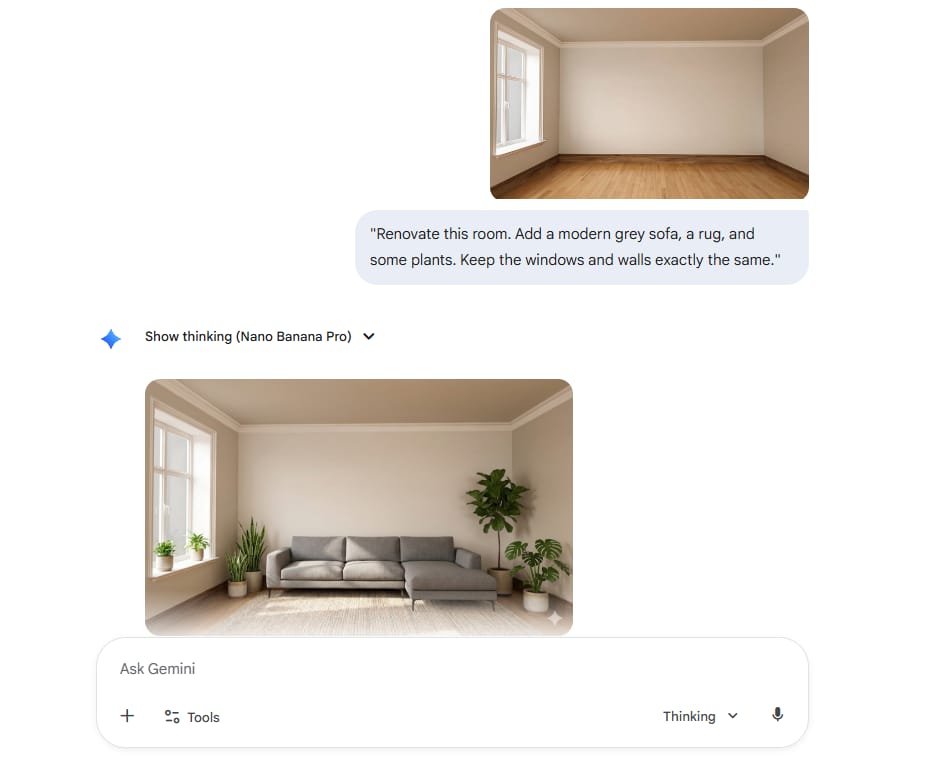
The AI will "stage" the room for you. It helps clients see what the house could look like.
2. For Online Sellers (E-commerce)
Let's say you sell handmade candles. You take one photo of your candle on your kitchen table. It looks okay, but not great.
You can upload that photo and ask the AI:
"Place this candle on a wooden spa shelf with soft towel in the background. Soft, relaxing lighting."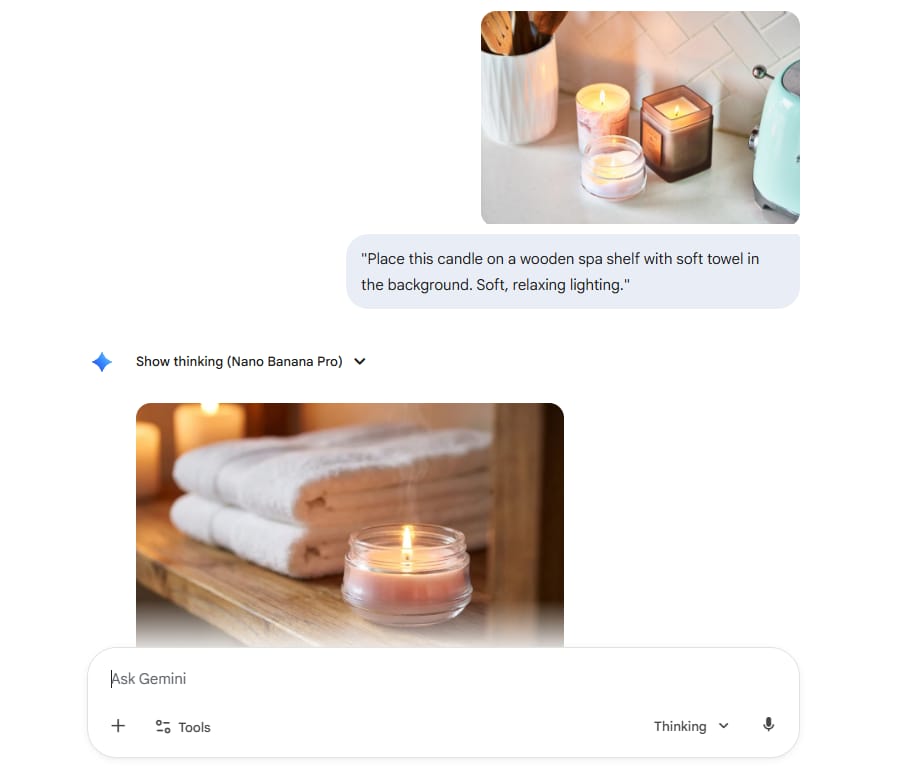
Now you have a professional product image without buying props or renting a studio.
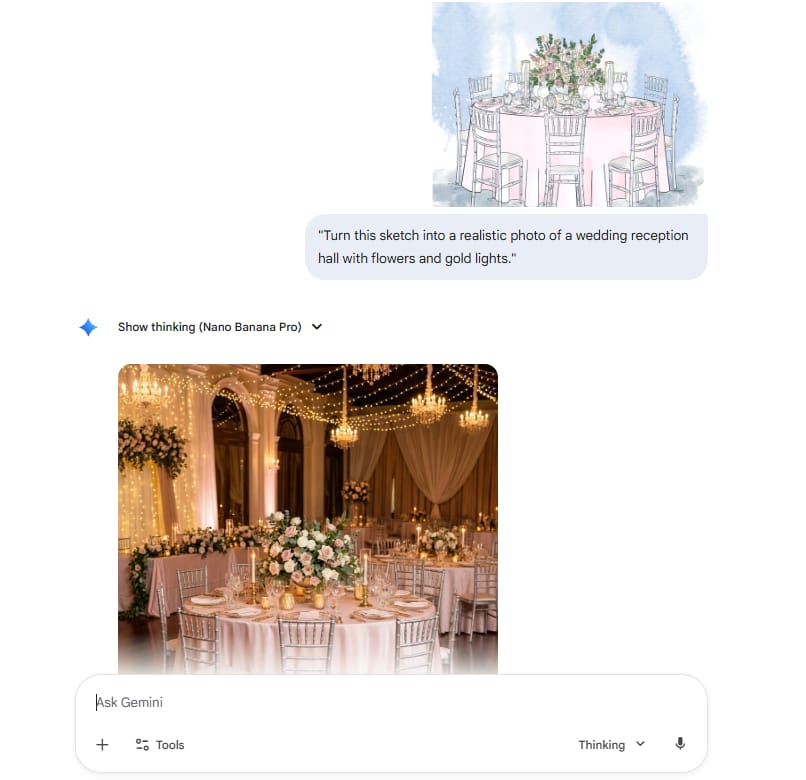
3. For Event Planners
If you are planning a wedding or a party, you can sketch your idea on a napkin, take a photo of it, and upload it.
Then ask:
"Turn this sketch into a realistic photo of a wedding reception hall with flowers and gold lights."It visualizes your idea instantly so you can show your clients.
Part VI: What Are The Best Tips To Get Perfect Results?
After spending hours with Gemini 3, I learned some "secrets" to make it work better.

Tip 1: The "Face First" Rule
If you want to put a specific person in a scene with many objects (like a car, a dog, and a house), always upload the photo of the person first.
The AI pays the most attention to the first thing it sees. If you upload the car first, the AI might make the car look perfect but mess up the person's face.
Tip 2: Be specific about the "Aspect Ratio"
The "Aspect Ratio" is just the shape of the picture.
If you don't tell the AI what shape you want, it usually gives you a square. Always add "16:9" or "Square" at the end of your prompt.
Tip 3: Trust The "Thinking" Process
When you hit enter, you will see a message saying "Analyzing" or "Thinking." Do not cancel it!
This is the most important part. The AI is checking your prompt to make sure it understands the lighting, the mood, and the objects. This short wait is why the images are so much better than before.
Tip 4: Use Specialized Tools For High-End Work
If you need images that are huge (4K resolution) or you want to generate things that Google might block (because Google is very strict about safety), you might want to look at other tools that use the same technology but with fewer rules.
One tool I like is Higgsfield AI. It allows for higher resolution and gives you more control, though it is a paid tool. You can also use Adobe Photoshop if you have a subscription, as they are starting to integrate these powerful models too.
Conclusion
I used to tell people to wait before trying AI image generators because they were too hard to use. That changes today.
Gemini 3 (or Nano Banana Pro) is the first time I feel like I have a professional artist inside my computer. The ability to edit images just by talking to them, and the fact that faces finally look like real humans, makes this a must-have tool.
Here is my challenge to you:
Go to Google Gemini today.
Think of a simple scene (like your dream house or a funny pet).
Type in a detailed description using the tips I gave you.
See what happens.
I think you will be surprised at how good it is. The technology is moving fast, and the best way to keep up is to just start playing with it.
Have fun creating!
If you are interested in other topics and how AI is transforming different aspects of our lives or even in making money using AI with more detailed, step-by-step guidance, you can find our other articles here:
1 Hour Of This AI Prep Will Save You 100+ Hours Of Study (Part 1)
1 Hour Of This AI Prep Will Save You 100+ Hours Of Study (Part 2)
Earn Money with MCP in n8n: A Guide to Leveraging Model Context Protocol for AI Automation*
Transform Your Product Photos with AI Marketing for Under $1!*
The AI Secret To Reports That Clients Actually Implement
*indicates a premium content, if any
How useful was this AI tool article for you? 💻Let us know how this article on AI tools helped with your work or learning. Your feedback helps us improve! |
Reply