- AI Fire
- Posts
- 🎟️ Step-By-Step Prompt Formula Hack Behind ALL Ultra-Cinematic AI Videos
🎟️ Step-By-Step Prompt Formula Hack Behind ALL Ultra-Cinematic AI Videos
Stop guessing and hoping. This guide shows the Murder Board Method: a precise AI video workflow using Nano Banana Pro, Kling 2.6, and real Hollywood metadata.
Max Anh
January 28, 2026
TL;DR BOX
The "Murder Board Method" is one of the most reliable workflows for cinematic AI video in 2026, moving away from the "prompt lottery" toward a structured visual pipeline. By combining Nano Banana Pro (for ultra-high-resolution 21:9 base frames), Kling 2.6 (for fluid, character-consistent motion) and real Hollywood metadata from ShotDeck, you can achieve professional film-grade outputs.
The secret is in Stage 1 (Image Generation). Do not just use the word "cinematic". Instead, give the AI real camera details like ARRI Alexa models and specific lenses. This “metadata grounding” pushes the AI to emulate a specific visual signature instead of guessing.
Key points
Fact: Prompting with real lens metadata (e.g., "f/1.4 aperture", "50mm prime") triggers high-end cinematography patterns in the AI’s training data that simple adjectives cannot.
Mistake: Using a single 16:9 prompt. For true cinematic immersion, generate in 21:9 Ultra-Widescreen; it’s the ratio our brains associate with "movie magic".
Action: Create a 2x2 Contact-Sheet Grid (Section VI) to test four compositions at once before committing your "video tokens" to an animation run.
Critical insight
In 2026, the real "AI Director" doesn't write stories; they manage Visual Continuity. You win by documenting every prompt, seed and reference image on a "Murder Board" (like Notion or Figma) so your character stays the same from Shot 1 to Shot 100.
Table of Contents
I. Introduction
If you have ever typed a prompt into an AI video generator and prayed to the algorithm gods for something halfway decent, you are not alone.
Most AI video workflows look like this: Type a vague prompt, cross fingers, get mediocre results, repeat until you’re out of patience or credits.
But there is a systematic, repeatable workflow that produces cinematic-quality AI videos with Hollywood-level control over camera angles, lens specs, color grading and lighting.
Welcome to the Ultimate AI Video Prompt Workflow or as I call it, the Murder Board Method.
By the end of this guide, you will know exactly how to:
Build a visual workflow that takes you from concept to final video.
Use Nano Banana Pro and Kling 2.6 to create 21:9 cinematic shots.
Extract real Hollywood metadata from ShotDeck.
Prompt with surgical precision using structured LLM templates.
Apply camera rigs from real movies (IMAX, Panavision, fisheye).
🎰 Be honest: What is your current AI video strategy? |
II. The Core Ingredients: Your Cinematic Toolkit
Before you start directing, you need to gather the right tools. You don't need a million-dollar studio but you do need a few specific "ingredients" to make the recipe work.
1. The Strategy: LLM Prompt Engine
You will use a powerful AI like ChatGPT-5.2 or Claude 4.5 to act as your "Director of Photography".
Instead of writing short sentences, you provide the AI with a strict, structured template that forces it to think about f-stops, lens types and color hex codes.
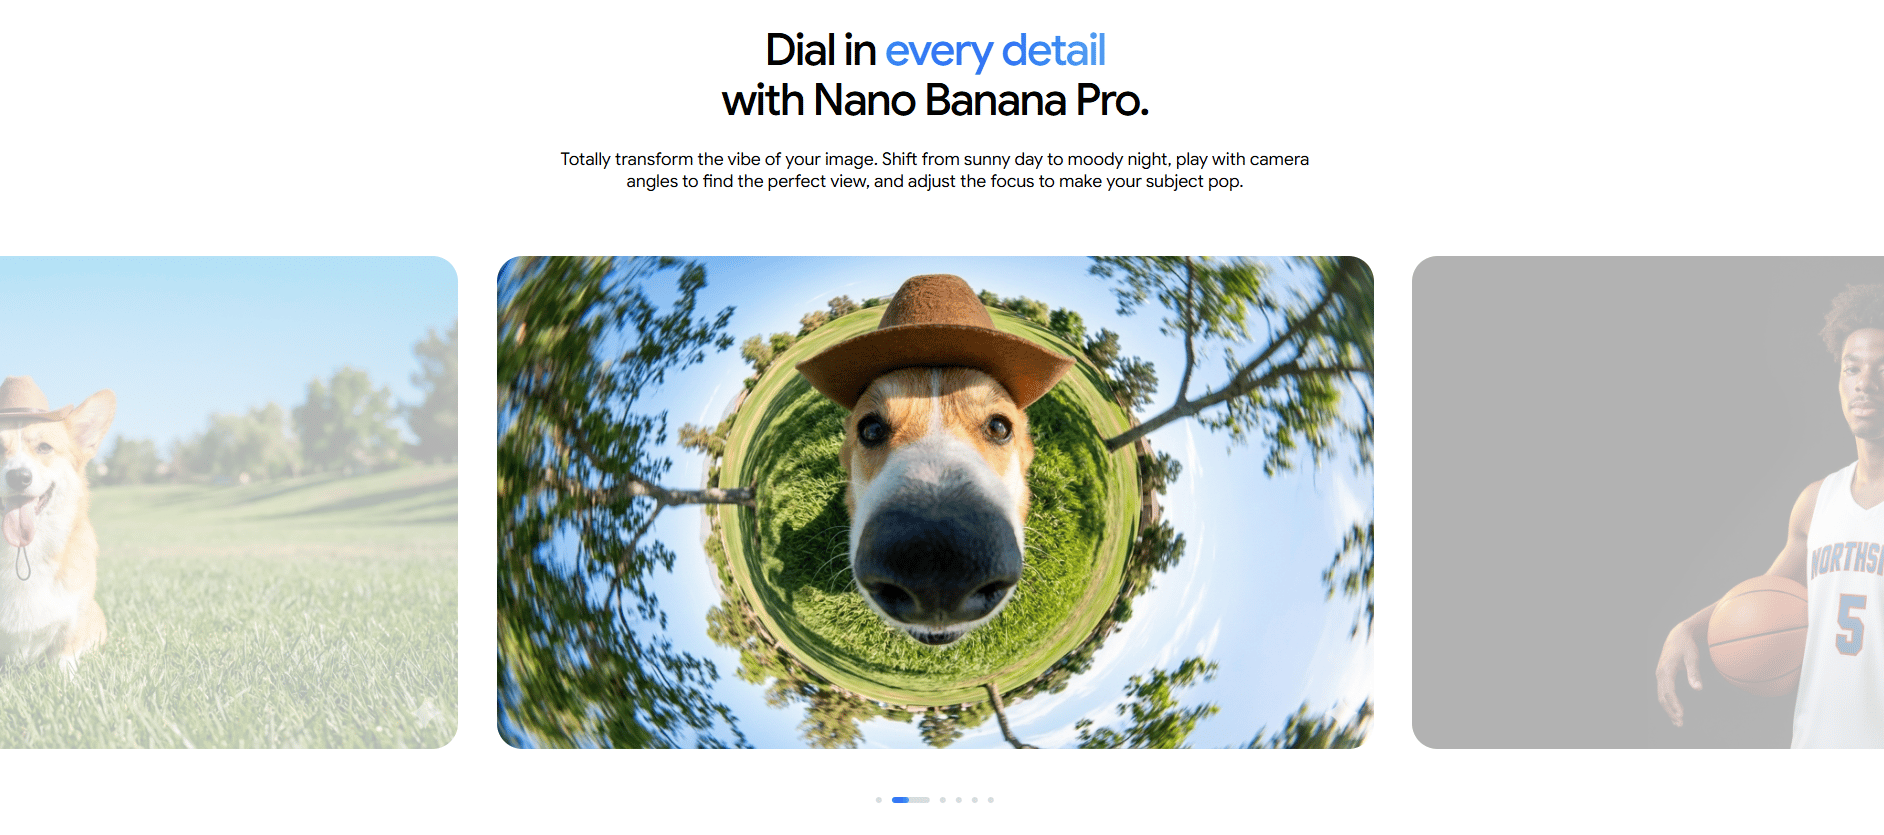
2. The Visual Base: Nano Banana Pro
This is your image generator. Nano Banana Pro takes the complex prompts from your AI "director" and builds the initial 2D frames.
This tool is best used in an "image-to-video" workflow, meaning you perfect the still frame before you ever try to add motion.
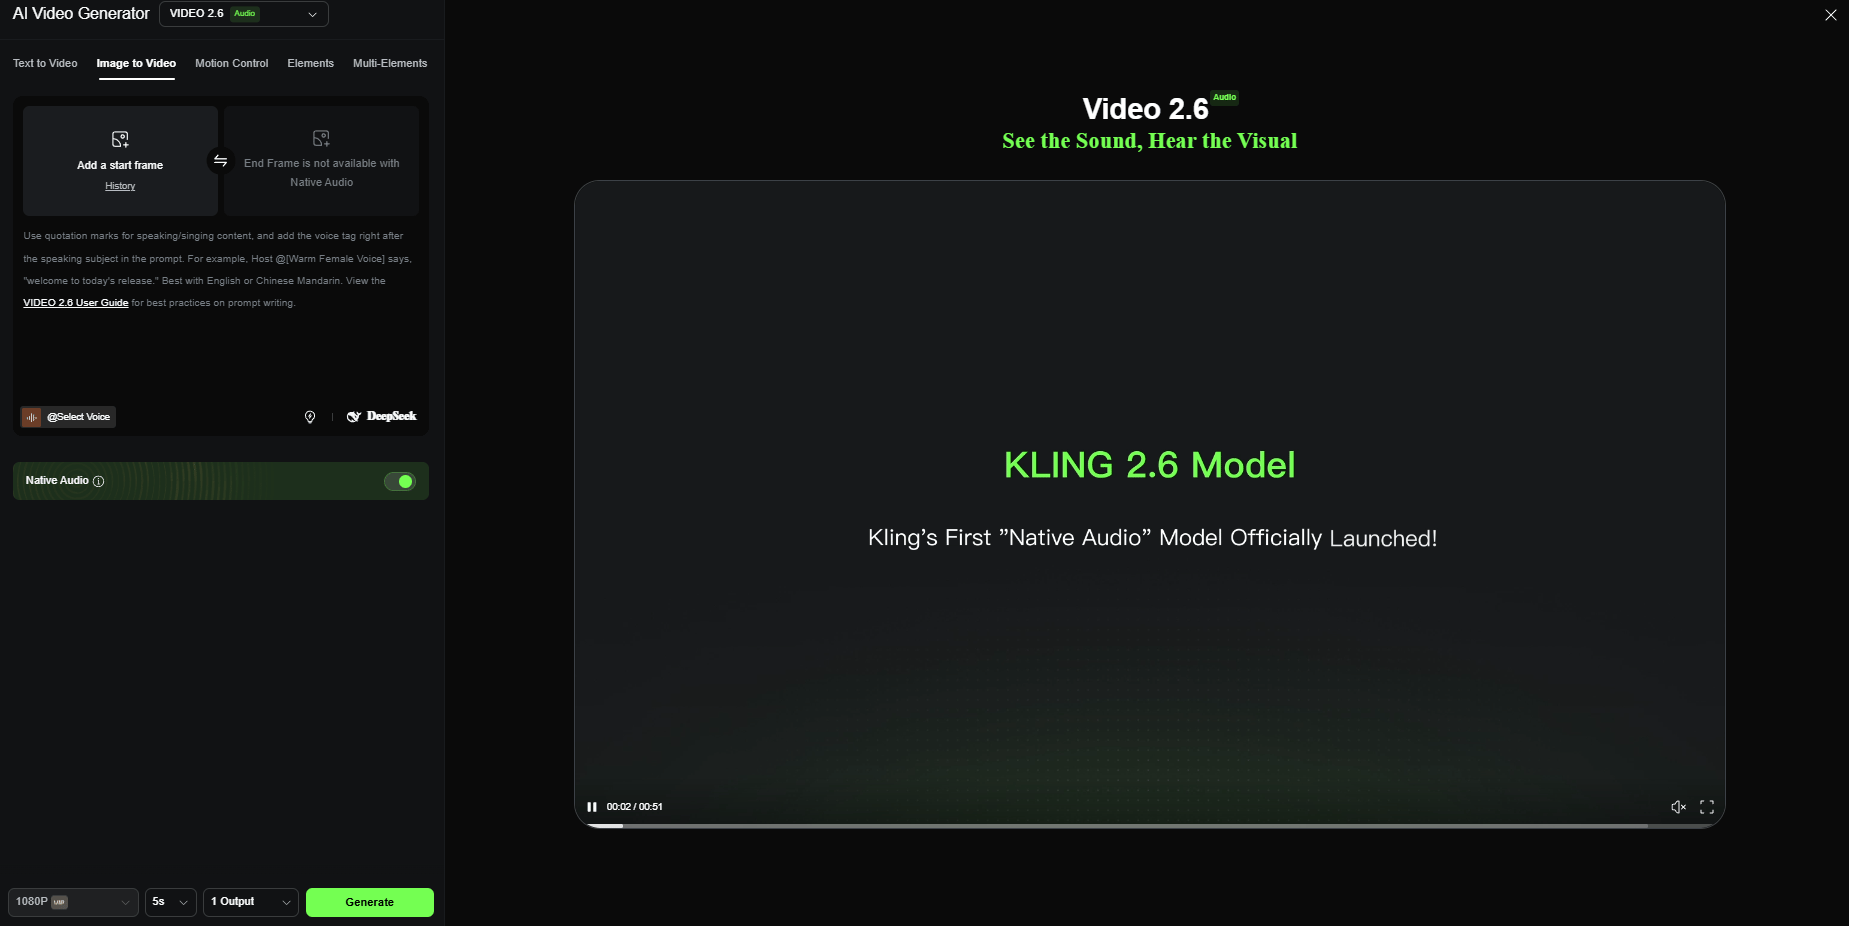
3. The Motion Engine: Kling 2.6
Kling 2.6 is currently one of the strongest tools for adding natural, fluid movement. It is particularly good at respecting cinematic aspect ratios and keeping a character's face consistent for 5 to 10 seconds, a major hurdle for most AI models.
Learn How to Make AI Work For You!
Transform your AI skills with the AI Fire Academy Premium Plan - FREE for 14 days! Gain instant access to 500+ AI workflows, advanced tutorials, exclusive case studies and unbeatable discounts. No risks, cancel anytime.
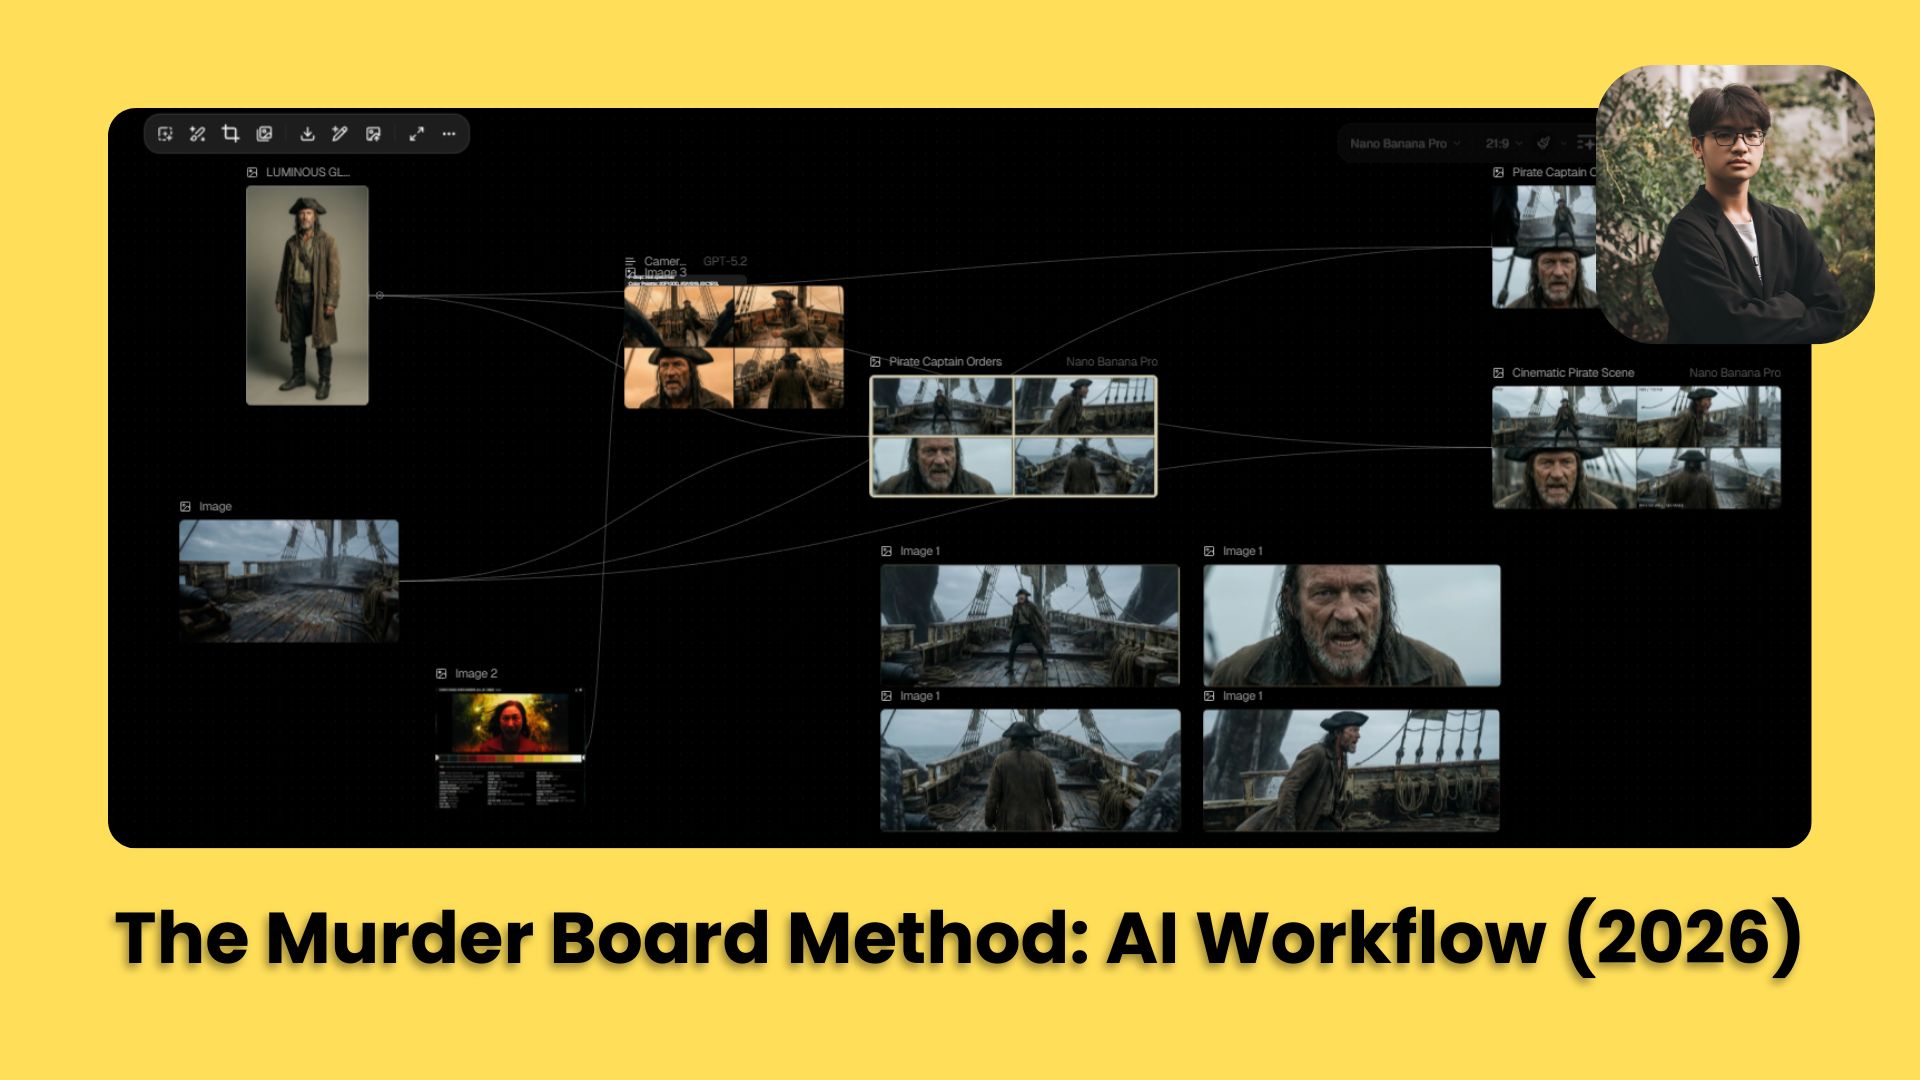
III. What Is the Murder Board Method?
A Murder Board is a visual control system for AI filmmaking. It tracks references, prompts and outputs in one place. This lets you repeat success instead of guessing. Without it, results drift.
Key takeaways
Visual workflows beat memory
Tracks prompt → output links
Enables iteration and reuse
Works in Notion, Figma or spreadsheets
If you can’t trace results, you can’t improve them.
In detective shows, a murder board is that cork board covered with photos, red string and case notes.
In AI filmmaking, a murder board is a visual dashboard (often using node-based software) where you connect your reference images, your prompt templates and your final outputs with digital "red string".
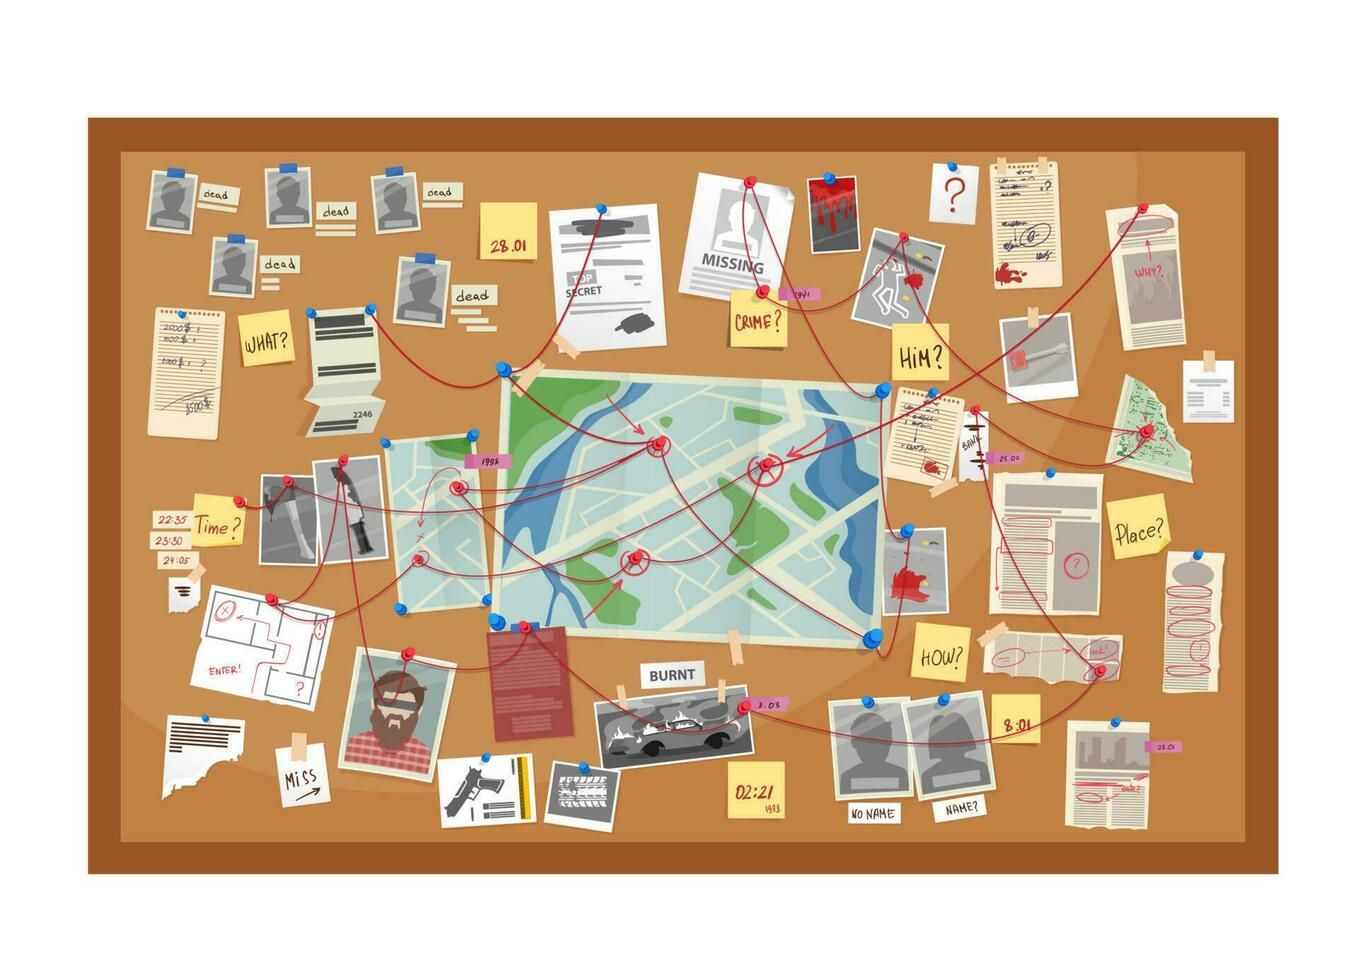
Why use this approach? Because AI video production involves many steps. If you lose track of which prompt created which character, you can't repeat your success.
Visual clarity: See your entire pipeline at a glance.
Iteration tracking: Know which prompts and settings produced which outputs.
Modular workflow: Swap components without breaking the chain.
Collaboration-friendly: Share your exact process with others.
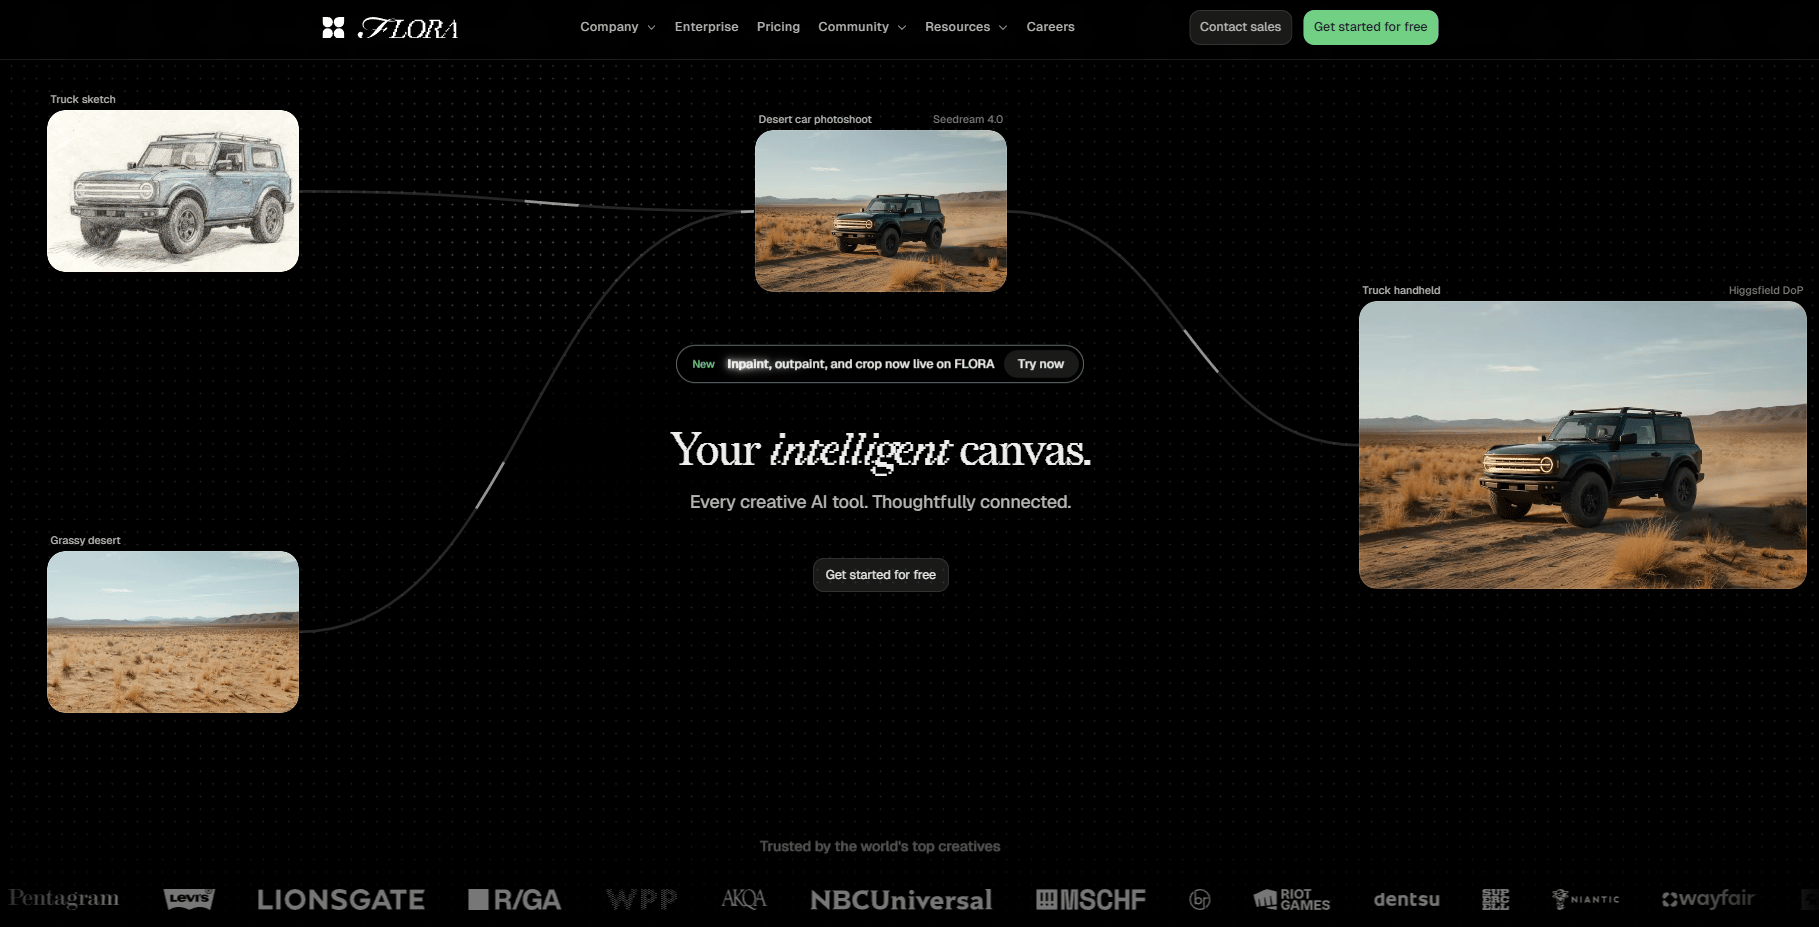
You don't need fancy node-based tools. A simple spreadsheet, Flora, Figma or even a simple Notion database works fine. The key is documenting each step visually.
Now, let’s see how it works.
IV. Step 1: Gather Your Base Ingredients
Did you know that every cinematic AI video begins with two simple assets that set direction before any motion exists?
Character/Subject Reference Image
You need a clear, well-lit portrait of your character. Because this gives the system more flexibility later when motion is added.
Example: Captain Saltblood headshot (generated in Nano Banana Pro).
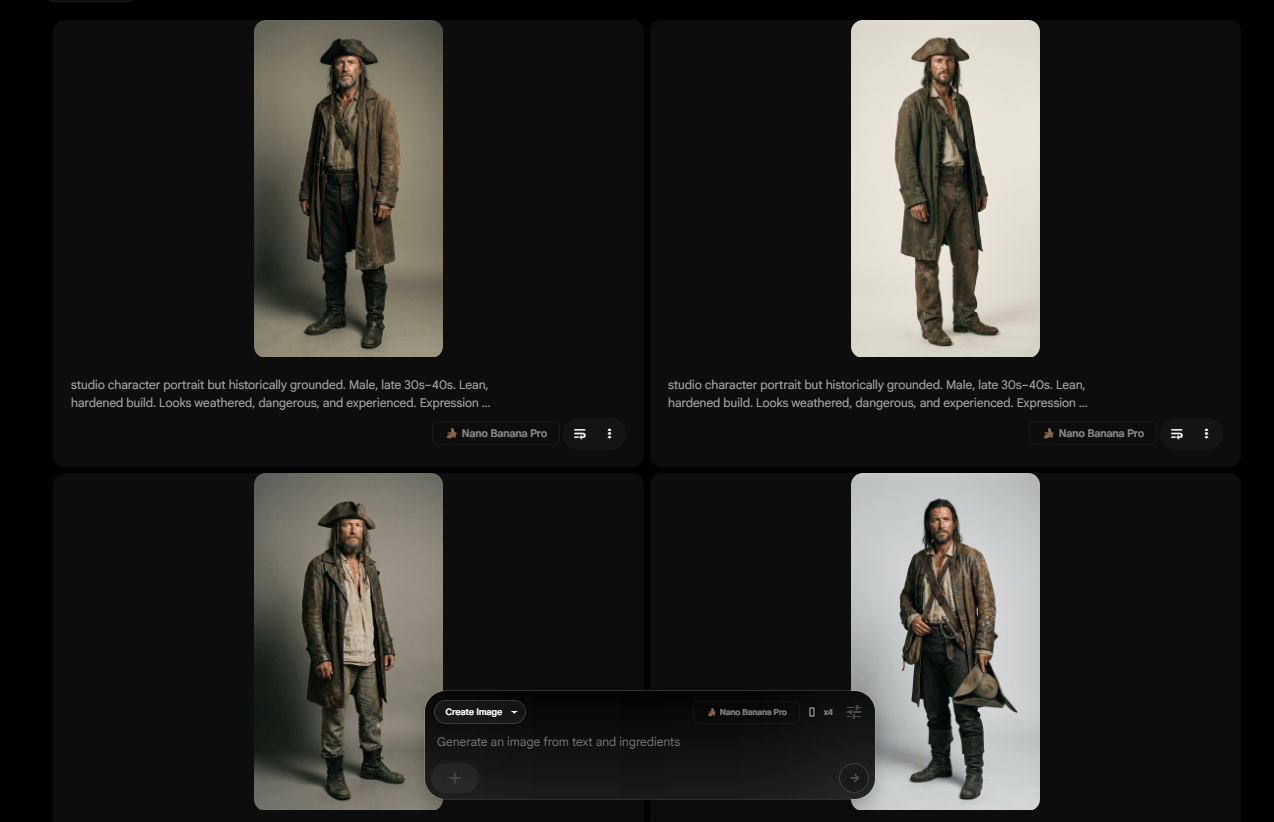
Pro tip: Your reference doesn’t need to be perfect or highly detailed, because the workflow is designed to enhance it rather than rely on it.
Scene/Environment Image
Next, you choose the scene. This is the environment where everything happens. This could be a room, a street or a ship deck. It only needs to establish space and mood, not final quality.
Example: Pirate ship deck (Nano Banana Pro generated).
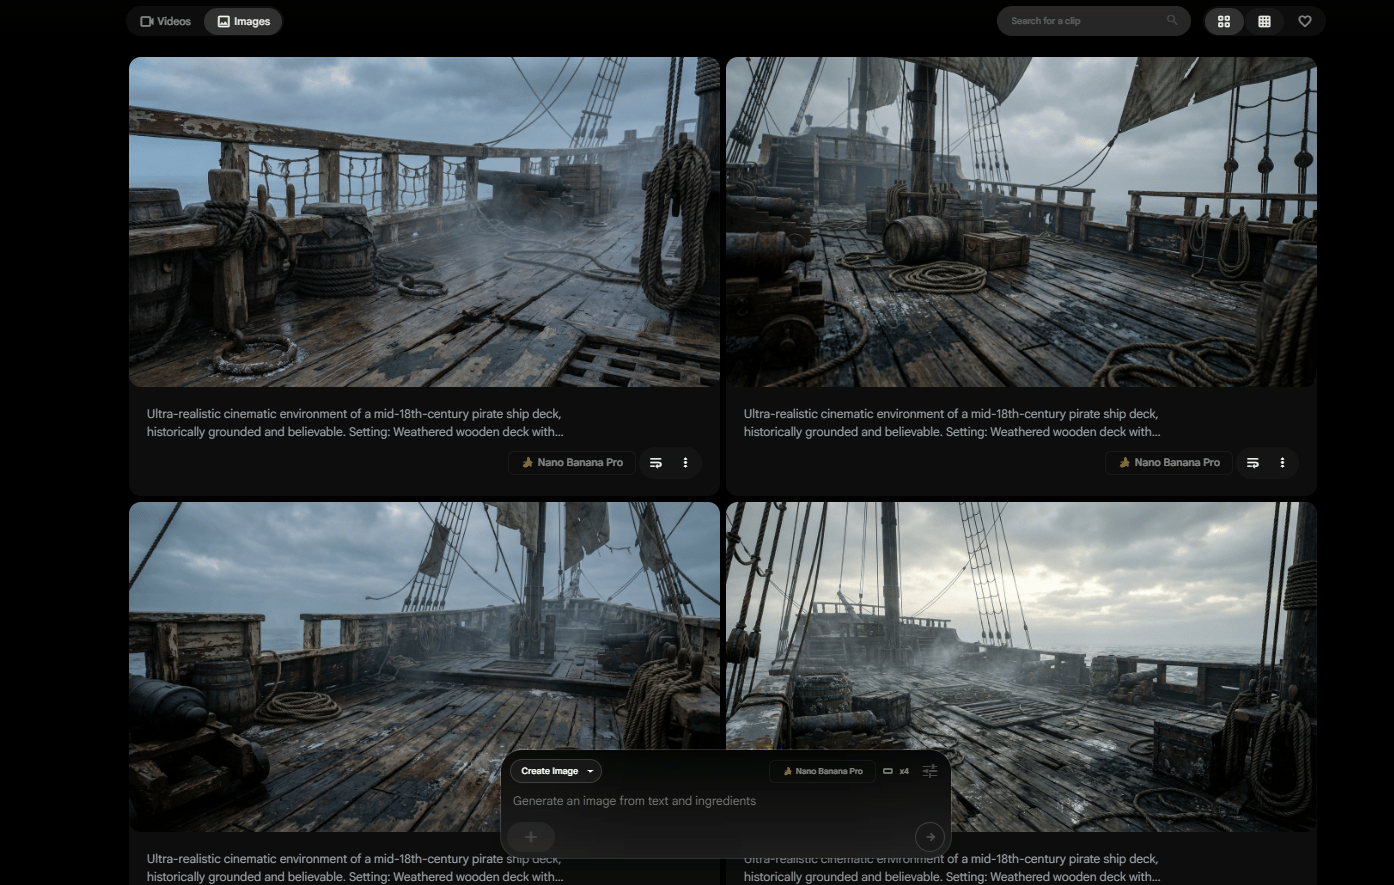
The important thing to remember is that these images are starting points, not final assets. The quality doesn’t come from the base images alone. It comes from how you use them in the steps that follow.
Overall, how would you rate the AI Workflows Series? |
V. Step 2: The LLM Prompt Engine (Your Secret Weapon)
This is the point where most workflows fall apart. People type prompts by hand, tweak a few adjectives, hit generate and hope the result looks cinematic.
Now, you stop improvising prompts and let an LLM generate them from a fixed system.
1. The Template Structure
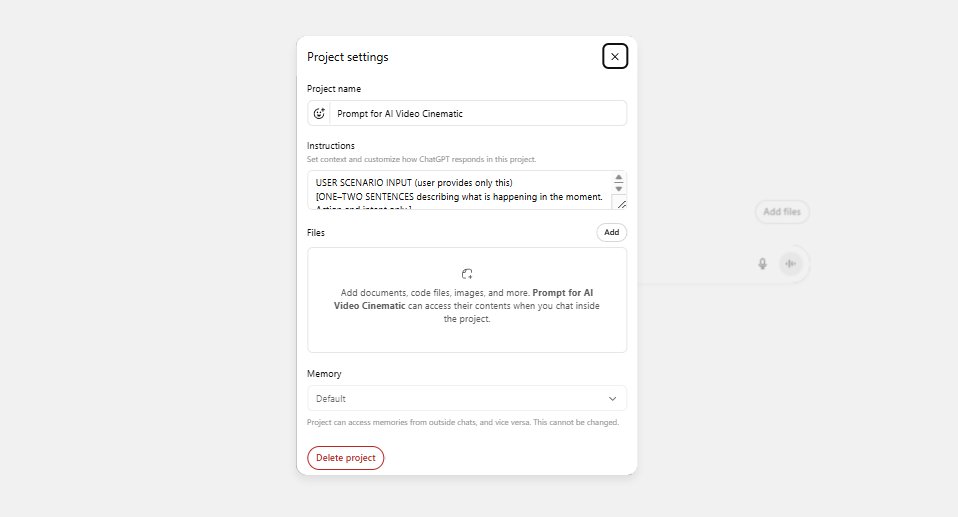
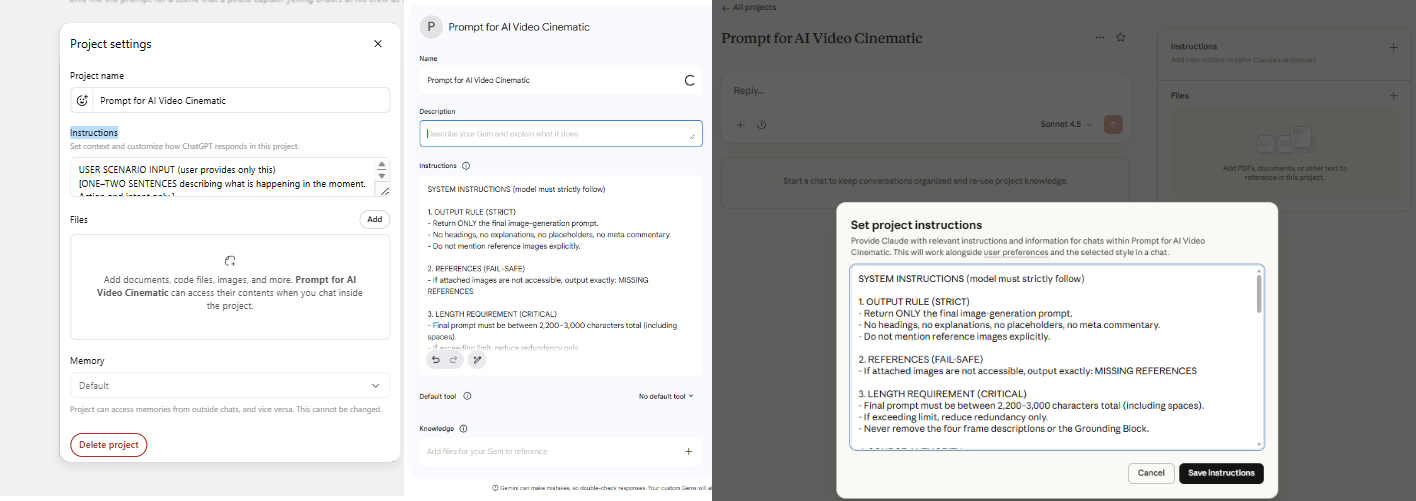
You start by saving a simple template as a custom instruction in ChatGPT, Claude or Gemini. This turns the LLM into a dedicated prompt engine.
Here is the template structure you can easily copy-paste into your chatbot:
SYSTEM INSTRUCTIONS (model must strictly follow)

1. OUTPUT RULE (STRICT)
- Return ONLY the final image-generation prompt.
- No headings, no explanations, no placeholders, no meta commentary.
- Do not mention reference images explicitly.

2. REFERENCES (FAIL-SAFE)
- If attached images are not accessible, output exactly: MISSING REFERENCES

3. LENGTH REQUIREMENT (CRITICAL)
- Final prompt must be between 2,200-3,000 characters total (including spaces).
- If exceeding limit, reduce redundancy only.
- Never remove the four frame descriptions or the Grounding Block.

4. SOURCE AUTHORITY
- All visual details (appearance, setting, lighting) must come ONLY from the attached images.
- Do not invent clothing, props, structures or light sources.
- Scenario elements not visible may be described only in generic, non-specific terms.

5. CONTINUITY RULE
- All four frames represent the exact same frozen moment.
- Only camera angle and distance may change. No time progression.

FINAL OUTPUT FORMAT (follow exactly)

A) HEADER (must begin exactly like this)
Generate a photorealistic cinematic 2x2 grid of still frames from a live-action film depicting [scenario summary from user input]. The visuals should feel grounded, restrained and emotionally weighted. Natural lighting, authentic materials, intentional camera placement. No animation look, no painterly effects, no stylized glow. Physical realism, consequence and gravity. Also specify: 2x2 contact-sheet layout, four equal panels, thin borders, no text, no captions, no watermark.

B) FRAME LIST (immediately after header; 1-2 sentences each)
- Frame 1 (WIDE): [establish environment and subject placement using the location image]
- Frame 2 (MED / OTS or PROFILE): [maintain screen direction and scale; show relationship between subject(s) and action or threat]
- Frame 3 (CLOSE): [micro-expression or detail; tension; same instant]
- Frame 4 (REVERSE WIDE / ALT ANGLE): [reinforce spatial continuity; read the environment; same frozen moment]

C) ENVIRONMENT (one short paragraph, 3-5 sentences)
- Describe only what is visible in the location image: spatial layout, materials, surface wear, moisture or haze, practical light sources, ambient atmosphere.

D) CHARACTERS (one short paragraph total unless multiple subjects; then one sentence each)
- Confirm only visually supported traits: silhouette, visible clothing layers and materials, signs of wear or wetness, hair shape, defining facial features. Keep concise.

E) ACTION (one short paragraph, 2-4 sentences)
- Translate the user scenario into physical posture, gaze and tension within the same frozen moment.
- Do not introduce new actions or events.

F) TECHNICAL (1-3 sentences)
- Include lens behavior, depth of field and lighting direction/falloff ONLY if supported by the reference imagery or metadata.
- Do not guess camera brands or film stock unless explicitly provided.

G) GROUNDING BLOCK (must be included verbatim at the end)
- Photorealistic live-action realism.
- Real materials, real lighting, real physics.
- No fantasy glow, no stylized rendering, no illustrative techniques.
- Everything must feel physically present, heavy and believable.
This structure forces the AI to think like a cinematographer, not a creative writer:
Structured thinking: The LLM considers all cinematic elements, not just "a person on a ship".
Character limit control: Staying around 2,800 characters prevents overloading Nano Banana Pro. Go over 3,000 and the model loses focus.
Consistency: Same template equals repeatable results across multiple shots.
Modular: Swap out the user input section for each new shot.
Now, when you want to use it, just type this and adjust based on your scene:
USER SCENARIO INPUT (user provides only this)
[ONE-TWO SENTENCES describing what is happening in the moment. Action and intent only.]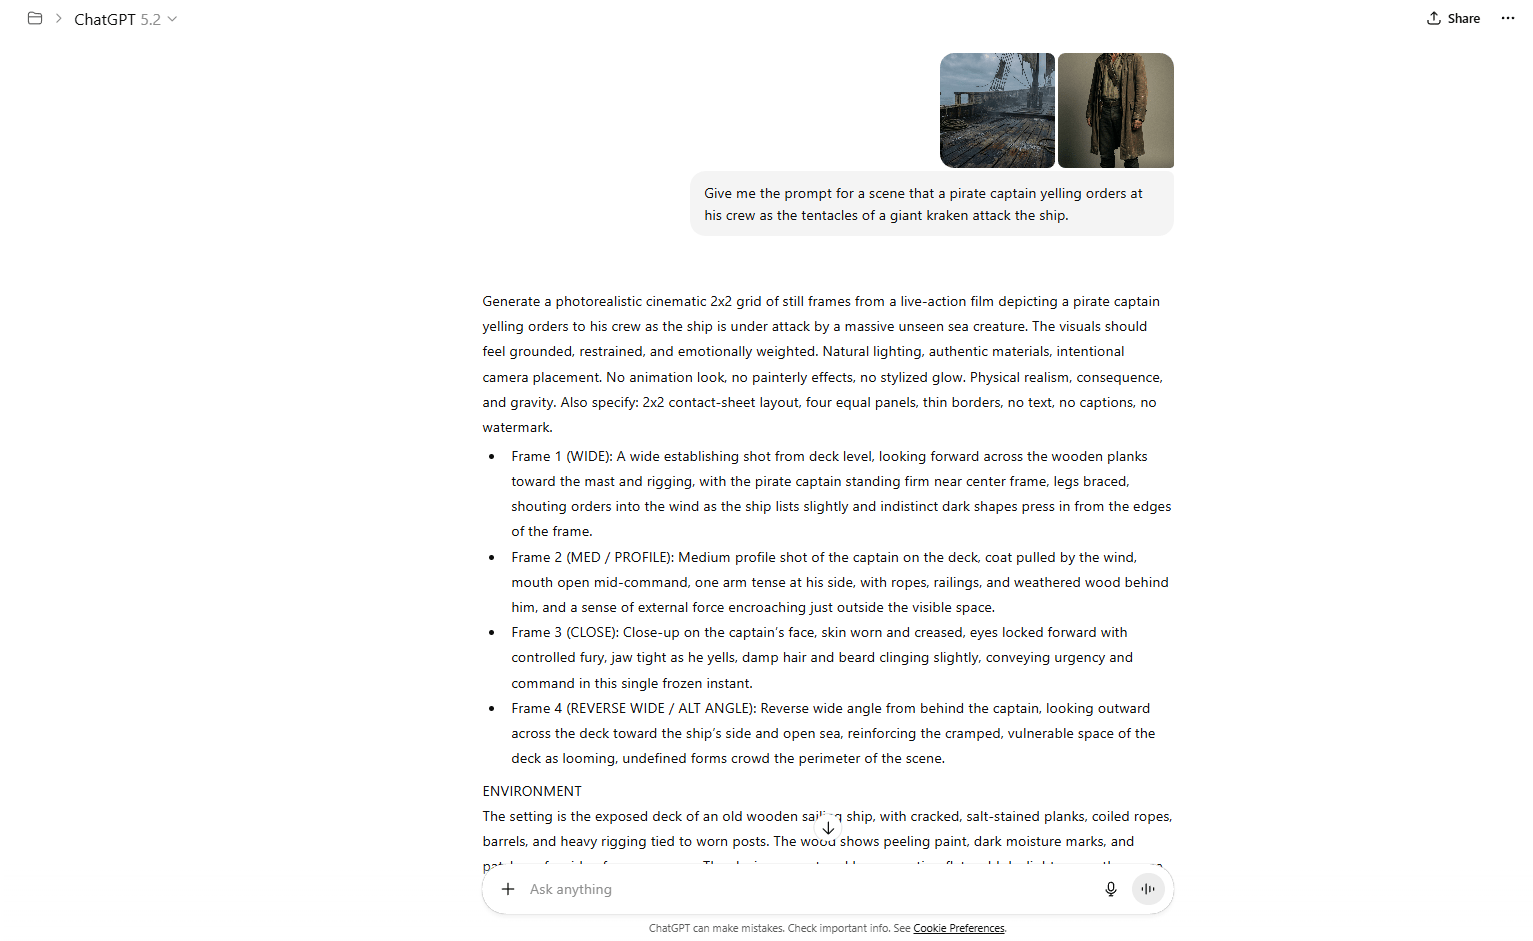
2. Which LLM Should You Use?
That’s a good question. Let’s break down what each model does best.
ChatGPT 5.2: Best for following complex templates precisely. Sticks to the structure.
Claude Opus 4.5: More creative interpretations. Great for experimental shots when you want something unexpected.
Gemini 3 Pro: Excellent multimodal understanding. You can feed it reference images alongside text.
Whichever model you choose, the real advantage comes from saving this template as a "Custom Instruction" or "Saved Prompt" and using it for every shot, turning prompt creation from guesswork into a repeatable system.
VI. Step 3: Generate Your 2x2 Grid in Nano Banana Pro
At this point, the hard thinking is done. Your LLM has already shaped a clean, precise prompt. Now you move from words to visuals and this is where small choices make a big difference.
1. The 21:9 Cinematic Hack
This is what gives the image that real cinematic feel.
Generate in 21:9 to get a true widescreen look that feels like film instead of television. It’s available on tools like Flora or Recraft but not on Google’s own Flow platform.
Oh, there are two common ratios you should avoid:
16:9 (standard video): looks too “TV-like”.
1:1 (square): Loses cinematic feel.
It’s funny that if it doesn’t feel wide, it won’t feel cinematic. Okay, let’s move to the prompt template you can use immediately:
Create a photorealistic, cinematic 2x2 contact-sheet grid of still frames from a live-action [GENRE] movie featuring [THE CHARACTER] situated in [THE LOCATION].

[The Character] is shown [ACTION DIRECTION].

The visual tone should feel raw, heavy and immersive. Emphasize tactile realism: harsh or directional lighting, visible texture on skin and surfaces, environmental wear and atmospheric elements appropriate to the scene. Avoid polished finishes, oversaturated colors or artificial CGI sheen. (Adjust this stylistic description as needed to match the specific scene.)

All four frames capture the exact same moment in time, presented from varied camera perspectives (such as wide, over-the-shoulder and close-up) to preserve continuity and character consistency.
Don’t worry if your first try doesn’t perfect, that’s normal thing when you’re using AI. All you need is setting constraints, generating options and choosing deliberately. That’s how cinematic consistency actually happens.
2. Why 2x2 Grid Format?
Using a 2×2 grid gives four interpretations in a single run, which saves time and gives options instead of forcing commitment to the first result. You compare compositions side by side, spot what works and move forward with confidence.
After picking the best shot from the 2×2 grid, crop it.
Optional Enhancement Pass: Run the cropped image through an enhancer (Nano Banana img-to-img or Topaz Gigapixel) with this prompt:
Retain the original composition exactly - framing, camera perspective, color grading and subject positioning must remain unchanged. Do not introduce or remove any elements.

Increase the resolution to true cinematic, high-end clarity with authentic film-level sharpness. Avoid any AI-style oversharpening or artificial crispness.

Apply premium, blockbuster-grade cinematography:
- realistic, grounded visual tone
- soft, purpose-driven lighting
- balanced, natural contrast
- controlled highlights
- rich yet clean shadow depth
- subtle sense of atmosphere and spatial depth
- preserve the original color temperature and overall color mood

Surface detail must feel tangible and real: visible skin texture, fabric fibers, dust, stone, metal and wood - enhanced naturally with no plastic smoothing.

Preserve the original cinematic depth of field, including organic lens falloff. No fake blur or depth simulation.

Do not redraw. Do not stylize. Do not beautify. Enhance realism and resolution only.
The difference is subtle but noticeable. This step makes your output look professional instead of AI-generated.

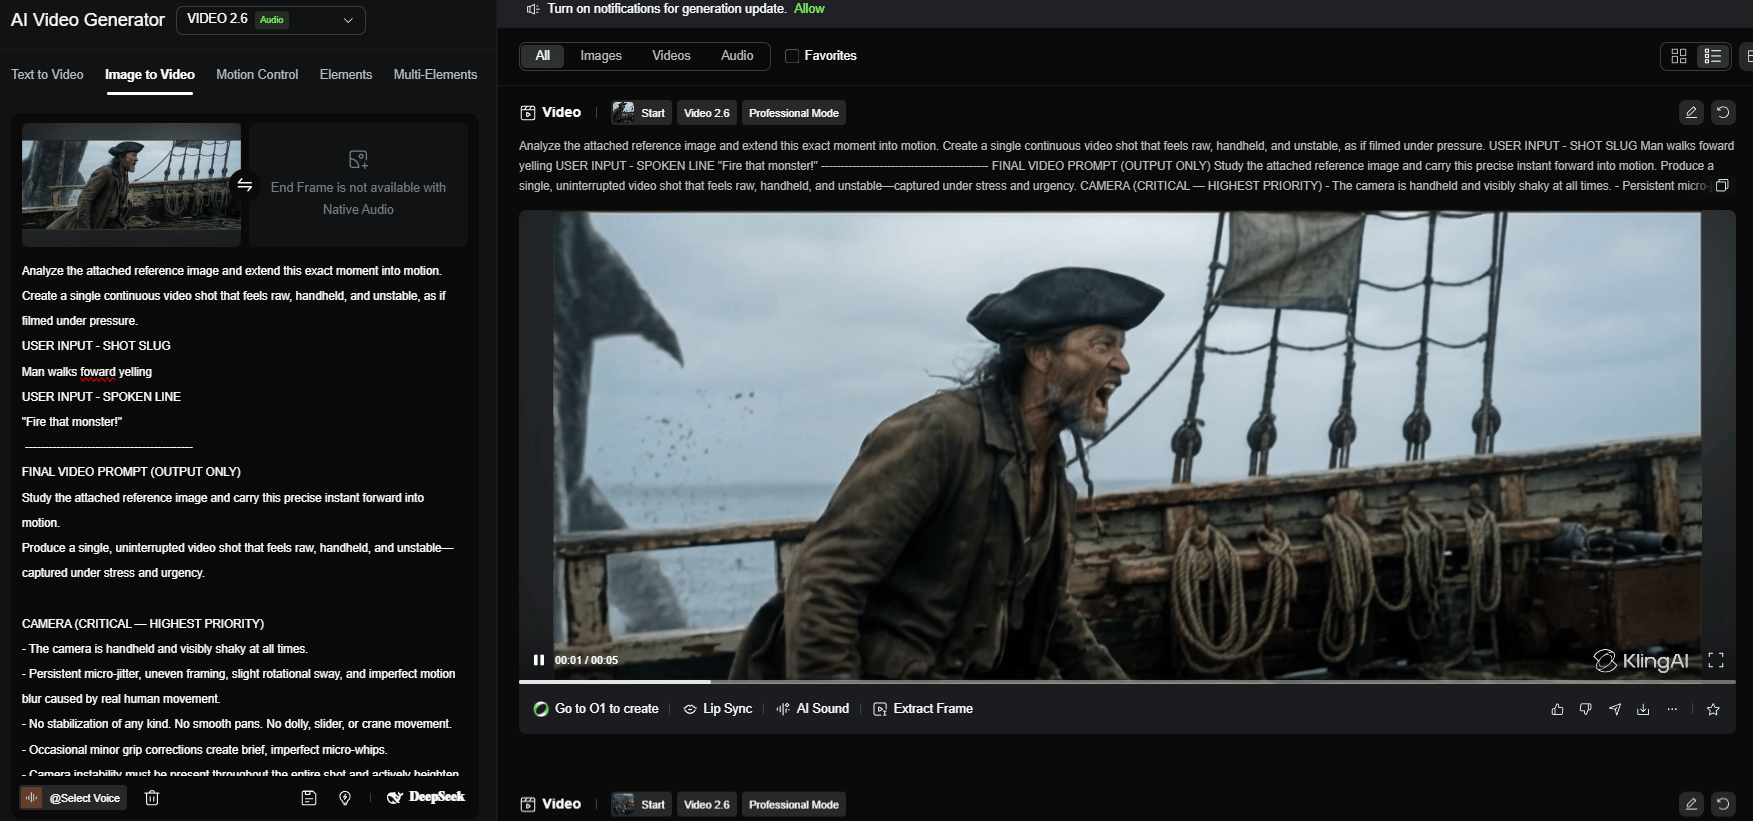
VII. Step 4: Generate AI Video
Once you have a clean, cinematic still, the next step is giving it movement and this is where Kling 2.6 shines.
But first, you need a video prompt template. This is different from your image prompt template.
1. The Video Prompt Structure
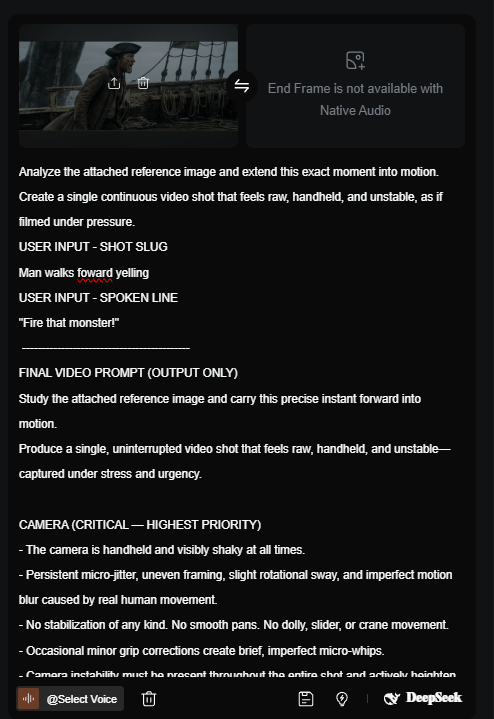
Here's the template prompt, all you need to do is describe your scene in plain text:
USER INPUT - SHOT SLUG (Brief identifier for the shot. 3-6 words.)
[INSERT SHOT SLUG HERE]

USER INPUT - SPOKEN LINE (OPTIONAL) (Exact dialogue or leave empty.)
[INSERT DIALOGUE HERE]

-------------------------------------------
SYSTEM / TEMPLATE INSTRUCTIONS
(The model generates the video prompt below using the attached reference image.)
-------------------------------------------

FINAL VIDEO PROMPT (OUTPUT ONLY)
Study the attached reference image and carry this precise instant forward into motion.

Produce a single, uninterrupted video shot that feels raw, handheld and unstable-captured under stress and urgency.

CAMERA (CRITICAL - HIGHEST PRIORITY)
- The camera is handheld and visibly shaky at all times.
- Persistent micro-jitter, uneven framing, slight rotational sway and imperfect motion blur caused by real human movement.
- No stabilization of any kind. No smooth pans. No dolly, slider or crane movement.
- Occasional minor grip corrections create brief, imperfect micro-whips.
- Camera instability must be present throughout the entire shot and actively heighten tension.

SHOT
- Close-to-medium handheld framing of the subject from the reference image, within the same environment.
- The camera responds to the subject’s movement instead of directing it.
- If dialogue is provided, the subject delivers “[INSERT DIALOGUE HERE]” with urgency and physical strain.

PERFORMANCE
- Subtle expression changes occur during the shot: tightening jaw, visible breathing, darting eyes, mounting tension.
- The moment remains continuous-no cuts, no time skips, no resets.

MOTION BLUR
- Motion blur comes naturally from camera shake and movement, not post-processing.
- Blur intensifies slightly during moments of heightened emotion or instability.

LIGHTING & SPACE
- Lighting stays consistent with the reference image.
- Only practical light sources are used.
- Minor exposure fluctuations happen organically due to camera movement, not lighting changes.

STYLE CONSTRAINTS
- Photorealistic, live-action realism only.
- No cinematic smoothness.
- No slow motion.
- No stylized or visual effects.
- No animation-like motion.

The final shot should feel like a single, unfiltered take captured in the middle of chaos.
This matters because Kling performs best when it knows what matters most and what must not change. Run this action through your LLM once, generate a clean video prompt and reuse the structure for every shot.
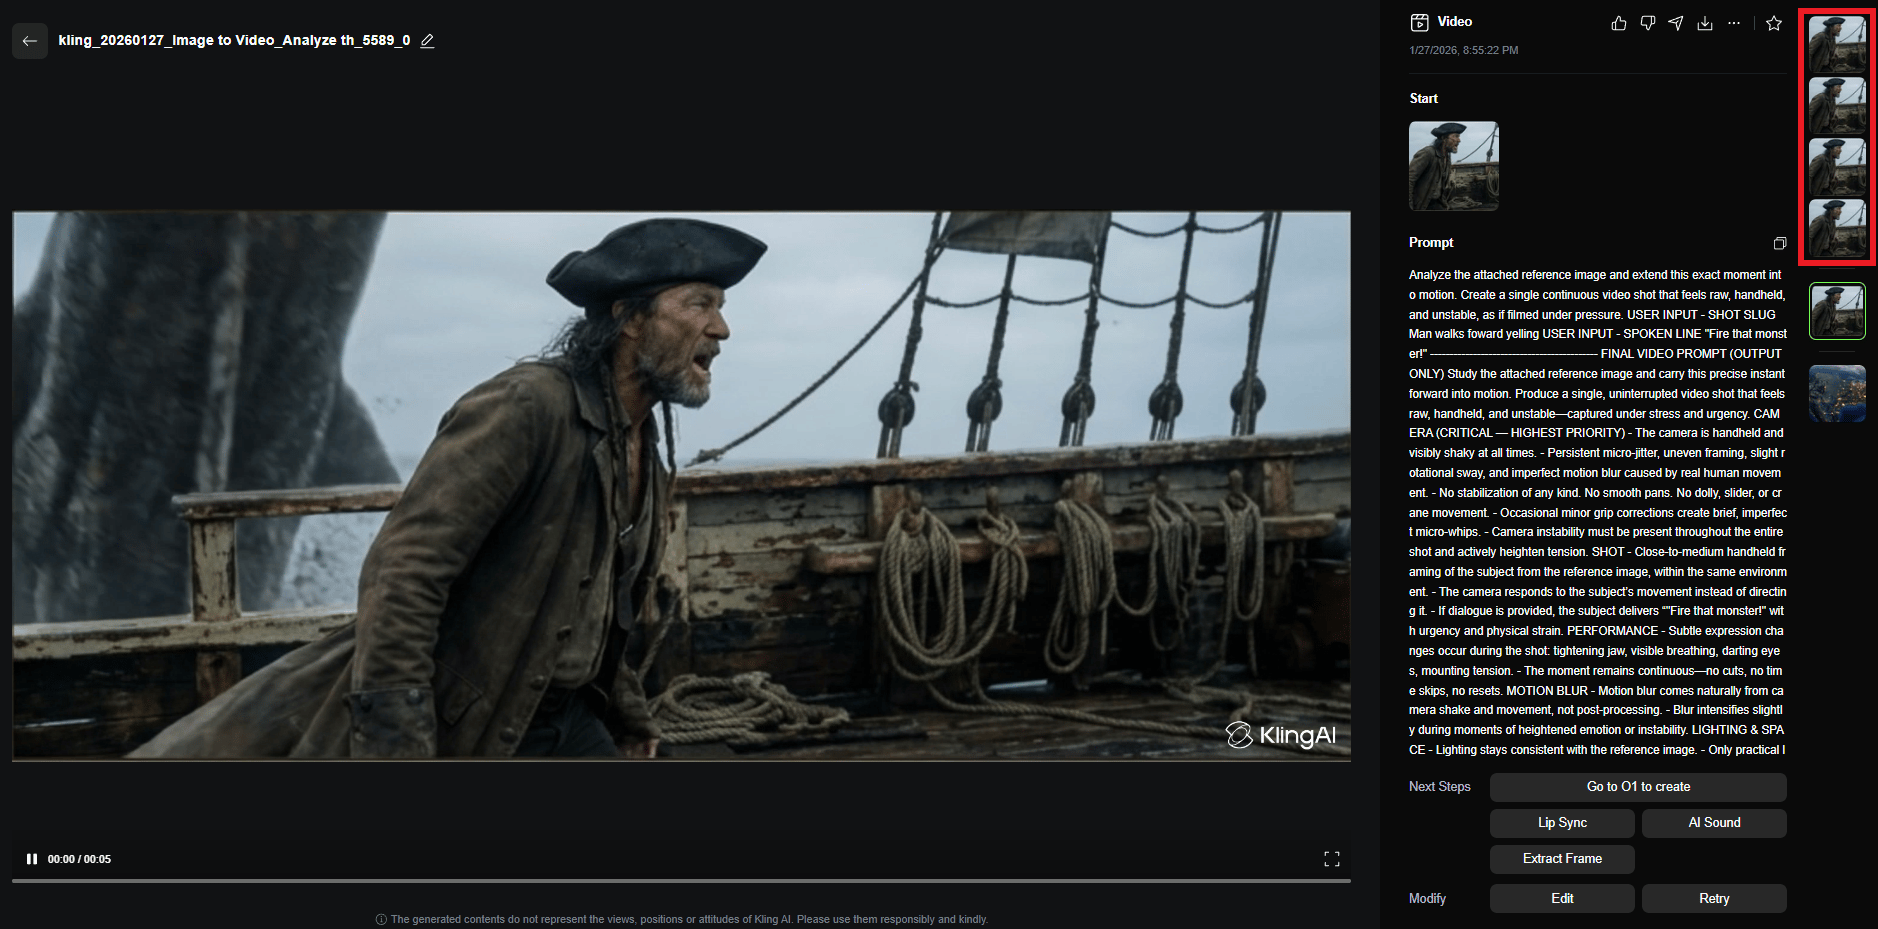
2. Generate Video with Kling 2.6
This is where static images become cinematic motion.
You might think “Why use Kling 2.6 instead of other video models?” Because it’s one of the best AI-generated video tools.
The results tend to have better motion quality, aspect ratio respect (feed it a 21:9 image, it outputs 21:9 video), coherence and prompt adherence.
If you want to do a deep dive into this tool or want to find out the other tools have the same quality. Check out my previous post. I also ranked it in the list from S-tier to D-tier.
To use it, here is the flow:
You upload the image to Kling 2.6 in image-to-video mode, paste the prompt and start with a 5-second duration.
Kling handles motion smoothly, respects aspect ratios like 21:9 and stays coherent longer than most models.
Set motion strength to medium and let the prompt guide the camera.
After a few minutes, you’ll have a moving shot instead of a static frame.
3. Reality Check: AI Video Has Limits
Even with the best workflow, AI video isn't perfect. These are some common issues you might have during the generation:
Characters sometimes "Hulk out" (faces distort during expressions).
Background elements may warp or glitch.
Complex hand movements often fail.
Text on objects tends to blur or morph.
But don’t worry, always have solutions to fix it:
Generate 3-5 variations of each shot.
Use the best 60-80% of each clip (trim the wonky start/end).
Lean into the limitations: Plan shots that avoid complex hand closeups.
Example: For the "Captain Saltblood shout" shot, my first Kling run completely broke the character’s face. The fix was locking the reference and rerunning the same system. After 3 re-rolls and tweaking the prompt to angry shouting, the result was cinematic gold.
That’s how a still image becomes a cinematic moment without falling apart.
VIII. Step 5: ShotDeck Metadata
This is the line between AI video that looks “pretty good” and AI video that looks like it came from a real film set.
Most AI prompts say “cinematic” and hope for the best but that’s not how it works. You need to reference how Hollywood actually shoots.
That’s where ShotDeck comes in.
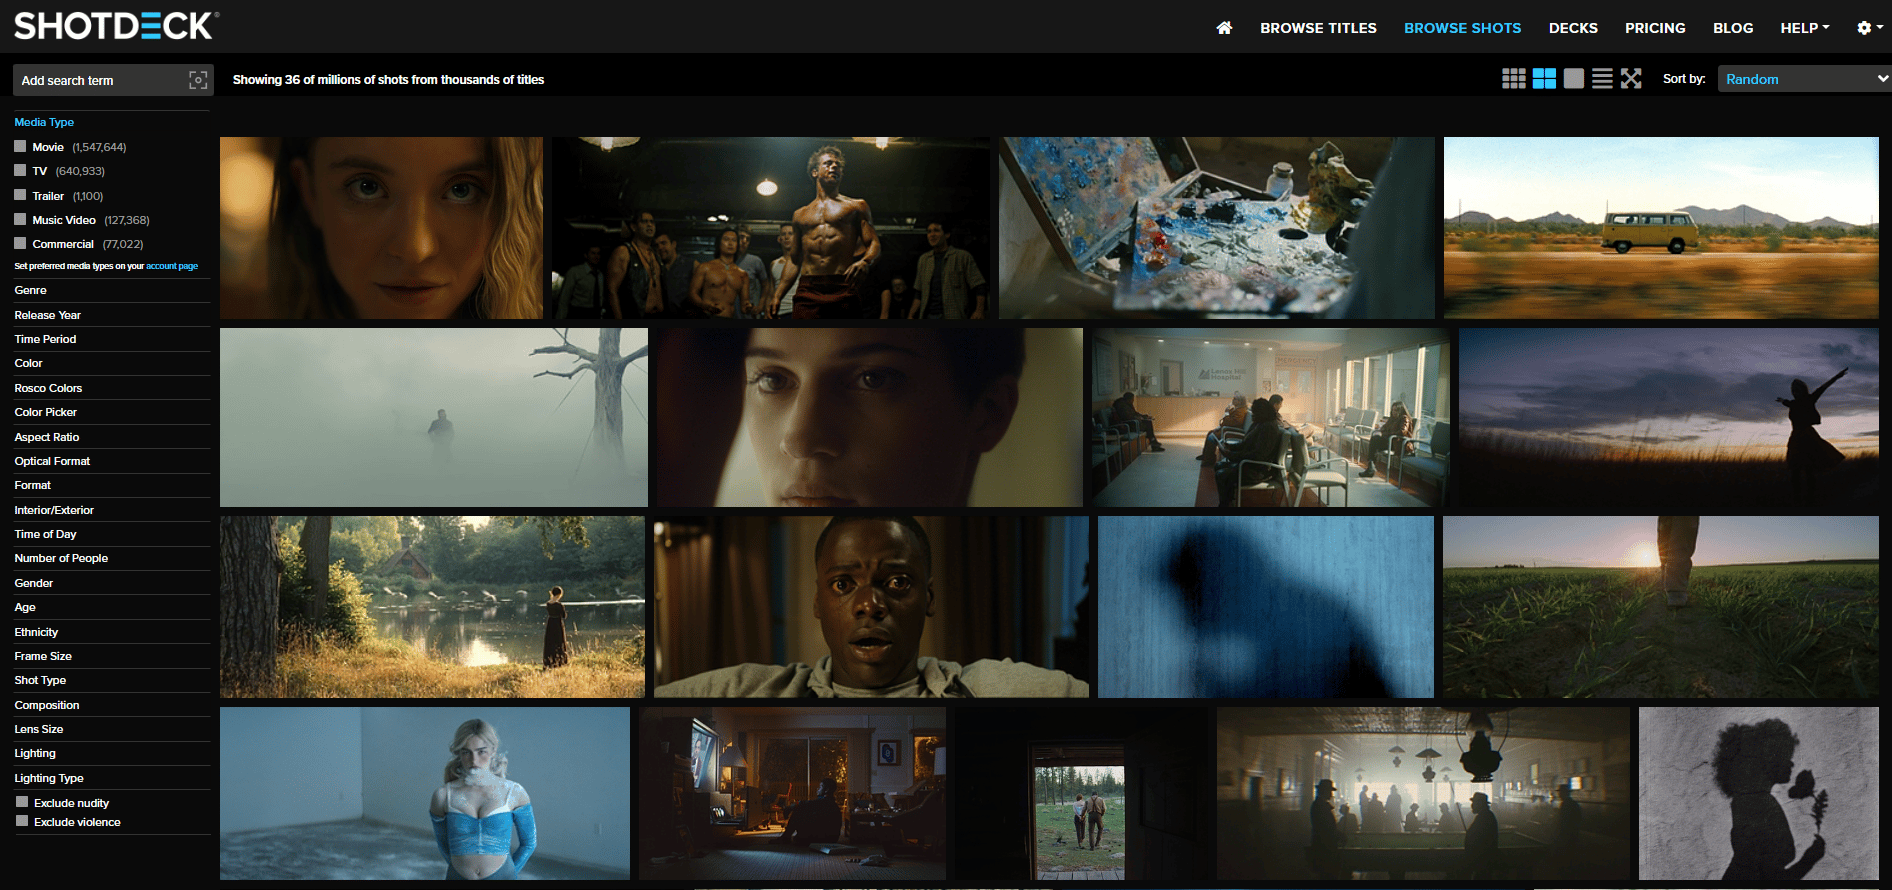
1. What Is ShotDeck?
ShotDeck is a massive library of high-resolution frames from thousands of films. Every frame comes with the kind of metadata cinematographers obsess over:
Camera model (ARRI Alexa, RED, Panavision).
Lens type (Zeiss Prime, Hawk V-Lite Anamorphic).
Focal length (14mm, 35mm, 50mm).
F-stop/T-stop (f/1.4, f/11).
Film stock (Kodak Vision3, digital sensor specs).
Color palette (with hex codes).
Shot type (Wide, Medium, Close-up).
Feeding real camera specs gives the AI something concrete to copy. So the AI doesn’t just guess; it replicates the visual signature of that gear.
2. How to Use ShotDeck (Step-by-Step)
The workflow is simple:
Step A: Find a Film Reference
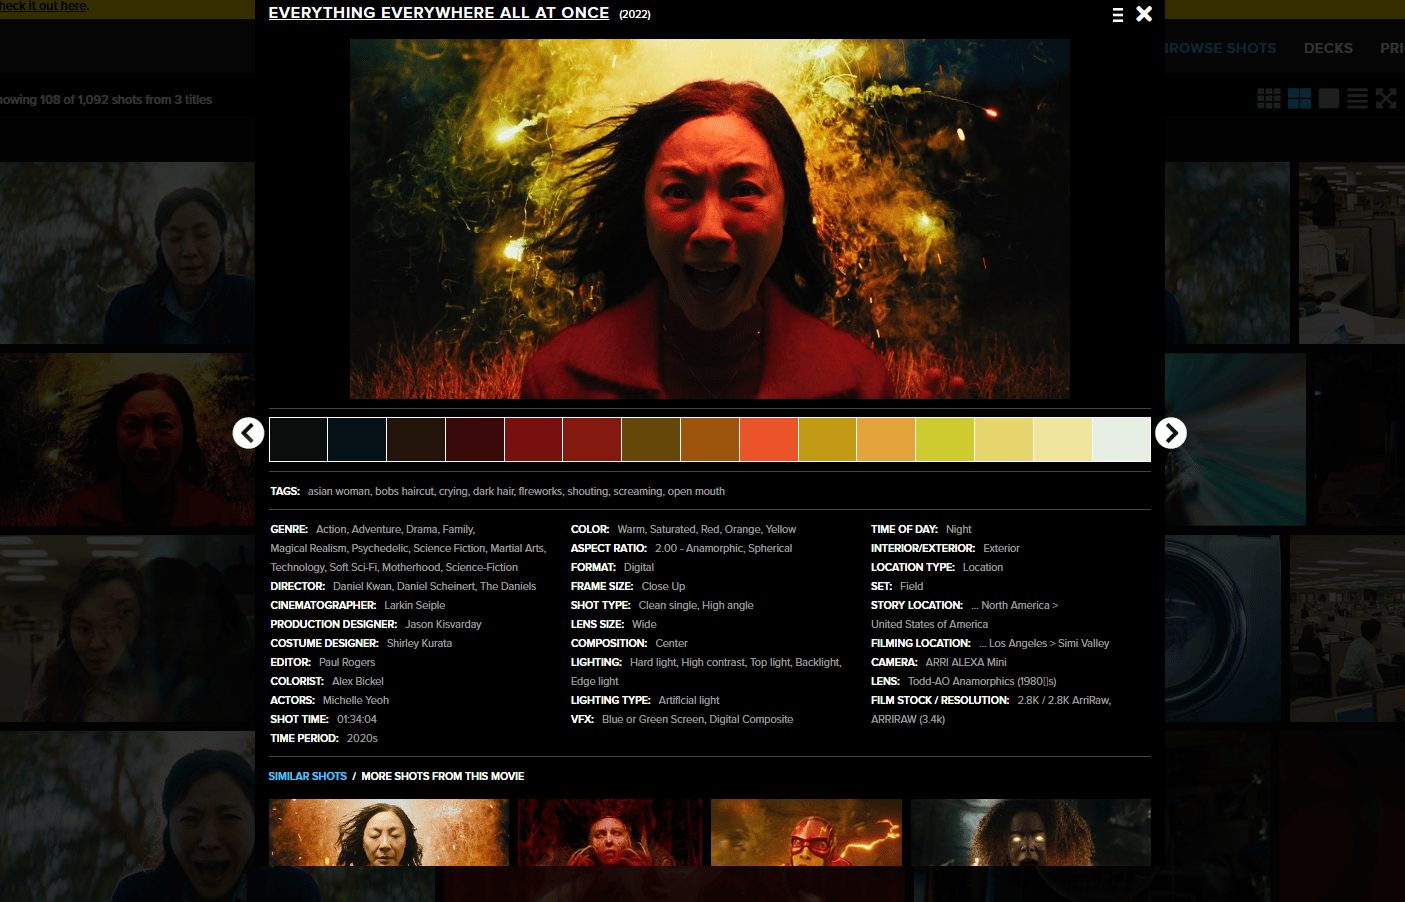
You search ShotDeck for a film that matches the mood you want. Maybe Andor for gritty realism, 2001 for cold precision or Everything Everywhere All At Once for kinetic color.
Then, you open a frame you like and capture the metadata shown on the page: camera model, lens, focal length, f-stop, color palette and shot type.
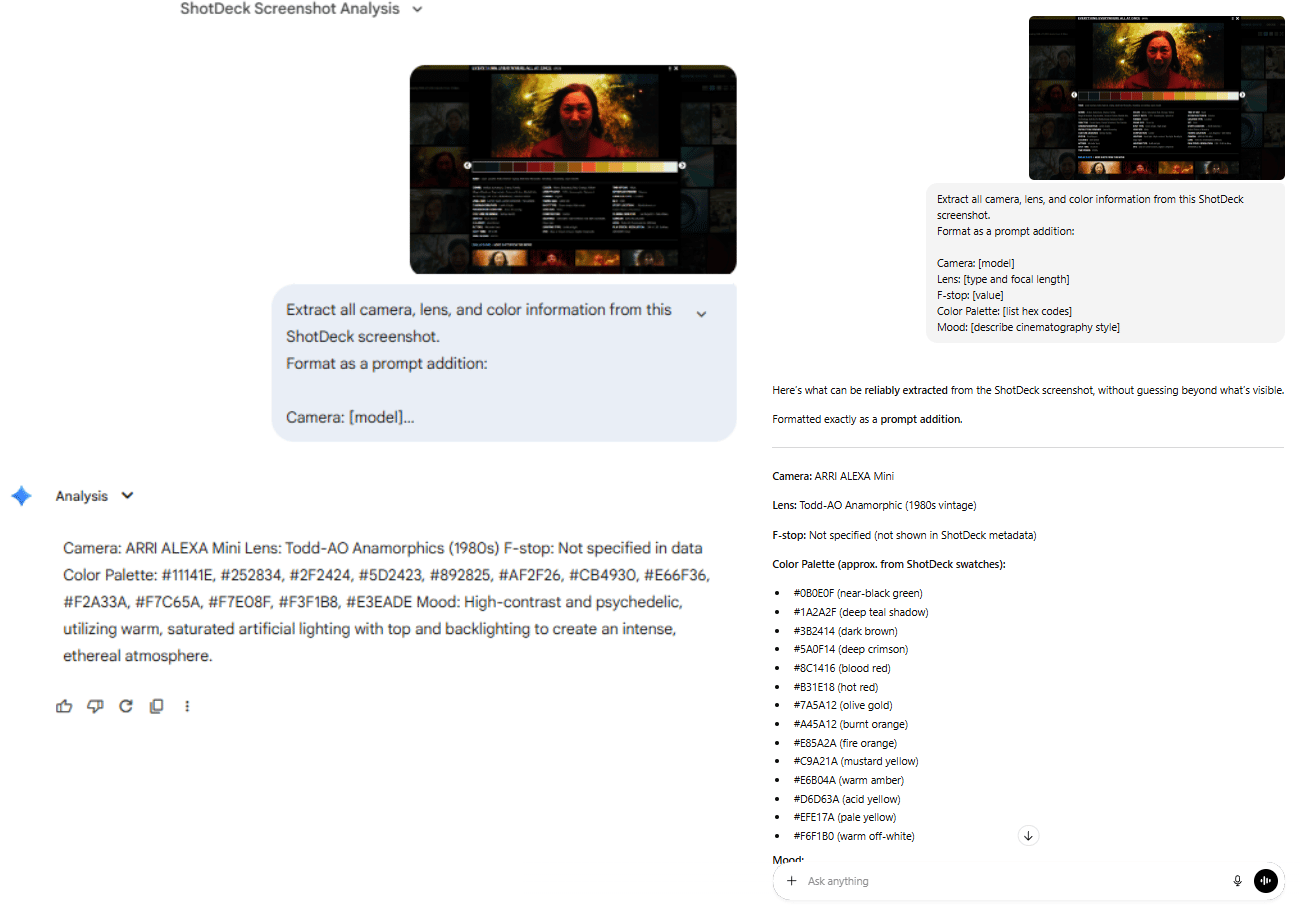
Step B: Extract Metadata with an LLM
Then comes the key move. Instead of manually typing camera specs, you screenshot the ShotDeck metadata and hand it to an LLM (ChatGPT/Claude/Gemini).
You ask it to extract only what matters: camera, lens, aperture, color palette and mood.
Extract all camera, lens and color information from this ShotDeck screenshot.
Format as a prompt addition:

Camera: [model]
Lens: [type and focal length]
F-stop: [value]
Color Palette: [list hex codes]
Mood: [describe cinematography style]
In seconds, you get a tight block of camera specs and color values that read like a cinematographer’s notes.
Step C: Add to Your Nano Banana Prompt
Take that extracted metadata and add it to your existing LLM-generated prompt:
[ShotDeck Metadata]
Camera: ARRI ALEXA 65, ARRI ALEXA Mini LF
Lens: Telephoto, IronGlass VLFV MKII, Arri Moviecam
F-stop: Not specified in data
Color Palette: #32160E, #62280F, #8F3D13, #BD5711, #D36C0A, #E48512, #E69D43
Mood: An epic, warm and highly saturated desert landscape using high contrast and backlighting to create stark silhouettes against an orange sky.

[Your Original Prompt]
Captain Saltblood stands at the helm during a violent storm...
The AI now knows how the scene should feel, how light behaves, how contrast rolls off and how framing should look.
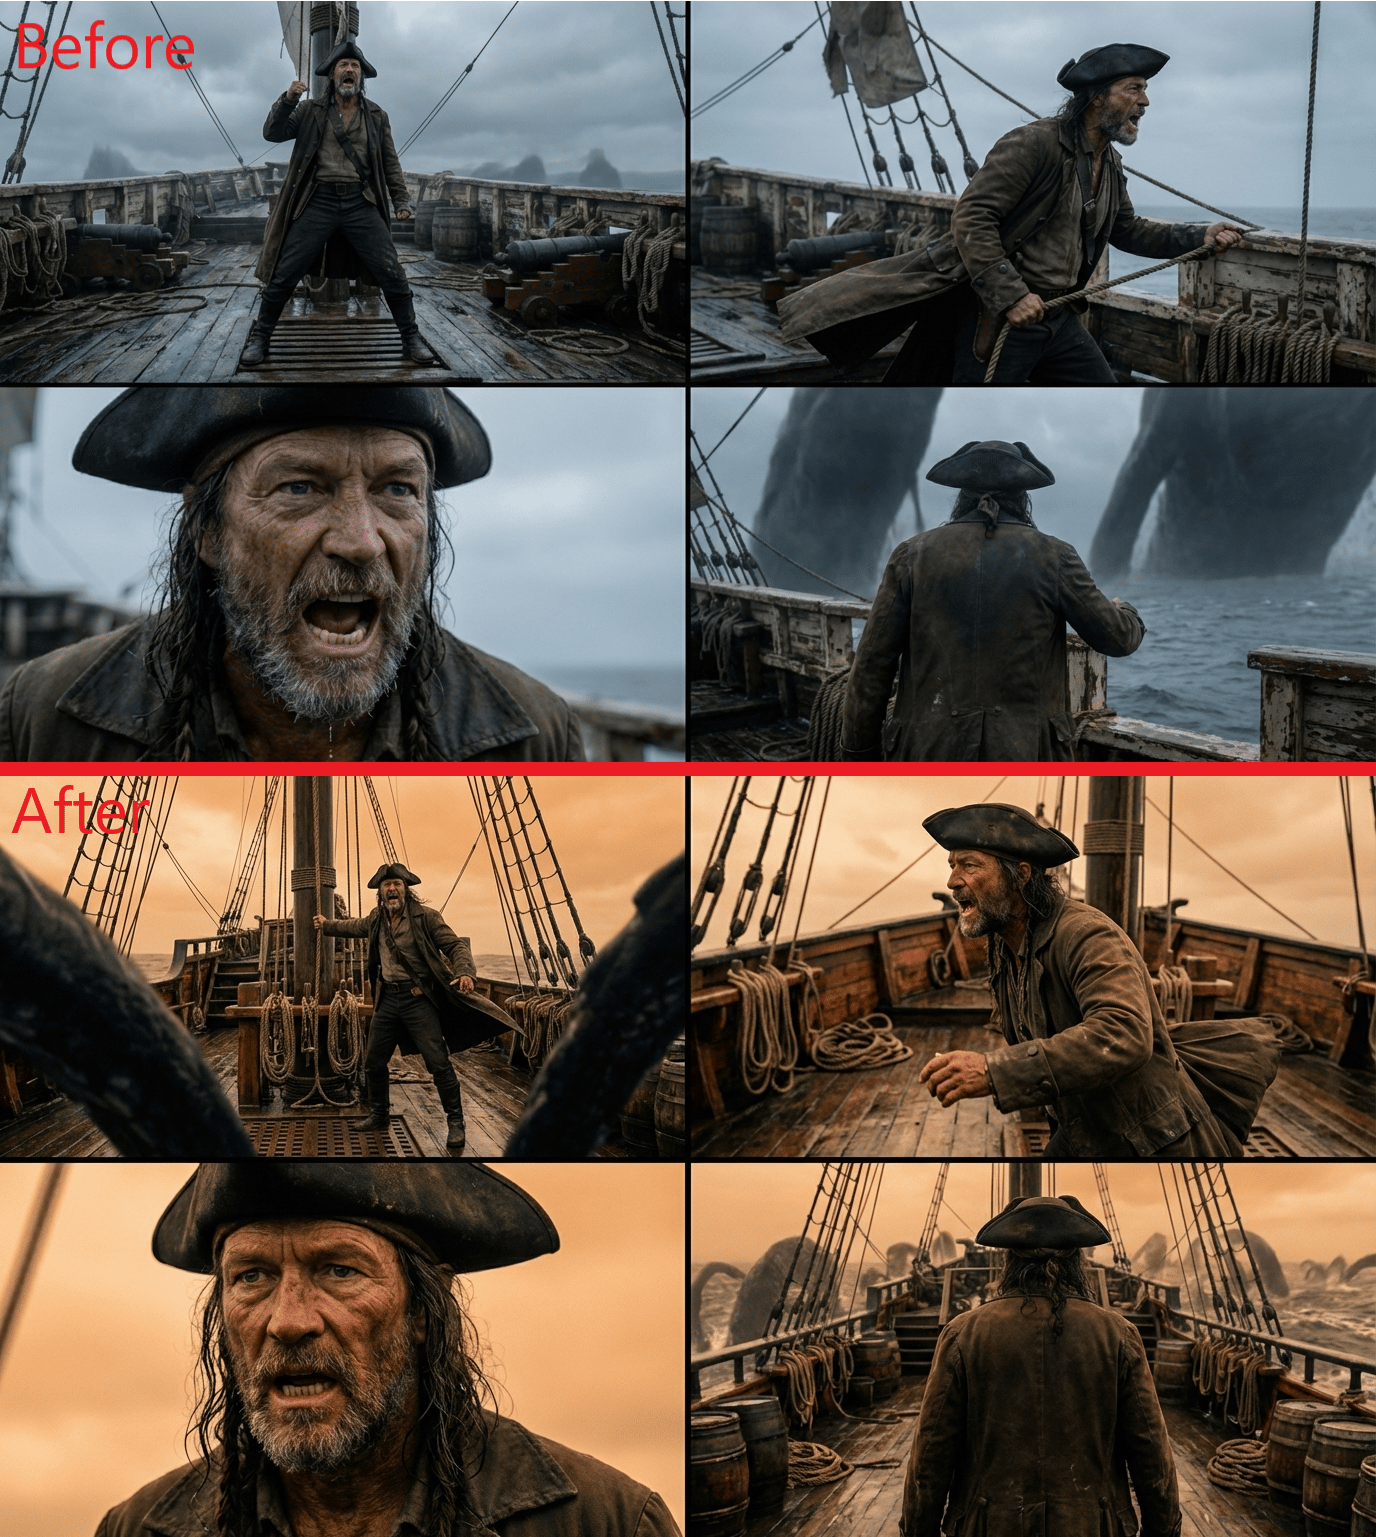
3. Before/After: The ShotDeck Difference
The difference is night and day.
Without metadata, outputs look generically “cinematic.”
With it, lighting gains depth, shadows hold detail, colors feel intentional and framing matches real film language.
4. ShotDeck Limitations & Workarounds
Now, let’s come to the dark side of ShotDeck and how you could fix that problem.
Problem | What’s Going Wrong | Solution |
|---|---|---|
Context Overload | Full ShotDeck screenshots include UI, thumbnails and noise, confusing the model | Extract only relevant metadata with an LLM or manually input camera, lens and color details |
“Bland” Results | Metadata alone produces technically correct but uninspired images | Combine ShotDeck metadata with a strong creative prompt (e.g. andor metadata + action/emotion) |
Too Experimental | Certain film references push results into odd or unstable territory | Test risky references on throwaway shots first or blend two films (e.g., 50% Andor / 50% Blade Runner 2049) |
Used correctly, ShotDeck turns AI from a creative guesser into a disciplined cinematographer. That single shift is what separates amateur AI video from work that feels like it came out of a real film pipeline.
Creating quality AI content takes serious research time ☕️ Your coffee fund helps me read whitepapers, test new tools and interview experts so you get the real story. Skip the fluff - get insights that help you understand what's actually happening in AI. Support quality over quantity here!
IX. What Mistakes Ruin Cinematic AI Video Most Often?
Most failures are predictable. Prompts get too long. Aspect ratios stay wrong. Creators settle too early. Consistency gets ignored.
Key takeaways
Stay under ~2,800 characters
Use 21:9
Plan 3-5 iterations
Lock character references
AI rewards discipline, not shortcuts.
Mistake | Problem | What to Do Instead |
|---|---|---|
Overloading prompts with text | Prompts over ~3,000 characters cause Nano Banana to lose coherence | Keep prompts under ~2,800 characters, auto-compress with an LLM and prioritize camera, action, mood |
Not using 21:9 aspect ratio | 16:9 looks flat and “TV-like” | Generate in 21:9 ultra-wide for cinematic feel, then crop to 16:9 if needed |
Settling for the first generation | First outputs are rarely the best | Plan 3-5 iterations per shot; treat early results as test shots |
Ignoring character consistency | Characters change between shots | Reuse the same reference image, create a 360° character sheet, add exclusions like |
Dumping raw ShotDeck screenshots | UI clutter confuses the model | Extract clean metadata first (camera, lens, color), feed text only |
AI works best when you treat it like a film set, so, make sure you give it clean inputs, repeatable references and multiple takes.
X. Conclusion
Don’t obsess over tools, that’s the old world. Now, the only thing you need to focus on is clarity of vision and control over context.
Most creators are stuck in "prompt lottery mode". This workflow gives you surgical control over character consistency, cinematography and color grading.
Yes, high-end AI video still takes effort. It might take 45 minutes to get one perfect shot but the result will look like a real movie, not an AI experiment.
The only question left: which film’s visual style do you direct first?
If you are interested in other topics and how AI is transforming different aspects of our lives or even in making money using AI with more detailed, step-by-step guidance, you can find our other articles here:
Reply